Aller au contenu principal

General Pipe Cleaners Drain Cleaner PMEBO 2016 Power Cable Replacement

Ce dont vous avez besoin

  1. General Pipe Cleaners Drain Cleaner PMEBO 2016 Power Cable Replacement, Reverse Switch: étape 1, image 1 de 1
    • Before you begin, make sure the drain cleaner is disconnected from power.

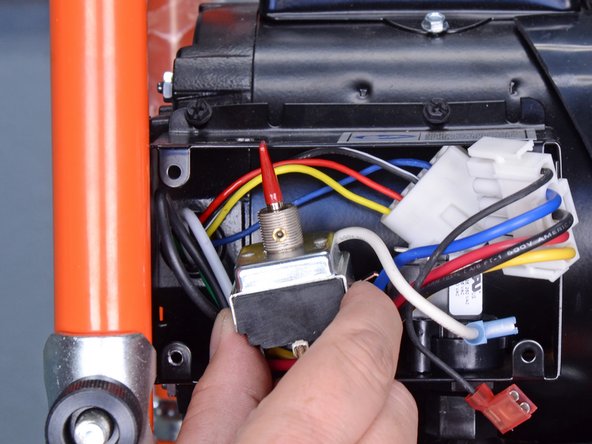
    • Use a Phillips #2 driver to remove the two screws securing the control box cover.

  2. General Pipe Cleaners Drain Cleaner PMEBO 2016 Power Cable Replacement: étape 2, image 1 de 1
    • Remove the control box cover.

  3. General Pipe Cleaners Drain Cleaner PMEBO 2016 Power Cable Replacement: étape 3, image 1 de 1
    • Use a 9/16 inch deep socket and ratchet to remove the nut securing the reverse switch.

  4. General Pipe Cleaners Drain Cleaner PMEBO 2016 Power Cable Replacement: étape 4, image 1 de 1
    • Remove the reverse switch guard.

  5. General Pipe Cleaners Drain Cleaner PMEBO 2016 Power Cable Replacement: étape 5, image 1 de 2 General Pipe Cleaners Drain Cleaner PMEBO 2016 Power Cable Replacement: étape 5, image 2 de 2
    • Squeeze the tabs on either side of the reverse switch connector.

    • Pull the two halves of the connector apart to disconnect it.

    • Take note of where everything is connected in the control box before disconnecting anything else.

  6. General Pipe Cleaners Drain Cleaner PMEBO 2016 Power Cable Replacement: étape 6, image 1 de 2 General Pipe Cleaners Drain Cleaner PMEBO 2016 Power Cable Replacement: étape 6, image 2 de 2
    • Pull the white cable straight off of its spade connector on the power switch diaphragm.

  7. General Pipe Cleaners Drain Cleaner PMEBO 2016 Power Cable Replacement: étape 7, image 1 de 2 General Pipe Cleaners Drain Cleaner PMEBO 2016 Power Cable Replacement: étape 7, image 2 de 2
    • Pull the black cable straight off of its spade connector on the power switch diaphragm.

  8. General Pipe Cleaners Drain Cleaner PMEBO 2016 Power Cable Replacement: étape 8, image 1 de 3 General Pipe Cleaners Drain Cleaner PMEBO 2016 Power Cable Replacement: étape 8, image 2 de 3 General Pipe Cleaners Drain Cleaner PMEBO 2016 Power Cable Replacement: étape 8, image 3 de 3
    • Slide the switch assembly down out of its hole in the control box and pull it out of the control box.

    • Be careful not to snag the switch on any cables during removal.

  9. General Pipe Cleaners Drain Cleaner PMEBO 2016 Power Cable Replacement, Power Cable: étape 9, image 1 de 3 General Pipe Cleaners Drain Cleaner PMEBO 2016 Power Cable Replacement, Power Cable: étape 9, image 2 de 3 General Pipe Cleaners Drain Cleaner PMEBO 2016 Power Cable Replacement, Power Cable: étape 9, image 3 de 3
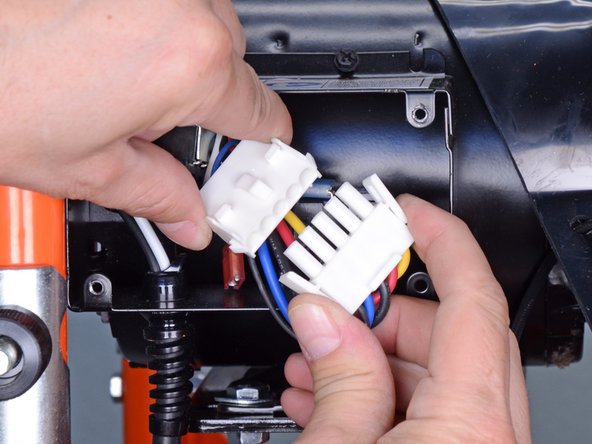
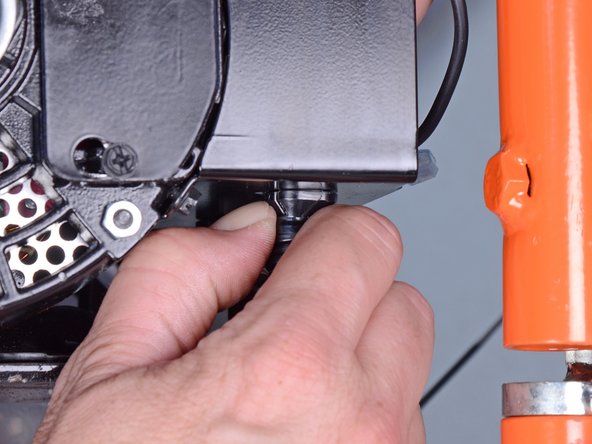
    • Push in on the small tab on the side of the plastic power cable clip.

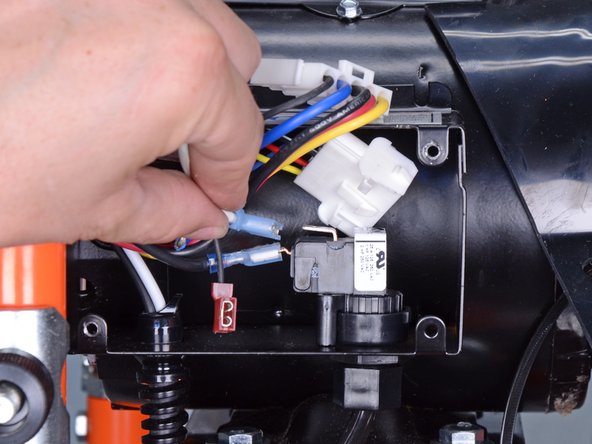
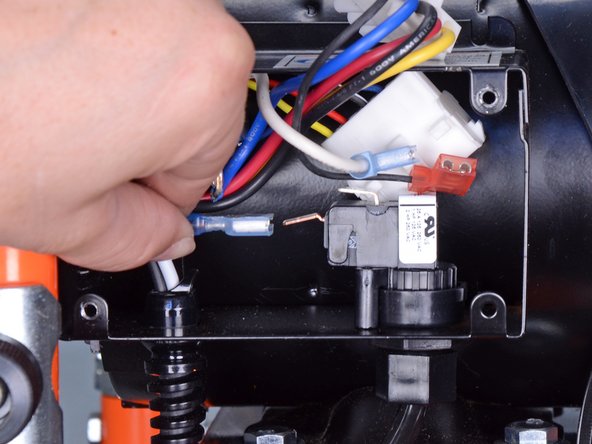
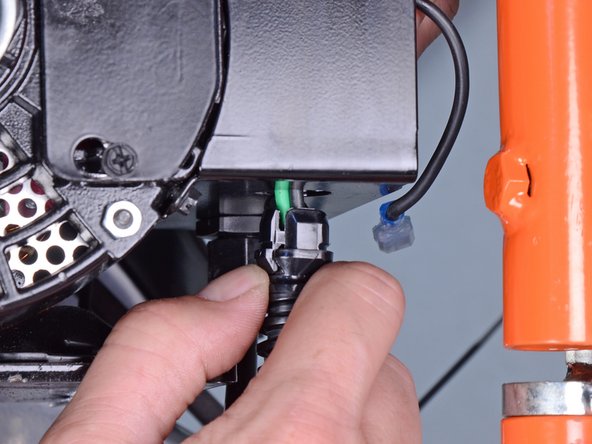
    • While holding the tab down, pull straight down on the power cable.

    • Do not remove the cable yet, it is still connected to the drain cleaner. Slide it down just enough to move the clip out of the control box.

  10. General Pipe Cleaners Drain Cleaner PMEBO 2016 Power Cable Replacement: étape 10, image 1 de 1
    • Use a Phillips #2 screwdriver to loosen the two screws securing the power box cover.

    • With the screws loose, slide the bottom of the cover to the right enough so the whole cover can swing down and away from the box opening.

  11. General Pipe Cleaners Drain Cleaner PMEBO 2016 Power Cable Replacement: étape 11, image 1 de 1
    • Use a flathead screwdriver to remove the green screw securing the green power cable wire.

  12. General Pipe Cleaners Drain Cleaner PMEBO 2016 Power Cable Replacement: étape 12, image 1 de 1
    • Use pliers to pull the white power cable straight off of its spade connector.

  13. General Pipe Cleaners Drain Cleaner PMEBO 2016 Power Cable Replacement: étape 13, image 1 de 2 General Pipe Cleaners Drain Cleaner PMEBO 2016 Power Cable Replacement: étape 13, image 2 de 2
    • Feed the green power cable wire through the control box first, then carefully pull down on the entire power cable and remove it.

    • Make sure you don't snag the power cable on any wires or on the control box during removal.

    • During reassembly, feed the white wire through the control box and into the power box first, then the green wire.

Conclusion

To reassemble your device, follow these instructions in reverse order.

2 autres ont terminé cette réparation.

Adam O'Camb

Membre depuis le 04/11/15

196 689 Réputation

416 tutoriels rédigés

0 commentaires

Ajouter un commentaire

Nombre de vues :

Dernières 24 heures : 1

7 derniers jours : 9

30 derniers jours : 21

Total : 1,189