Aller au contenu principal

Google Pixel 5 Screen Replacement

Ce dont vous avez besoin

  1. Google Pixel 5 Screen Replacement, Heat the bottom edge of the screen: étape 1, image 1 de 1
    • Heat an iOpener and apply it to the bottom edge of the screen for one minute.

    • A hair dryer, heat gun, or hot plate may also be used, but be careful not to overheat the phone—the display and internal battery are both susceptible to heat damage.

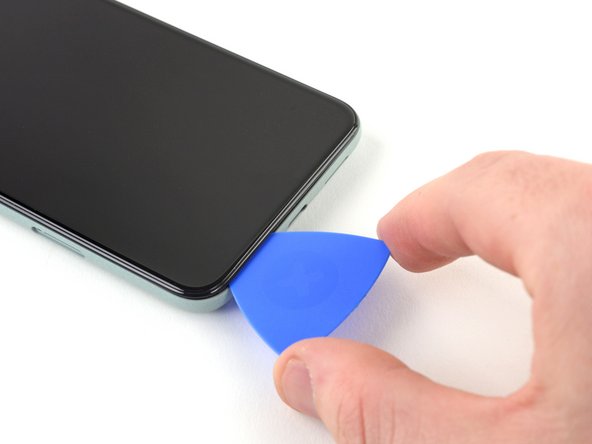
  2. Google Pixel 5 Screen Replacement, Insert an opening pick: étape 2, image 1 de 3 Google Pixel 5 Screen Replacement, Insert an opening pick: étape 2, image 2 de 3 Google Pixel 5 Screen Replacement, Insert an opening pick: étape 2, image 3 de 3
    • Apply a suction cup to the screen, as close to the heated edge as possible.

    • If your screen is badly cracked, follow this guide to tape over the cracked screen. If all else fails, you can superglue the suction cup to the broken screen.

    • Pull up on the suction cup with strong, steady force to create a gap.

    • Depending on the age of your device, this may be difficult. If you have trouble, apply more heat and try again.

    • Insert the opening pick into the gap.

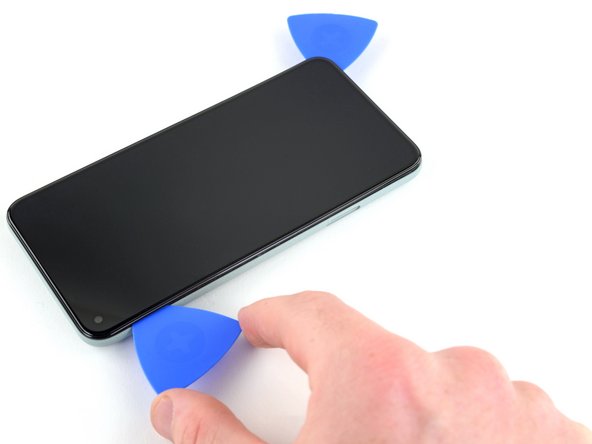
  3. Google Pixel 5 Screen Replacement, Slice the bottom adhesive: étape 3, image 1 de 3 Google Pixel 5 Screen Replacement, Slice the bottom adhesive: étape 3, image 2 de 3 Google Pixel 5 Screen Replacement, Slice the bottom adhesive: étape 3, image 3 de 3
    • Slide the opening pick back and forth along the bottom of the screen to slice the adhesive.

    • Leave the pick inserted in the bottom right corner to prevent the adhesive from re-sealing.

  4. Google Pixel 5 Screen Replacement, Heat the left edge of the screen: étape 4, image 1 de 1
    • Apply a heated iOpener to the left edge of the screen for one minute.

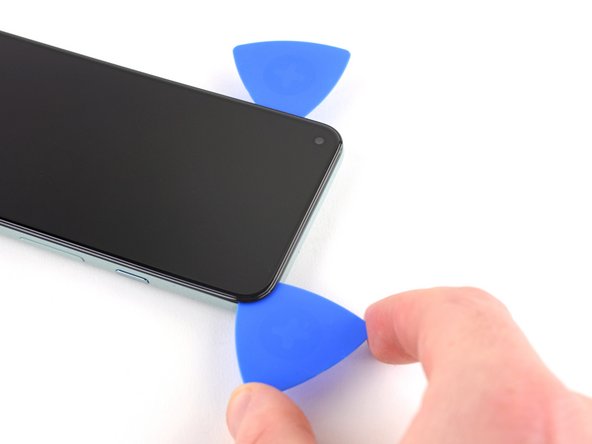
  5. Google Pixel 5 Screen Replacement: étape 5, image 1 de 3 Google Pixel 5 Screen Replacement: étape 5, image 2 de 3 Google Pixel 5 Screen Replacement: étape 5, image 3 de 3
    • Insert another opening pick into the bottom left corner of the screen.

    • Slide the opening pick around the left corner.

    • Do not insert the pick more than 1/4 inch (6 mm) or you may damage the screen's flex cable located in the middle of the left edge.

    • Continue to slide the pick up towards the front camera to slice the adhesive on the left edge of the screen.

    • Leave the pick inserted to prevent the adhesive from re-sealing.

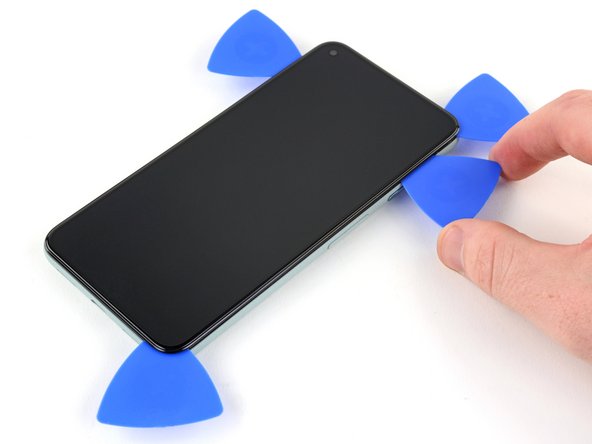
  6. Google Pixel 5 Screen Replacement: étape 6, image 1 de 3 Google Pixel 5 Screen Replacement: étape 6, image 2 de 3 Google Pixel 5 Screen Replacement: étape 6, image 3 de 3
    • Insert another opening pick into the top left corner of the screen.

    • Slide the pick around the front camera and across the top edge of the phone.

    • If the adhesive is difficult to slice, apply heat to the area for one minute and try again.

    • Slide the pick to the top right corner of the phone and leave the pick inserted.

  7. Google Pixel 5 Screen Replacement: étape 7, image 1 de 3 Google Pixel 5 Screen Replacement: étape 7, image 2 de 3 Google Pixel 5 Screen Replacement: étape 7, image 3 de 3
    • Insert an opening pick into the bottom right corner of the screen.

    • Slide the pick up to the top right corner to slice the last edge of adhesive.

    • You may need to run an opening pick around the edges again to ensure all the adhesive is cut. It is applied the thickest on the four corners.

  8. Google Pixel 5 Screen Replacement, Open up the screen: étape 8, image 1 de 2 Google Pixel 5 Screen Replacement, Open up the screen: étape 8, image 2 de 2
    • Use the opening pick from the top left corner to lift up the left edge of the screen a few millimeters. This will keep the clips from snapping back down into the case.

    • Lift up on the right side of the screen and open up the phone like a book.

    • Do not open the screen more than 90 degrees to prevent damaging the screen flex cable.

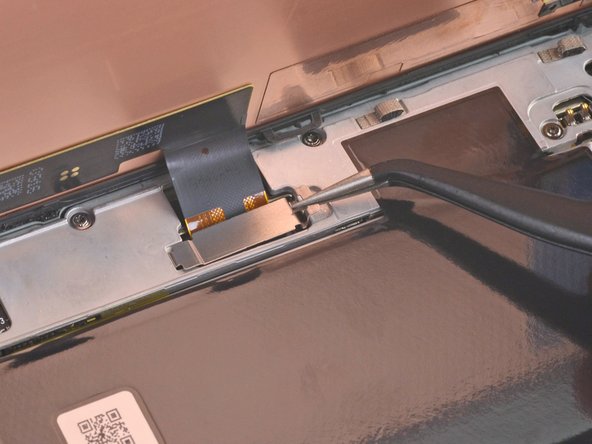
  9. Google Pixel 5 Screen Replacement, Disconnect the screen: étape 9, image 1 de 2 Google Pixel 5 Screen Replacement, Disconnect the screen: étape 9, image 2 de 2
    • Use tweezers to grip the screen connector cover securing the screen flex cable.

    • Push the clip in towards the connector to unlatch it.

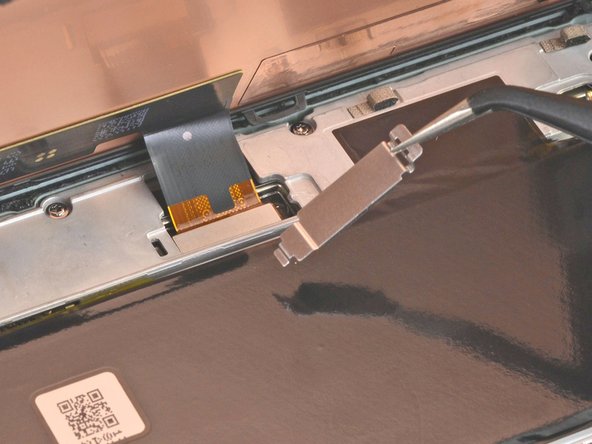
  10. Google Pixel 5 Screen Replacement: étape 10, image 1 de 2 Google Pixel 5 Screen Replacement: étape 10, image 2 de 2
    • Remove the screen connector cover.

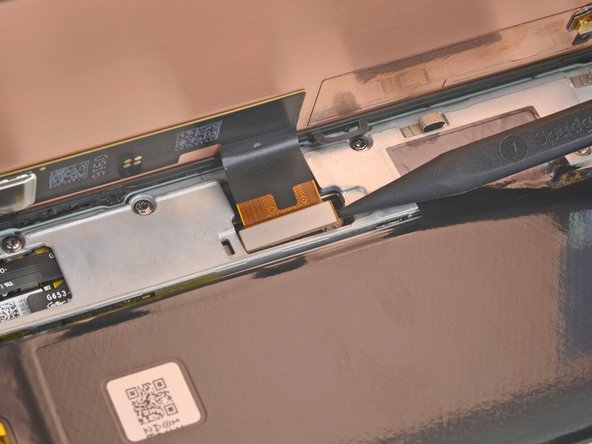
  11. Google Pixel 5 Screen Replacement: étape 11, image 1 de 2 Google Pixel 5 Screen Replacement: étape 11, image 2 de 2
    • Use the tip of the spudger to pry up and disconnect the screen flex cable.

    • To re-attach press connectors like this one, carefully align and press down on one side until it clicks into place, then repeat on the other side. Do not press down on the middle. If the connector is misaligned, the pins can bend, causing permanent damage

  12. Google Pixel 5 Screen Replacement, Remove the screen: étape 12, image 1 de 2 Google Pixel 5 Screen Replacement, Remove the screen: étape 12, image 2 de 2
    • Remove the screen.

    • Use tweezers to pick off the remaining adhesive on the case.

    • Be sure to test your repairs before you affix the screen with new adhesive.

    • If you are using a custom-cut adhesive, follow this guide for instructions on how to apply adhesive to the replacement screen.

    • If you are using Tesa tape to reattach the screen, follow this guide.

Conclusion

Compare your new replacement part to the original part—you may need to transfer remaining components or remove adhesive backings from the new part before installing.

To reassemble your device, follow the above steps in reverse order.

Take your e-waste to an R2 or e-Stewards certified recycler.

Repair didn’t go as planned? Try some basic troubleshooting, or ask our Answers community for help.

50 autres ont terminé cette réparation.

Robert Boyd

Membre depuis le 02/01/21

26 386 Réputation

94 tutoriels rédigés

29 commentaires

if i want only screen (lcd display) of pixel 5 from where can i get the screen. sudhri@gmail.com my mail address

Digvijay Engineers - Réponse

Hello! This tutorial is well explained and seems ok to realize, but the problem i’m facing is to find the right spare part… Once contacted, google assistance said the only option is to send it back to them for 138€ and 7-10 days… Can you recommand a trustworsthy website for that?

Aurelien Malot - Réponse

Usually i look on amazon (sent by amazon) to get the warranty if i got any problem.

Daniele Carminati -

Check out the iFixit store. We stock some parts for the Pixel 5, including the screen and battery.

Zac Hall -

The screen that I ordered has a cable that runs the wrong way. It would need to be twisted to make it fit my Pixel 5. Any suggestions?

Gordon Stephenson - Réponse

Ajouter un commentaire

Nombre de vues :

Dernières 24 heures : 39

7 derniers jours : 282

30 derniers jours : 1,268

Total : 91,744