Aller au contenu principal

Google Pixelbook Left Charging Port Replacement

Ce dont vous avez besoin

  1. Google Pixelbook Left Charging Port Replacement, Battery (Back Panel): étape 1, image 1 de 3 Google Pixelbook Left Charging Port Replacement, Battery (Back Panel): étape 1, image 2 de 3 Google Pixelbook Left Charging Port Replacement, Battery (Back Panel): étape 1, image 3 de 3
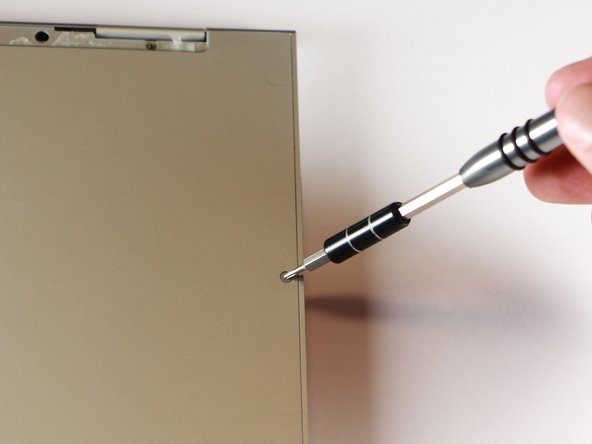
    • Use the iFixit opening tools or a metal spudger to pry the rubber covers off the back of your Pixelbook.

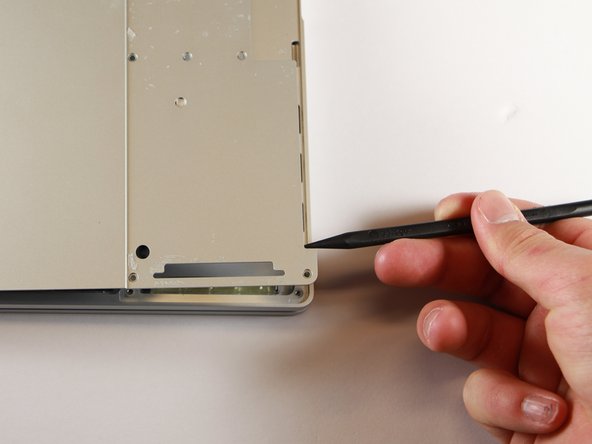
    • Peel the linings off completely until the back of the Pixelbook looks bare.

  2. Google Pixelbook Left Charging Port Replacement: étape 2, image 1 de 2 Google Pixelbook Left Charging Port Replacement: étape 2, image 2 de 2
    • Remove the two yellow 2.0mm screws by using a T3 Torx screwdriver.

  3. Google Pixelbook Left Charging Port Replacement: étape 3, image 1 de 3 Google Pixelbook Left Charging Port Replacement: étape 3, image 2 de 3 Google Pixelbook Left Charging Port Replacement: étape 3, image 3 de 3
    • Remove the seventeen 3.0mm T5 Torx screws from the bottom panel.

  4. Google Pixelbook Left Charging Port Replacement: étape 4, image 1 de 3 Google Pixelbook Left Charging Port Replacement: étape 4, image 2 de 3 Google Pixelbook Left Charging Port Replacement: étape 4, image 3 de 3
    • Use the nylon spudger to pry the edge of the Pixelbook up until you can grab the edge with your fingers.

    • Open the back panel completely and lay it flat so you see the whole inside of the computer.

  5. Google Pixelbook Left Charging Port Replacement: étape 5, image 1 de 2 Google Pixelbook Left Charging Port Replacement: étape 5, image 2 de 2
    • Remove the yellow 2.0mm screw from the middle of the panel by using the T3 Torx screwdriver to turn the screw counterclockwise.

  6. Google Pixelbook Left Charging Port Replacement: étape 6, image 1 de 2 Google Pixelbook Left Charging Port Replacement: étape 6, image 2 de 2
    • Remove the small, black casing by using the spudger to lift it up from its place.

  7. Google Pixelbook Left Charging Port Replacement: étape 7, image 1 de 1
    • Disconnect the flat, black cord from the main component by using a spudger to push it out of the slot, or by using your hand to carefully pull it out.

    • Your back panel is now free from the main component.

  8. Google Pixelbook Left Charging Port Replacement, Left Charging Port: étape 8, image 1 de 2 Google Pixelbook Left Charging Port Replacement, Left Charging Port: étape 8, image 2 de 2
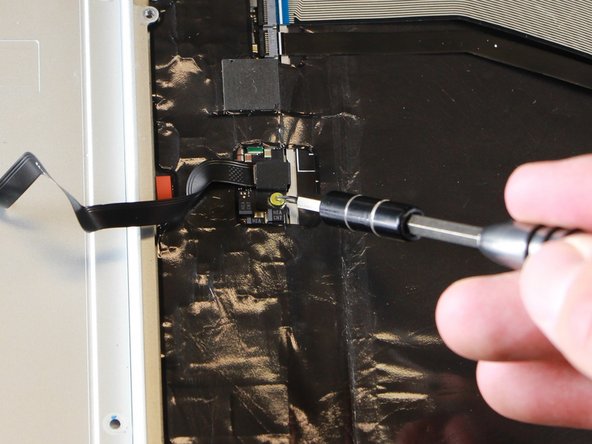
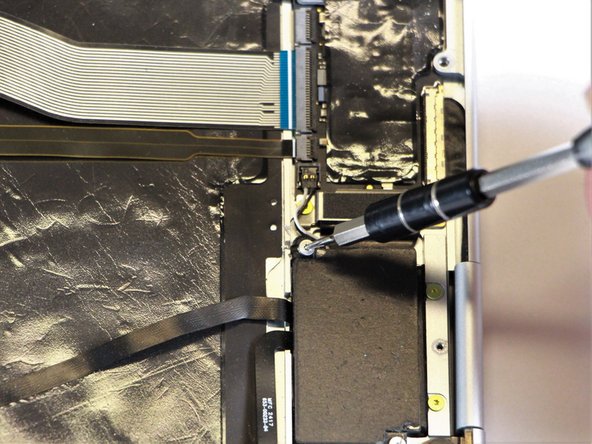
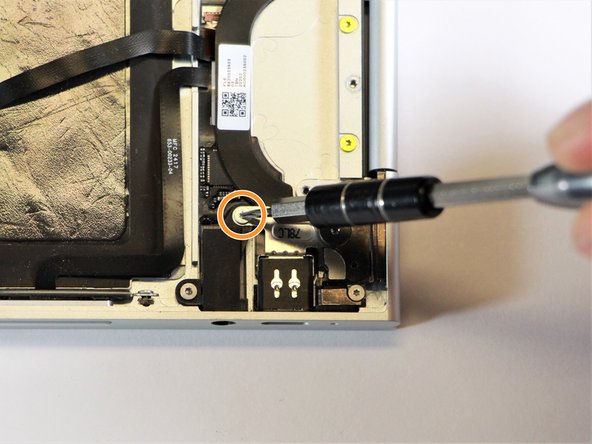
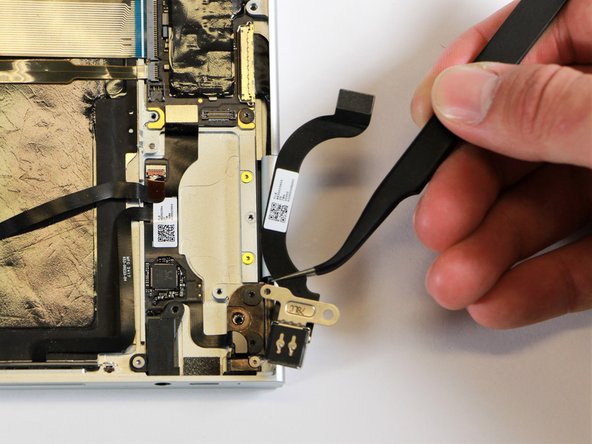
    • Remove the two 3.0mm silver screws from the thin, black component by using a T3 Torx screwdriver to turn the screws counterclockwise.

  9. Google Pixelbook Left Charging Port Replacement: étape 9, image 1 de 2 Google Pixelbook Left Charging Port Replacement: étape 9, image 2 de 2
    • Disconnect the thin, black and white cord from the motherboard by using the spudger to snap the connector up and out of place.

  10. Google Pixelbook Left Charging Port Replacement: étape 10, image 1 de 1
    • Remove the thin, black component by pulling it up and out of the laptop with your fingers.

    • This photo shows the bottom screw still in the black box, but yours should be removed.

  11. Google Pixelbook Left Charging Port Replacement: étape 11, image 1 de 1
    • Remove the gold 2.0mm corner screw by turning it counterclockwise with a T3 Torx screwdriver.

  12. Google Pixelbook Left Charging Port Replacement: étape 12, image 1 de 2 Google Pixelbook Left Charging Port Replacement: étape 12, image 2 de 2
    • Using needle-nose tweezers, remove the silver casing by lifting it up and out of the computer.

  13. Google Pixelbook Left Charging Port Replacement: étape 13, image 1 de 2 Google Pixelbook Left Charging Port Replacement: étape 13, image 2 de 2
    • Remove the three 3.0mm black screws on the right side by using a T5 Torx screwdriver to turn the screws counterclockwise.

    • Remove the silver 2.0mm screw on the left side by using a T3 Torx screwdriver to turn the screw counterclockwise.

  14. Google Pixelbook Left Charging Port Replacement: étape 14, image 1 de 1
    • Disconnect the thin, black ribbon cable by using the spudger to lift it up from the computer.

  15. Google Pixelbook Left Charging Port Replacement: étape 15, image 1 de 2 Google Pixelbook Left Charging Port Replacement: étape 15, image 2 de 2
    • Use the needle-nose tweezers to remove the charging port by lifting the component up and out of the Pixelbook.

Conclusion

To reassemble your device, follow these instructions in reverse order.

Alon Gary

Membre depuis le 01/24/18

526 Réputation

2 tutoriels rédigés

Équipe

Cal Poly, Team S18-G1, Livingston Winter 2018 Membre de l'équipe Cal Poly, Team S18-G1, Livingston Winter 2018

CPSU-LIVINGSTON-W18S18G1

4 membres

7 tutoriels rédigés

3 commentaires

Where to get replacemt charging port from please

kamil Szym - Réponse

Where can we get a replacement charging port for the Pixelbook Go 2 (i7)?

michaelnic - Réponse

Hi Michael, did you manage to find the charging port and replace it for the Pixelbook Go?

redshift galaxy -

Ajouter un commentaire

Nombre de vues :

Dernières 24 heures : 0

7 derniers jours : 6

30 derniers jours : 24

Total : 2,836