Aller au contenu principal

Graco Literider Classic Connect Seat Replacement

Ce dont vous avez besoin

  1. Graco Literider Classic Connect Seat Replacement, Seat: étape 1, image 1 de 2 Graco Literider Classic Connect Seat Replacement, Seat: étape 1, image 2 de 2
    • Flip the stroller over so the back of the seat points upward.

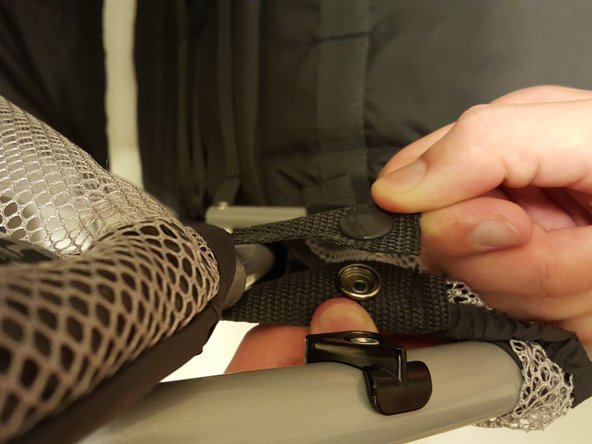
    • Locate the twelve 12 mm Phillips screws holding the fabric to the frame of the stroller. Six are found along the back of the seat, and the other six are along the bottom of the seat.

  2. Graco Literider Classic Connect Seat Replacement: étape 2, image 1 de 2 Graco Literider Classic Connect Seat Replacement: étape 2, image 2 de 2
    • Using a Phillips #1 screwdriver, remove the twelve 12 mm screws and set them aside.

  3. Graco Literider Classic Connect Seat Replacement: étape 3, image 1 de 2 Graco Literider Classic Connect Seat Replacement: étape 3, image 2 de 2
    • Locate the two buttons holding the fabric basket frame on either side of the stroller.

    • Unbutton the two buttons.

  4. Graco Literider Classic Connect Seat Replacement: étape 4, image 1 de 2 Graco Literider Classic Connect Seat Replacement: étape 4, image 2 de 2
    • Locate the three velcro straps holding the seat to the canopy.

    • Undo the three straps.

  5. Graco Literider Classic Connect Seat Replacement: étape 5, image 1 de 1
    • Remove the seat from the frame.

    • When replacing the seat on the frame, some additional force may be required to insert the screws into their proper places.

Conclusion

To reassemble your device, follow these instructions in reverse order.

Une autre personne a terminé cette réparation.

Tyler Laird

Membre depuis le 09/29/15

540 Réputation

3 tutoriels rédigés

Équipe

Cal Poly, Team 11-4, Forte Fall 2015 Membre de l'équipe Cal Poly, Team 11-4, Forte Fall 2015

CPSU-FORTE-F15S11G4

5 membres

3 tutoriels rédigés

0 commentaires

Ajouter un commentaire

Nombre de vues :

Dernières 24 heures : 2

7 derniers jours : 6

30 derniers jours : 24

Total : 1,081