Aller au contenu principal

HP 14-an012nr Fan Replacement

Ce dont vous avez besoin

  1. HP 14-an012nr Fan Replacement, Battery: étape 1, image 1 de 3 HP 14-an012nr Fan Replacement, Battery: étape 1, image 2 de 3 HP 14-an012nr Fan Replacement, Battery: étape 1, image 3 de 3
    • Remove the battery by sliding both sliders inward.

  2. HP 14-an012nr Fan Replacement, Back Panel: étape 2, image 1 de 3 HP 14-an012nr Fan Replacement, Back Panel: étape 2, image 2 de 3 HP 14-an012nr Fan Replacement, Back Panel: étape 2, image 3 de 3
    • Remove the eight 6 mm screws from the back panel using a Phillips #1 screwdriver.

    • Remove the rubber pads from the upper corners of the laptop to reveal two screws on each side.

    • Remove six 4 mm screws using a Phillips #1 screwdriver.

    • Pry the back panel off using an opening tool, working your way around the edges.

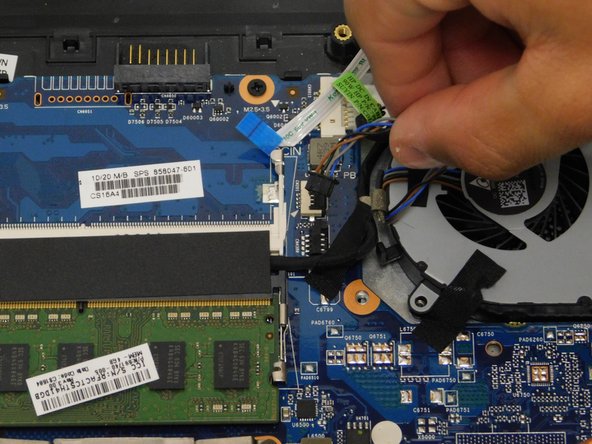
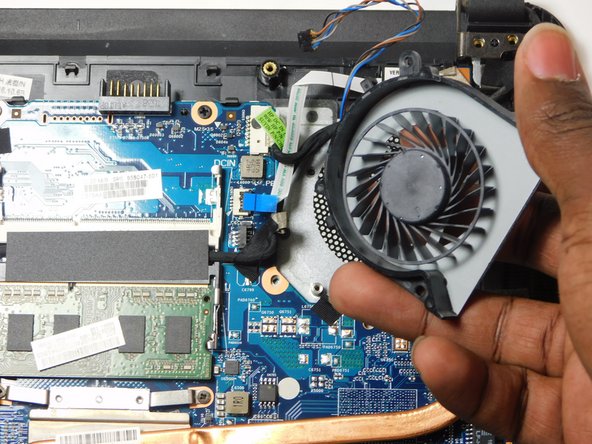
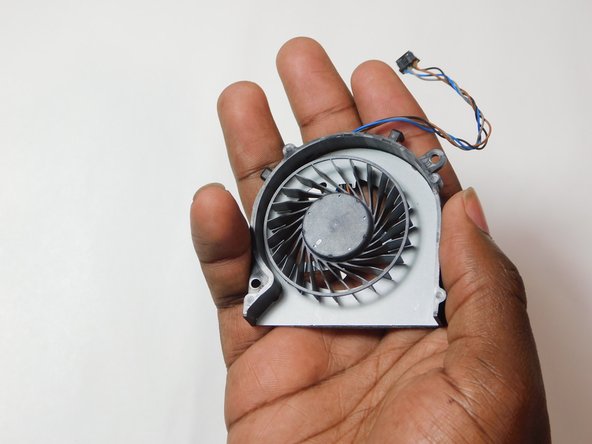
  3. HP 14-an012nr Fan Replacement, Fan: étape 3, image 1 de 3 HP 14-an012nr Fan Replacement, Fan: étape 3, image 2 de 3 HP 14-an012nr Fan Replacement, Fan: étape 3, image 3 de 3
    • Remove the two 3 mm screws that secure the fan.

    • Gently disconnect the power cable; it can tear easily.

    • Remove the fan.

  4. HP 14-an012nr Fan Replacement: étape 4, image 1 de 2 HP 14-an012nr Fan Replacement: étape 4, image 2 de 2
    • Clean the area where the fan was located with a clean soft cloth or cotton swab.

    • Once cleaned and free of dust place the new fan and follow the steps in reverse to rebuild the laptop.

Conclusion

To reassemble your device, follow these instructions in reverse order.

Christopher Brackeen

Membre depuis le 09/07/23

85 Réputation

1 tutoriel rédigé

Équipe

Gateway, Team 2-2, Gonzalez Fall 2023 Membre de l'équipe Gateway, Team 2-2, Gonzalez Fall 2023

GCC-GONZALEZ-F23S2G2

5 membres

5 tutoriels rédigés

0 commentaires

Ajouter un commentaire

Nombre de vues :

Dernières 24 heures : 0

7 derniers jours : 1

30 derniers jours : 12

Total : 109