Aller au contenu principal

HP 14-fq1025nr Speakers Replacement

Ce dont vous avez besoin

  1. HP 14-fq1025nr Speakers Replacement, Back Cover: étape 1, image 1 de 1
    • Flip the laptop upside down so the bottom cover is facing up.

  2. HP 14-fq1025nr Speakers Replacement: étape 2, image 1 de 1
    • Use a pair of tweezers to grab and pull the feet off of the cover.

  3. HP 14-fq1025nr Speakers Replacement: étape 3, image 1 de 1
    • Remove the two 4 mm screws using a Phillips #0 screwdriver.

    • Remove the six remaining 6 mm screws located around the edges and underneath the feet using a Phillips #0 screwdriver.

  4. HP 14-fq1025nr Speakers Replacement: étape 4, image 1 de 1
    • Flip the laptop right-side up and slide an iFixit opening tool and/or Jimmy inside of the bottom cover seam to pry it open.

  5. HP 14-fq1025nr Speakers Replacement: étape 5, image 1 de 1
    • Remove the bottom cover.

  6. HP 14-fq1025nr Speakers Replacement, Fan: étape 6, image 1 de 1
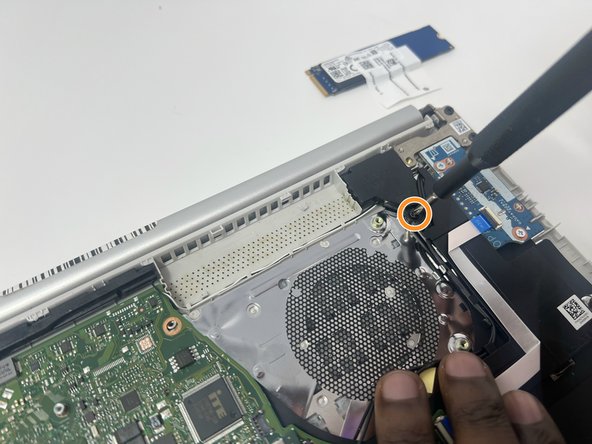
    • Remove the three silver screws (one 2 mm screw and two 4 mm screws) holding down the fan using a Phillips #0 screwdriver.

  7. HP 14-fq1025nr Speakers Replacement: étape 7, image 1 de 1
    • Unplug the fan’s power cord from the motherboard.

    • Use tweezers to pull the plug out, if needed.

  8. HP 14-fq1025nr Speakers Replacement: étape 8, image 1 de 1
    • Remove the fan.

  9. HP 14-fq1025nr Speakers Replacement, Heat Sink: étape 9, image 1 de 1
    • Remove the four gray 3 mm screws around the heat sink using a Phillips #0 screwdriver.

    • Remove the heat sink.

  10. HP 14-fq1025nr Speakers Replacement, Speakers: étape 10, image 1 de 2 HP 14-fq1025nr Speakers Replacement, Speakers: étape 10, image 2 de 2
    • Using a Phillips #0 screwdriver, remove the three black 5 mm screws holding down the speaker:

    • Two screws on the left side

    • One screw on the right side

  11. HP 14-fq1025nr Speakers Replacement: étape 11, image 1 de 1
    • Unplug the speaker wire.

    • Use tweezers if needed.

  12. HP 14-fq1025nr Speakers Replacement: étape 12, image 1 de 1
    • Remove the speaker.

Conclusion

To reassemble your device, follow these instructions in reverse order.

Nil Parra

Membre depuis le 09/27/22

485 Réputation

4 tutoriels rédigés

Équipe

Utah Tech University, Team 1-6, McMurrin Fall 2022 Membre de l'équipe Utah Tech University, Team 1-6, McMurrin Fall 2022

UTAHTECH-MCMURRIN-F22S1G6

3 membres

9 tutoriels rédigés

0 commentaires

Ajouter un commentaire

Nombre de vues :

Dernières 24 heures : 0

7 derniers jours : 0

30 derniers jours : 2

Total : 72