Cette version peut contenir des modifications incorrectes. Passez au dernier aperçu vérifié.
Ce dont vous avez besoin
-
Cette étape n’est pas traduite. Aidez à la traduire
-
Locate the CD Compartment panel and gently slide it out.
-
-
-
Cette étape n’est pas traduite. Aidez à la traduire
-
Remove the back of the laptop by unscrewing the screws shown.
-
Also remove the other 5 Phillips screws lining the back cover.
-
-
Cette étape n’est pas traduite. Aidez à la traduire
-
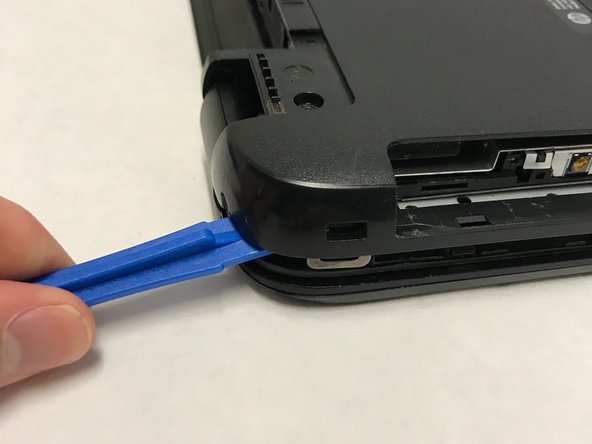
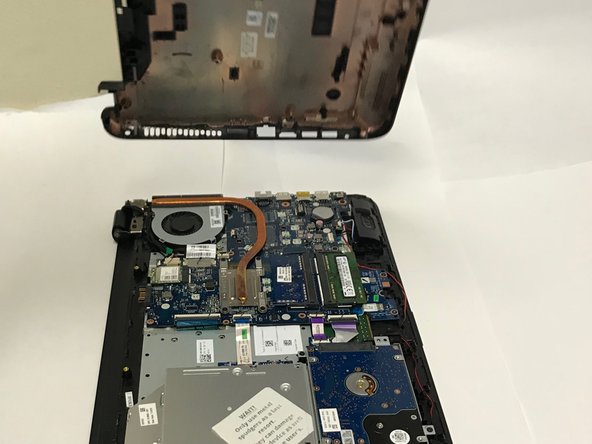
Using the prying tool, wedge it underneath the back of the laptop and do the same all around until the back comes off.
-
Dont forget to unscrew 2 screws under 2 plastic tabs (one on each hing). The lid will not come off without them being removed!
-


Annulation : je n'ai pas terminé ce tutoriel.
3 autres ont terminé cette réparation.
Équipe

Baylor, Team S1-G2, Johnson Spring 2018 Membre de l'équipe Baylor, Team S1-G2, Johnson Spring 2018
BU-JOHNSON-S18S1G2
3 membres
6 tutoriels rédigés