Aller au contenu principal

HP 15-ay114cy Keyboard Replacement

Ce dont vous avez besoin

  1. HP 15-ay114cy Keyboard Replacement, Orient the Laptop: étape 1, image 1 de 1
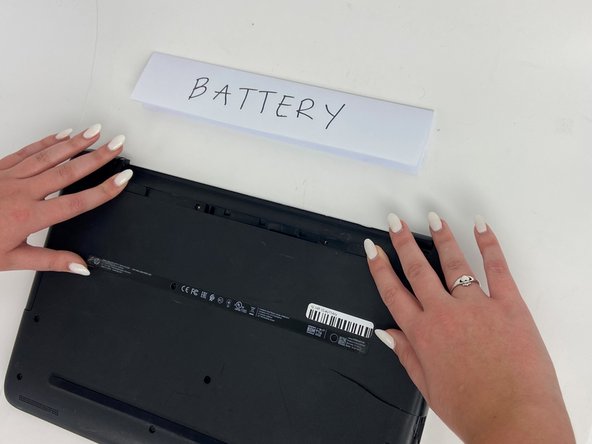
    • Orient the Laptop so the HP logo is facing the table and the battery tabs are accessible.

    • Ensure the laptop is powered off before moving forward.

  2. HP 15-ay114cy Keyboard Replacement, Push out the Battery: étape 2, image 1 de 2 HP 15-ay114cy Keyboard Replacement, Push out the Battery: étape 2, image 2 de 2
    • Place your index fingers on each of the two battery holder clips.

    • Using your index fingers, push the battery holder clips inwards (towards the center of the laptop).

  3. HP 15-ay114cy Keyboard Replacement, Remove the Battery: étape 3, image 1 de 2 HP 15-ay114cy Keyboard Replacement, Remove the Battery: étape 3, image 2 de 2
    • After the battery clips are pushed in, use either hand to grab hold of the battery.

    • Gently push up to remove the battery.

  4. HP 15-ay114cy Keyboard Replacement, Unscrew the Back Cover: étape 4, image 1 de 2 HP 15-ay114cy Keyboard Replacement, Unscrew the Back Cover: étape 4, image 2 de 2
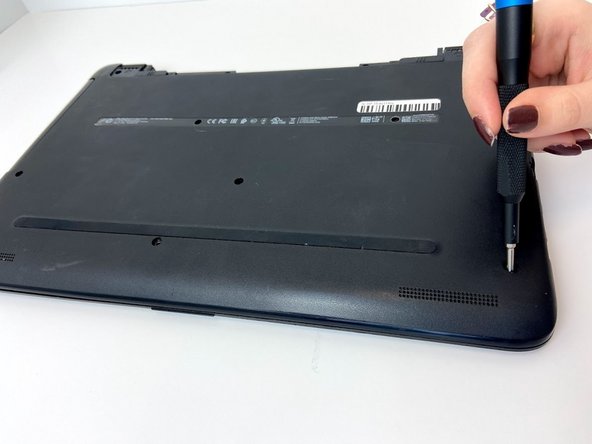
    • Use a Phillips #0 screwdriver to remove the twelve 8 mm Phillips screws that are holding down the bottom cover of the laptop.

  5. HP 15-ay114cy Keyboard Replacement, Remove the Disk Drive: étape 5, image 1 de 2 HP 15-ay114cy Keyboard Replacement, Remove the Disk Drive: étape 5, image 2 de 2
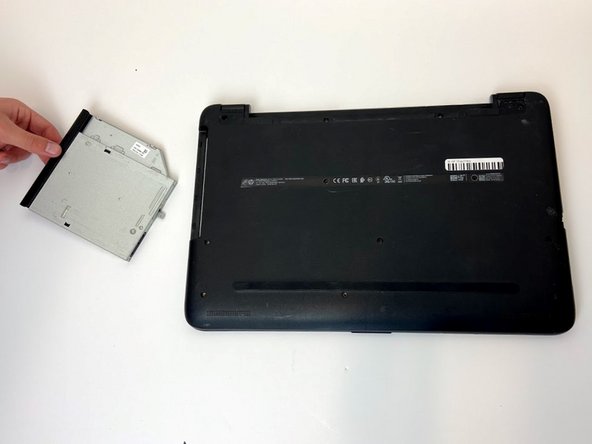
    • Grab a hold of the disk drive and carefully pull it away from the computer.

    • Continue to slide the disk drive out of the laptop until fully removed.

    • Due to the removal of the battery, no power is available to open the disk drive through the use of the eject button.

    • Make sure to pull out the disk drive at a 90 degree angle as demonstrated. Do not attempt to wiggle the drive out of the laptop.

    • There will be resistance when removing the drive. Mishandling may cause broken wires, which could make your disk drive inoperative.

  6. HP 15-ay114cy Keyboard Replacement, Remove the Back Cover: étape 6, image 1 de 3 HP 15-ay114cy Keyboard Replacement, Remove the Back Cover: étape 6, image 2 de 3 HP 15-ay114cy Keyboard Replacement, Remove the Back Cover: étape 6, image 3 de 3
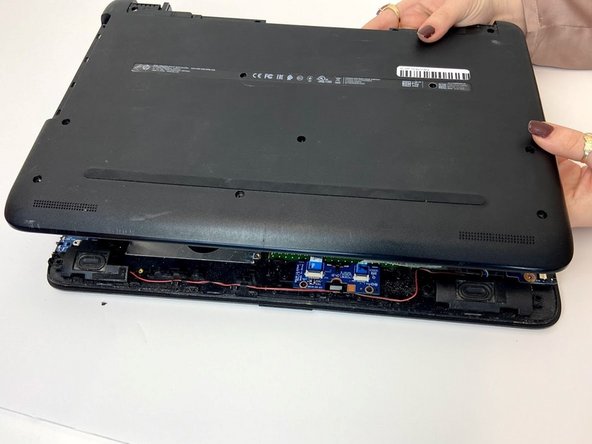
    • Place a plastic opening tool in-between the upper and lower pieces of the bottom cover.

    • Using your hands and the plastic opening tool, gently separate the cover from the frame.

    • Slowly remove the bottom cover from the base of the laptop.

    • Using metal pry tools can damage your device.

  7. HP 15-ay114cy Keyboard Replacement, Remove the Fan Screws: étape 7, image 1 de 2 HP 15-ay114cy Keyboard Replacement, Remove the Fan Screws: étape 7, image 2 de 2
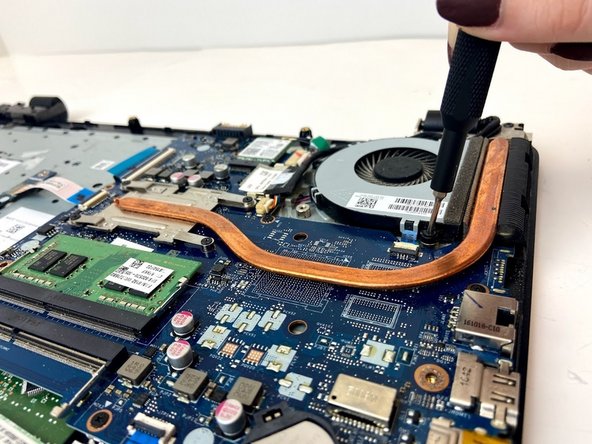
    • Use a Phillips #0 screwdriver to remove the two 8 mm Phillips-head screws that attach the fan to the base.

  8. HP 15-ay114cy Keyboard Replacement, Remove the Fan Wire: étape 8, image 1 de 3 HP 15-ay114cy Keyboard Replacement, Remove the Fan Wire: étape 8, image 2 de 3 HP 15-ay114cy Keyboard Replacement, Remove the Fan Wire: étape 8, image 3 de 3
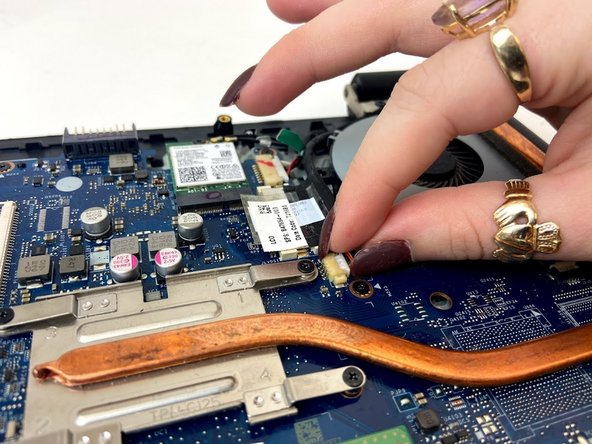
    • Using your index finger and thumb, carefully grab the wire that connects the fan to the motherboard.

    • Using a bit of force, remove the cable from the connector on the motherboard.

  9. HP 15-ay114cy Keyboard Replacement, Remove the Fan: étape 9, image 1 de 2 HP 15-ay114cy Keyboard Replacement, Remove the Fan: étape 9, image 2 de 2
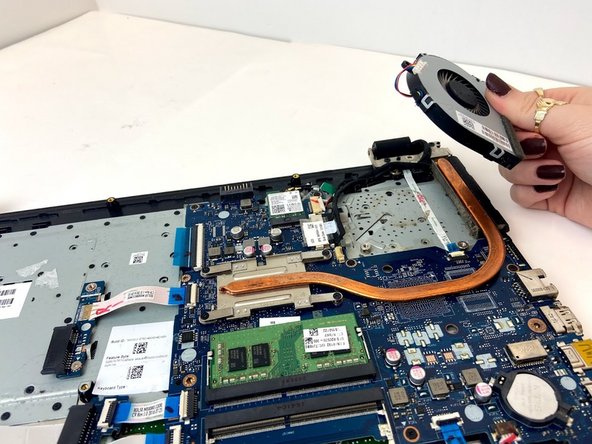
    • Using your hand, grab one of the fan corners and pull up.

    • Carefully remove the entire fan from the base of the laptop.

  10. HP 15-ay114cy Keyboard Replacement, Remove the Heatsink: étape 10, image 1 de 3 HP 15-ay114cy Keyboard Replacement, Remove the Heatsink: étape 10, image 2 de 3 HP 15-ay114cy Keyboard Replacement, Remove the Heatsink: étape 10, image 3 de 3
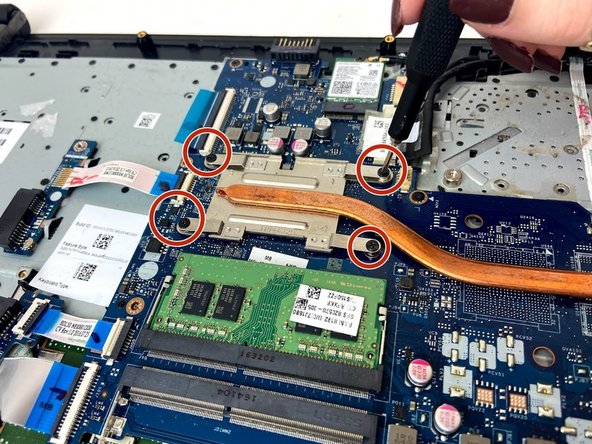
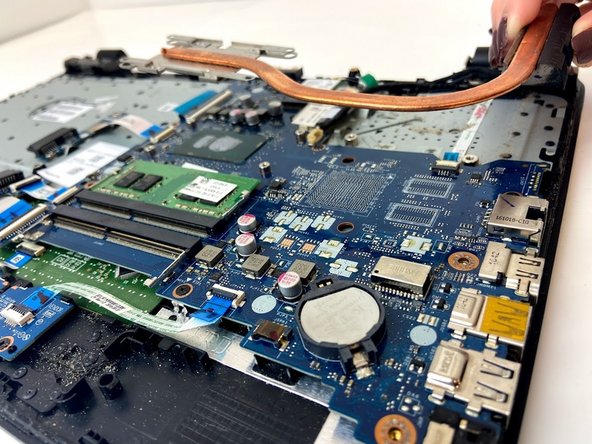
    • Using the Phillips #0 screwdriver, unscrew the four 2 mm Phillips-head screws that secure the heatsink to the laptop base.

    • Grasp one end of the heatsink and then carefully lift up to remove it from the laptop base.

  11. HP 15-ay114cy Keyboard Replacement, Remove the Speaker Wire Connection: étape 11, image 1 de 3 HP 15-ay114cy Keyboard Replacement, Remove the Speaker Wire Connection: étape 11, image 2 de 3 HP 15-ay114cy Keyboard Replacement, Remove the Speaker Wire Connection: étape 11, image 3 de 3
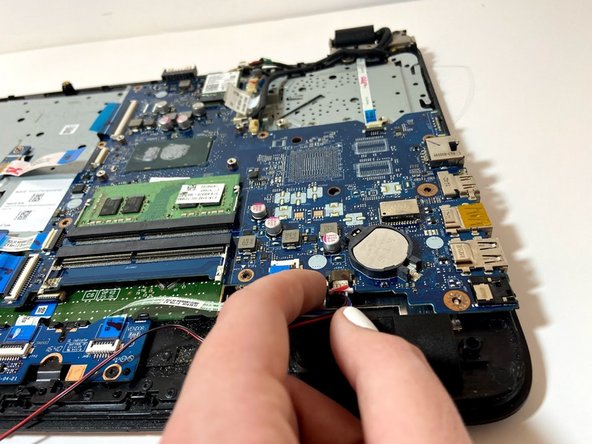
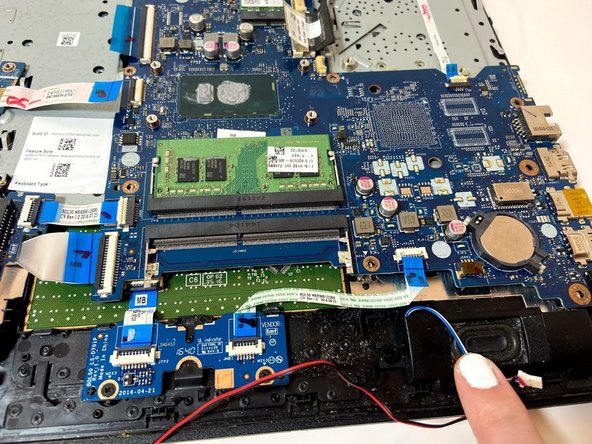
    • Using your index finger and thumb, gently grasp the speaker cable and pull it from the connector.

    • Move along the speaker wire and ensure that none of the wiring is caught on other components or mounting tabs.

    • Remove the speakers.

  12. HP 15-ay114cy Keyboard Replacement, Remove the Wired Connections: étape 12, image 1 de 3 HP 15-ay114cy Keyboard Replacement, Remove the Wired Connections: étape 12, image 2 de 3 HP 15-ay114cy Keyboard Replacement, Remove the Wired Connections: étape 12, image 3 de 3
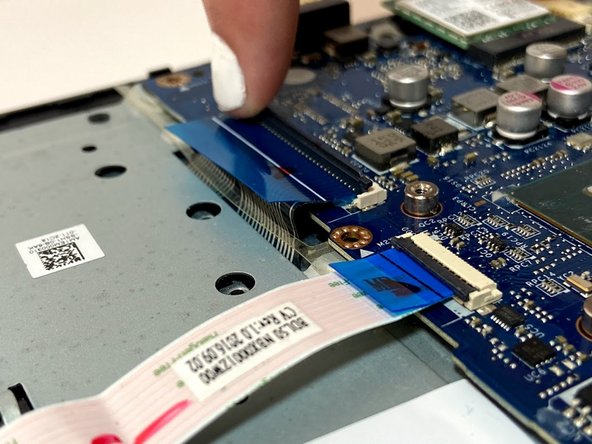
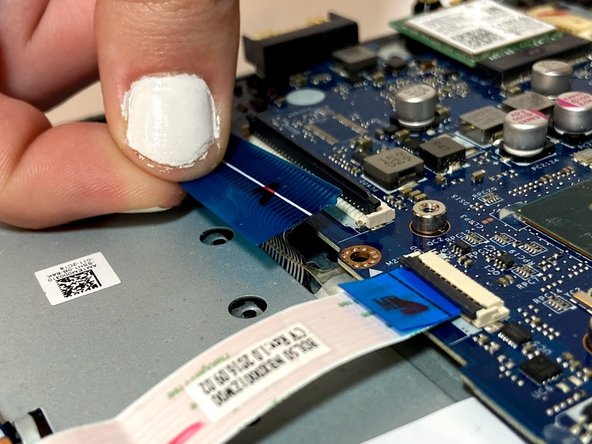
    • Place your index finger on the plastic ridge of each of the seven ZIF connectors connected to the motherboard.

    • Using your index finger, flip up the black tabs on each of the connectors to release the cable.

    • Gently pull each the wired connections from the motherboard.

  13. HP 15-ay114cy Keyboard Replacement, Remove the Screws from the Base: étape 13, image 1 de 2 HP 15-ay114cy Keyboard Replacement, Remove the Screws from the Base: étape 13, image 2 de 2
    • Using a Phillips #0 screwdriver, unscrew the twelve 2 mm Phillips-head screws that secure the motherboard to the laptop base.

  14. HP 15-ay114cy Keyboard Replacement, Remove the Wireless Card: étape 14, image 1 de 3 HP 15-ay114cy Keyboard Replacement, Remove the Wireless Card: étape 14, image 2 de 3 HP 15-ay114cy Keyboard Replacement, Remove the Wireless Card: étape 14, image 3 de 3
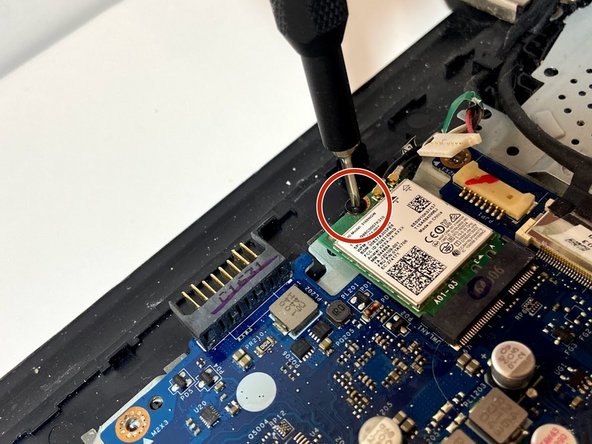
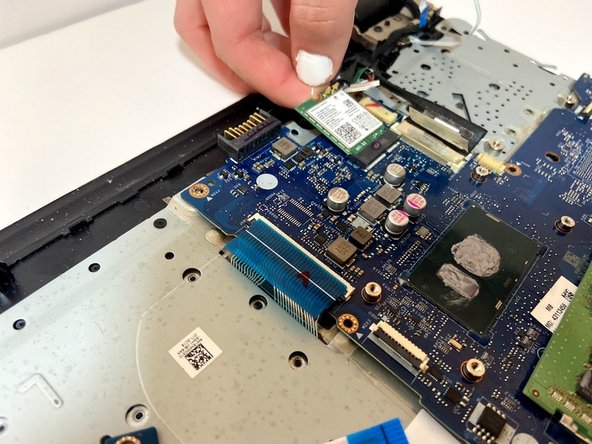
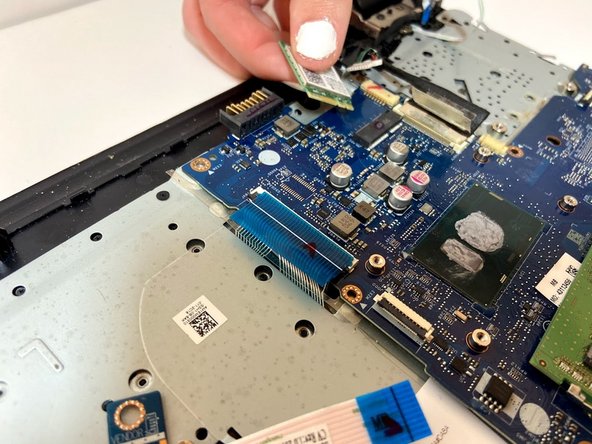
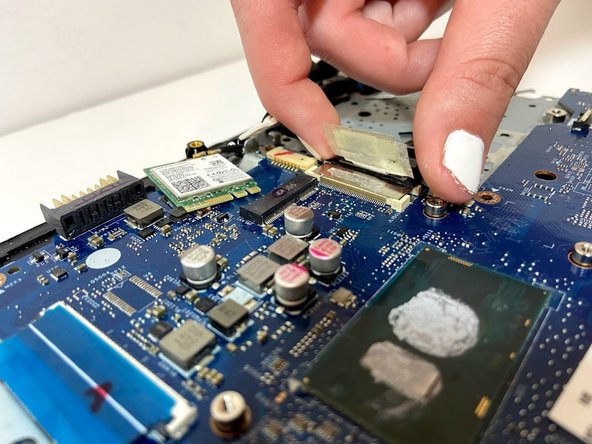
    • Use your index finger and thumb to gently grasp the green wireless card, then pull the card horizontally out and away from the motherboard.

  15. HP 15-ay114cy Keyboard Replacement, Remove the Audio/USB Board: étape 15, image 1 de 3 HP 15-ay114cy Keyboard Replacement, Remove the Audio/USB Board: étape 15, image 2 de 3 HP 15-ay114cy Keyboard Replacement, Remove the Audio/USB Board: étape 15, image 3 de 3
    • Use your index finger and thumb to gently grasp the display connector and remove it from the motherboard.

    • Carefully grasp an end of the motherboard and gradually lift it up and away from the laptop.

  16. HP 15-ay114cy Keyboard Replacement, Remove the Circuit: étape 16, image 1 de 3 HP 15-ay114cy Keyboard Replacement, Remove the Circuit: étape 16, image 2 de 3 HP 15-ay114cy Keyboard Replacement, Remove the Circuit: étape 16, image 3 de 3
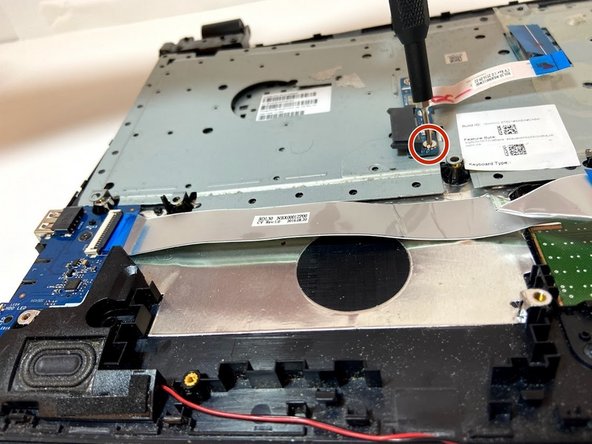
    • Unscrew the silver 2 mm Phillips #0 screw holding on the blue circuit/dock and place it to the side.

    • Gently lift up to remove the blue circuit board from the silver panel.

    • Peel the 3M tape towards the battery compartment to un-stick it from the panel.

    • Note: Check for any other screws which may prevent you from removing the silver panel.

  17. HP 15-ay114cy Keyboard Replacement, Remove the Panel: étape 17, image 1 de 3 HP 15-ay114cy Keyboard Replacement, Remove the Panel: étape 17, image 2 de 3 HP 15-ay114cy Keyboard Replacement, Remove the Panel: étape 17, image 3 de 3
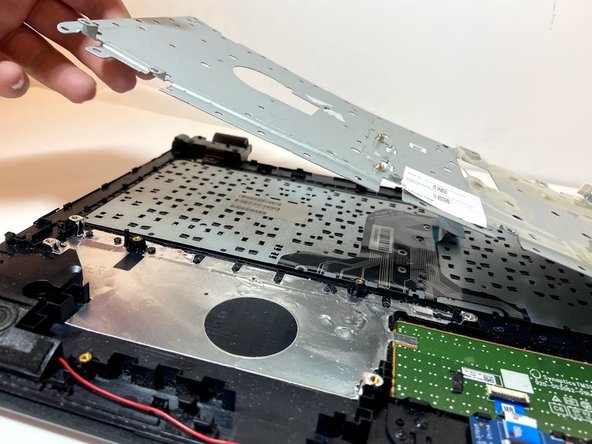
    • Insert the flat end of the metal spudger into one of the panel corners and lift up on the pry tool. This action will separate the panel from the laptop frame.

    • Steadily pry around the edges of the rectangular panel in a clockwise rotation.

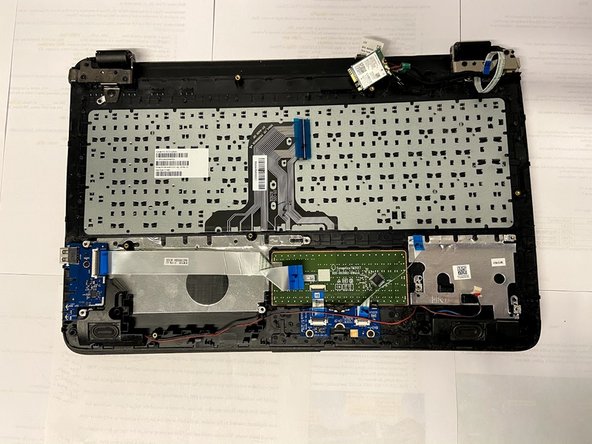
    • Lift up the silver panel cover to remove it and place it to the side. This will reveal your keyboard assembly.

    • When using the pry tool to separate the panel, you will hear popping and also will see small plastic bits break off of your device.

    • Due to the likelihood of plastic projectiles, we recommend the use of eye protection when performing this task.

    • Using the metal spudger pry tool may damage your device. Be careful not to put too much pressure on the plastic frame, as it may cause bending and cracking.

  18. HP 15-ay114cy Keyboard Replacement, Remove the Keyboard: étape 18, image 1 de 3 HP 15-ay114cy Keyboard Replacement, Remove the Keyboard: étape 18, image 2 de 3 HP 15-ay114cy Keyboard Replacement, Remove the Keyboard: étape 18, image 3 de 3
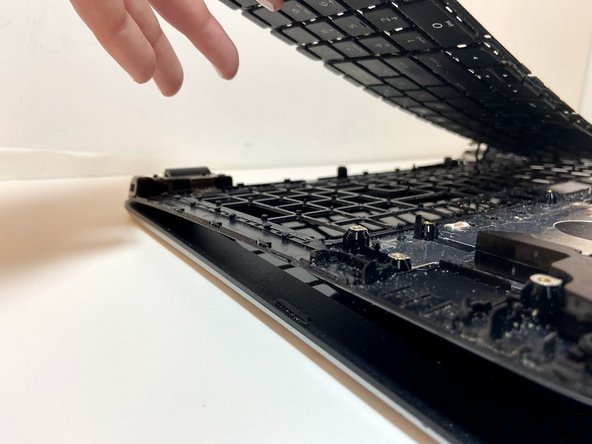
    • Carefully open the laptop and push up on one of the keys. This will allow you to grab the keyboard from the edge and remove the keyboard assembly from the device.

Conclusion

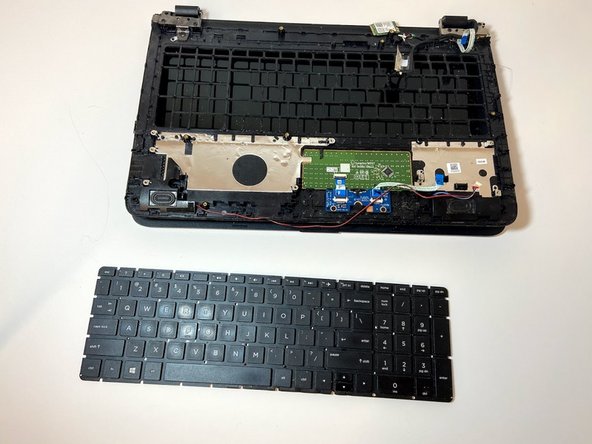
To reassemble your device, follow these instructions in reverse order.

Bradley Evans

Membre depuis le 01/24/20

613 Réputation

5 tutoriels rédigés

Équipe

S20S3G#1 Membre de l'équipe S20S3G#1

Repair Café

4 membres

6 tutoriels rédigés

0 commentaires

Ajouter un commentaire

Nombre de vues :

Dernières 24 heures : 0

7 derniers jours : 0

30 derniers jours : 2

Total : 271