Aller au contenu principal

HP 15-ba0709dx Speakers Replacement

Ce dont vous avez besoin

  1. HP 15-ba0709dx Speakers Replacement, Battery: étape 1, image 1 de 1
    • Flip the device over and locate the battery compartment.

    • Slide the battery release latch on the left and right side until the battery is detached from its slot.

    • A noticeable pop will be heard when the battery is fully released.

  2. HP 15-ba0709dx Speakers Replacement: étape 2, image 1 de 1
    • Pull the battery out of its slot.

    • Be careful not to damage any of the connectors in the process.

  3. HP 15-ba0709dx Speakers Replacement, Back Cover: étape 3, image 1 de 1
    • Place the laptop on a clean, flat surface with the bottom side facing up.

  4. HP 15-ba0709dx Speakers Replacement: étape 4, image 1 de 1
    • Using a Phillips Head Screwdriver, remove the screws anchoring the bottom casing.

    • Note: Make sure to keep track of the screws once they have been removed.

  5. HP 15-ba0709dx Speakers Replacement: étape 5, image 1 de 1
    • Locate the screws about 1 inch from the battery release tabs and use a Phillips Head Screwdriver to remove these screws.

    • Note:Place these newly removed screws with the ones removed in Step 2.

  6. HP 15-ba0709dx Speakers Replacement: étape 6, image 1 de 2 HP 15-ba0709dx Speakers Replacement: étape 6, image 2 de 2
    • Locate the rubber friction pads on the top corners of the laptop. Pry the pads from the laptop and place them off to the side

    • Removing the friction pads will reveal two more anchoring screws.

    • Note: The adhesive keeping the pads on the laptop will weaken once doing this, but it is necessary to removing the bottom cover of the laptop.

  7. HP 15-ba0709dx Speakers Replacement: étape 7, image 1 de 1
    • Remove disc reader.

    • Note: If all screws are removed it should slide out easily.

  8. HP 15-ba0709dx Speakers Replacement: étape 8, image 1 de 2 HP 15-ba0709dx Speakers Replacement: étape 8, image 2 de 2
    • Use a plastic prod to pry the back cover off the laptop.

    • Be careful not to damage the laptop while prying.

  9. HP 15-ba0709dx Speakers Replacement, Speakers: étape 9, image 1 de 2 HP 15-ba0709dx Speakers Replacement, Speakers: étape 9, image 2 de 2
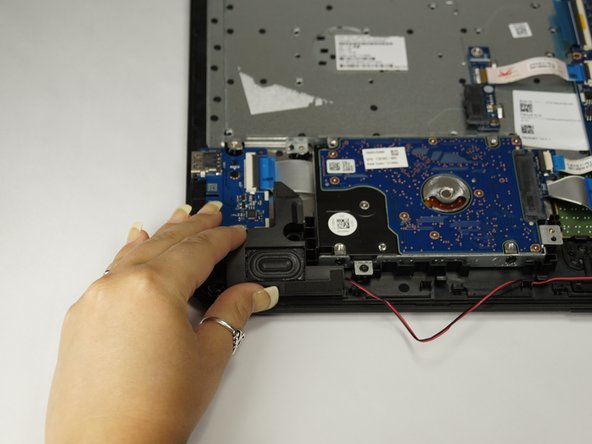
    • Locate the speakers on the right and left on the bottom on the back of the device.

  10. HP 15-ba0709dx Speakers Replacement: étape 10, image 1 de 1
    • Pull up on the left speaker to pop it off.

    • Do the same on the right speaker to pop it off.

  11. HP 15-ba0709dx Speakers Replacement: étape 11, image 1 de 2 HP 15-ba0709dx Speakers Replacement: étape 11, image 2 de 2
    • Pull out the speaker outlet.

    • Caution: Be careful not to damage cords while doing so.

Conclusion

To reassemble your device, follow these instructions in reverse order.

Reece Marr

Membre depuis le 03/20/17

369 Réputation

3 tutoriels rédigés

Équipe

Texas Tech, Team S13-G3, Bennett Spring 2017 Membre de l'équipe Texas Tech, Team S13-G3, Bennett Spring 2017

TTU-BENNETT-S17S13G3

5 membres

5 tutoriels rédigés

0 commentaires

Ajouter un commentaire

Nombre de vues :

Dernières 24 heures : 0

7 derniers jours : 0

30 derniers jours : 1

Total : 317