Aller au contenu principal

HP Chromebook 11 G4 LCD Replacement

Ce dont vous avez besoin

  1. HP Chromebook 11 G4 LCD Replacement, LCD: étape 1, image 1 de 3 HP Chromebook 11 G4 LCD Replacement, LCD: étape 1, image 2 de 3 HP Chromebook 11 G4 LCD Replacement, LCD: étape 1, image 3 de 3
    • Open the laptop.

    • With the plastic spudger or your fingers, gently peel off the two thin adhesive layers at the left and right bottom edges of the screen.

    • Do not pry up the plastic bezel (monitor frame), just the adhesive layer.

    • If the adhesive layer isn't coming off, use a metal spudger.

  2. HP Chromebook 11 G4 LCD Replacement: étape 2, image 1 de 2 HP Chromebook 11 G4 LCD Replacement: étape 2, image 2 de 2
    • Remove the two 3 mm Phillips #00 screws located underneath the adhesive layers that were removed in the previous step

  3. HP Chromebook 11 G4 LCD Replacement: étape 3, image 1 de 3 HP Chromebook 11 G4 LCD Replacement: étape 3, image 2 de 3 HP Chromebook 11 G4 LCD Replacement: étape 3, image 3 de 3
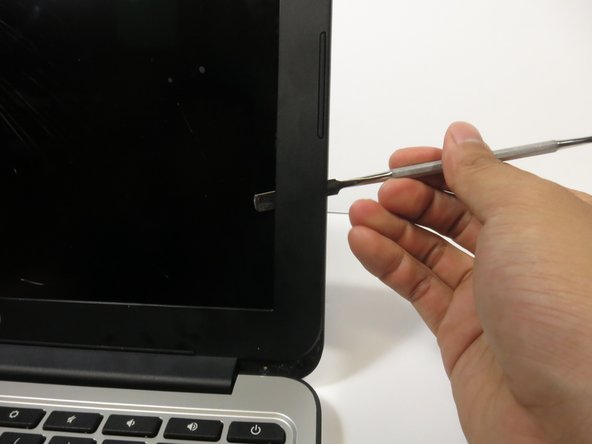
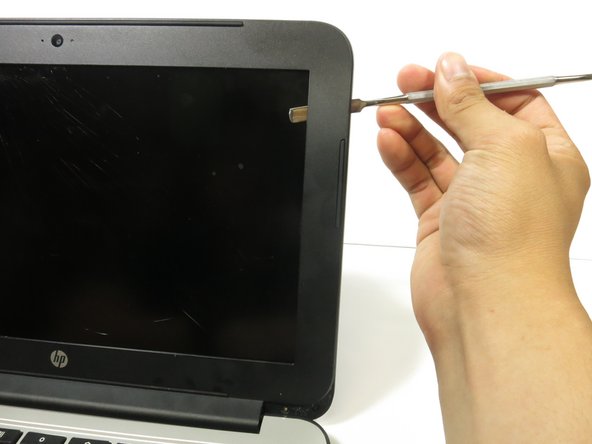
    • Gently pry up the plastic bezel with the small, narrow end of the metal spudger.

    • Insert the long, flat end of the metal spudger into the gap.

    • Slide the metal spudger along the edge to disconnect the bezel from the laptop

    • You should hear popping sounds as you slide the spudger along the edge.

    • If the spudger gets stuck while sliding, it's okay to use more force.

  4. HP Chromebook 11 G4 LCD Replacement: étape 4, image 1 de 2 HP Chromebook 11 G4 LCD Replacement: étape 4, image 2 de 2
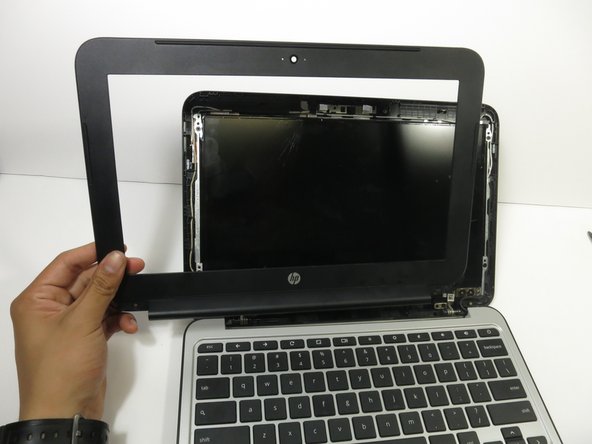
    • Tilt the laptop screen as far back as possible

    • Hold the bezel with both hands, then pull the bezel towards you to disconnect the bottom edge of the bezel from the laptop.

    • You may have to use extra force for this step

  5. HP Chromebook 11 G4 LCD Replacement: étape 5, image 1 de 3 HP Chromebook 11 G4 LCD Replacement: étape 5, image 2 de 3 HP Chromebook 11 G4 LCD Replacement: étape 5, image 3 de 3
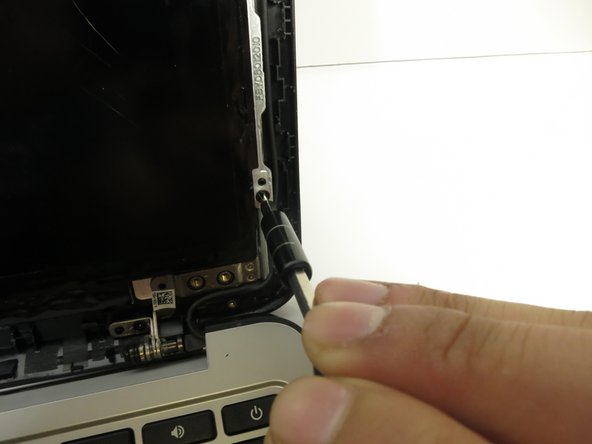
    • Remove the four silver 4 mm Phillips #0 screws at the bottom of the LCD.

    • Remove the four black 3 mm Phillips #00 screws along the perimeter of the LCD.

  6. HP Chromebook 11 G4 LCD Replacement: étape 6, image 1 de 2 HP Chromebook 11 G4 LCD Replacement: étape 6, image 2 de 2
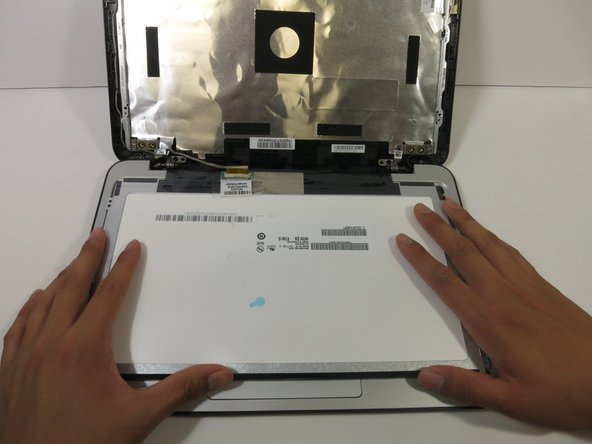
    • Lift the LCD off its mount and gently lay it facedown on the keyboard.

  7. HP Chromebook 11 G4 LCD Replacement: étape 7, image 1 de 3 HP Chromebook 11 G4 LCD Replacement: étape 7, image 2 de 3 HP Chromebook 11 G4 LCD Replacement: étape 7, image 3 de 3
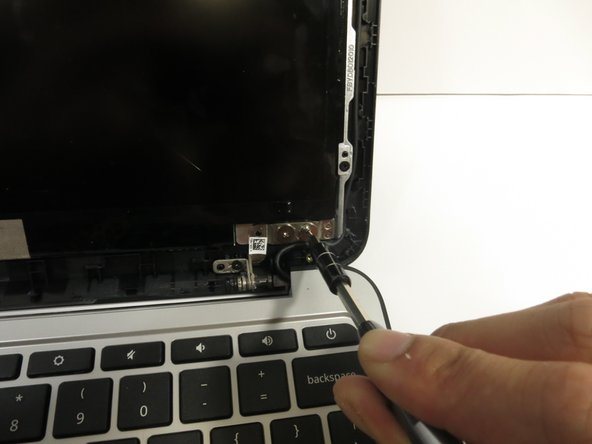
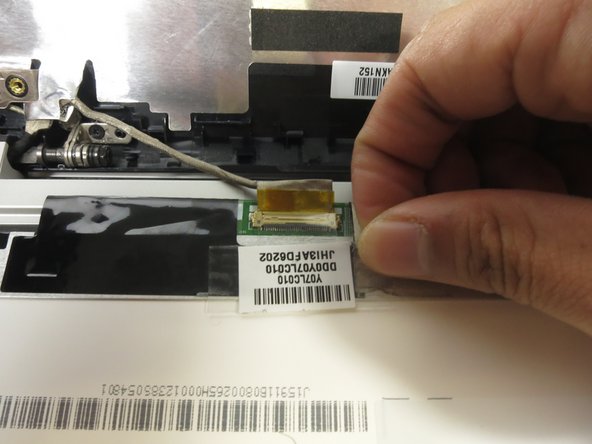
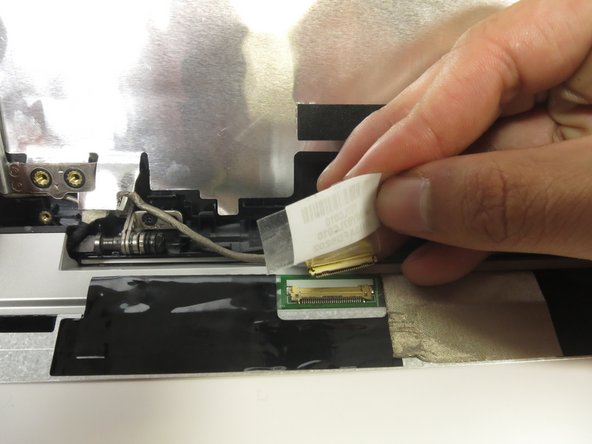
    • Peel off the clear sticker covering the display cable at the base of the LCD.

    • Gently pull the display cable from the connector.

Conclusion

To reassemble your device, follow these instructions in reverse order.

13 autres ont terminé cette réparation.

Jonah Silva

Membre depuis le 04/26/17

785 Réputation

1 tutoriel rédigé

Équipe

Cal Poly, Team S23-G5, Livingston Spring 2017 Membre de l'équipe Cal Poly, Team S23-G5, Livingston Spring 2017

CPSU-LIVINGSTON-S17S23G5

3 membres

6 tutoriels rédigés

3 commentaires

Thanks for the great guidance. Easy as pie!

lcowsert - Réponse

i need to replace the top cover of this Laptop HP Chromebook 11-2201NA Can you help

grahamcoles - Réponse

I did it! Thank you for terrific instructions.

Krenee - Réponse

Ajouter un commentaire

Nombre de vues :

Dernières 24 heures : 1

7 derniers jours : 13

30 derniers jours : 38

Total : 7,604