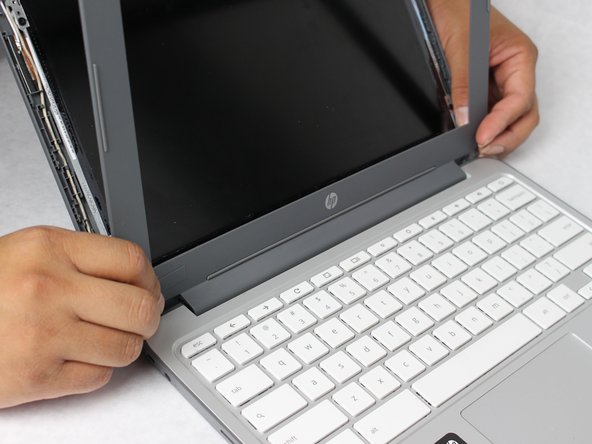
Aller au contenu principal

HP Chromebook 11-2210nr LCD Screen Replacement

Ce dont vous avez besoin

  1. HP Chromebook 11-2210nr LCD Screen Replacement, LCD Screen: étape 1, image 1 de 1
    Outil utilisé dans cette étape :
    Tweezers
    $4.99
    J'achète
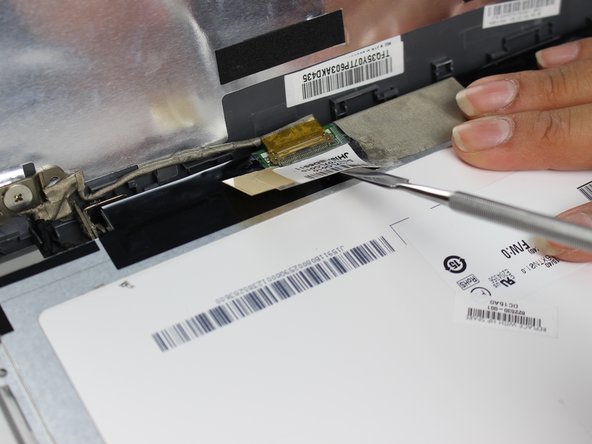
    • Remove adhesive tabs using fine point tweezers or a metal spudger.

    • These adhesives are typically located at the bottom left and right corners of the screen.

  2. HP Chromebook 11-2210nr LCD Screen Replacement: étape 2, image 1 de 1
    • Remove the one 3 mm screw located underneath both adhesive layers using a Phillips #0 screwdriver.

  3. HP Chromebook 11-2210nr LCD Screen Replacement: étape 3, image 1 de 2 HP Chromebook 11-2210nr LCD Screen Replacement: étape 3, image 2 de 2
    • Using a metal spudger, gently pry the front plastic frame (or bezel) off of the device by inserting the tool along the inside edge of the bezel.

    • Completely open the screen as far as possible to remove the bottom edge of the bezel from the laptop.

    • Be sure to disconnect the bezel from all the way around the screen before completely removing.

  4. HP Chromebook 11-2210nr LCD Screen Replacement: étape 4, image 1 de 2 HP Chromebook 11-2210nr LCD Screen Replacement: étape 4, image 2 de 2
    • Remove the four black 3 mm screws along the left and right sides of the LCD screen using a Phillips #0 screwdriver.

  5. HP Chromebook 11-2210nr LCD Screen Replacement: étape 5, image 1 de 1
    • After removing all screws, gently lower the LCD screen onto the keyboard.

    • The LCD screen will not be completely disconnected from the laptop just yet.

  6. HP Chromebook 11-2210nr LCD Screen Replacement: étape 6, image 1 de 2 HP Chromebook 11-2210nr LCD Screen Replacement: étape 6, image 2 de 2
    • Gently use the spudger to pry off the tape on top of the gold chip. You may also use your hands to gently remove the tape.

  7. HP Chromebook 11-2210nr LCD Screen Replacement: étape 7, image 1 de 2 HP Chromebook 11-2210nr LCD Screen Replacement: étape 7, image 2 de 2
    • Remove the display cable by gently sliding out the cable away from the LCD screen.

    • This action disconnects the LCD screen from the rest of the device, allowing it to be completely removed.

Conclusion

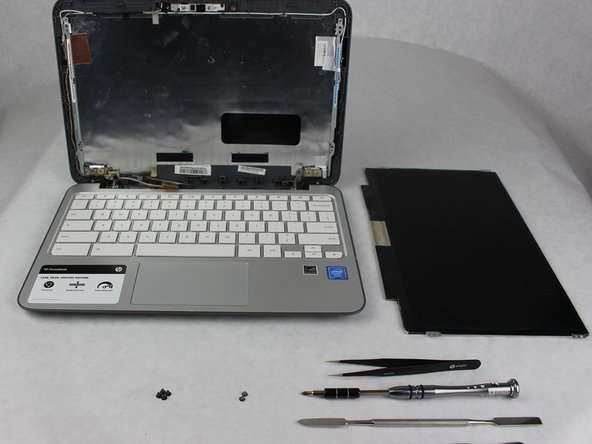
To reassemble your device, follow these instructions in reverse order.

Une autre personne a terminé cette réparation.

Kimberly Rodriguez

Membre depuis le 10/02/18

425 Réputation

2 tutoriels rédigés

Équipe

Sam Houston State, Team S11-G3, Blackburne Fall 2018 Membre de l'équipe Sam Houston State, Team S11-G3, Blackburne Fall 2018

SHSU-BLACKBURNE-F18S11G3

4 membres

5 tutoriels rédigés

0 commentaires

Ajouter un commentaire

Nombre de vues :

Dernières 24 heures : 2

7 derniers jours : 3

30 derniers jours : 8

Total : 334