Aller au contenu principal

HP Chromebook 14-Q010DX Motherboard Replacement

Ce dont vous avez besoin

  1. HP Chromebook 14-Q010DX Motherboard Replacement, Keyboard and Touchpad: étape 1, image 1 de 2 HP Chromebook 14-Q010DX Motherboard Replacement, Keyboard and Touchpad: étape 1, image 2 de 2
    • Flip the laptop with the base of the laptop is facing you.

    • Using the #00 screwdriver, unscrew these screws.

    • Using the #00 screwdriver, unscrew these screws.

  2. HP Chromebook 14-Q010DX Motherboard Replacement: étape 2, image 1 de 3 HP Chromebook 14-Q010DX Motherboard Replacement: étape 2, image 2 de 3 HP Chromebook 14-Q010DX Motherboard Replacement: étape 2, image 3 de 3
    • Start from the top right corner of the laptop and work clockwise with an iFixit opening tool or spudger to pry the keyboard from the frame of the laptop.

    • When prying open a laptop it could require some force, but it also has fragile connectors underneath. Use caution so as to avoid breaking these connectors.

  3. HP Chromebook 14-Q010DX Motherboard Replacement: étape 3, image 1 de 3 HP Chromebook 14-Q010DX Motherboard Replacement: étape 3, image 2 de 3 HP Chromebook 14-Q010DX Motherboard Replacement: étape 3, image 3 de 3
    • Gently pull the keyboard in the opposite direction of the screen, so the wires beneath are exposed.

    • Lift the black flap and pull the blue ribbon gently towards you until it is disconnected.

    • Lift the white flap and pull the blue ribbon towards you until it is disconnected.

  4. HP Chromebook 14-Q010DX Motherboard Replacement: étape 4, image 1 de 1
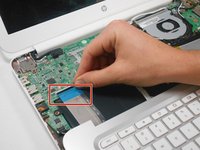
    • Lift keyboard slightly and remove the strip gently to prevent damaging any parts.

    • The tape has no function other than to keep the wire tucked away.

  5. HP Chromebook 14-Q010DX Motherboard Replacement: étape 5, image 1 de 1
    • Set aside the detached keyboard.

  6. HP Chromebook 14-Q010DX Motherboard Replacement, Speaker: étape 6, image 1 de 3 HP Chromebook 14-Q010DX Motherboard Replacement, Speaker: étape 6, image 2 de 3 HP Chromebook 14-Q010DX Motherboard Replacement, Speaker: étape 6, image 3 de 3
    • Use a #00 screwdriver to remove the two screws.

    • Using fingers or the spudger, slide out the black connector indicated on the left.

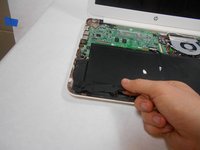
    • Undo the black tape located on the bottom from the frame of the laptop.
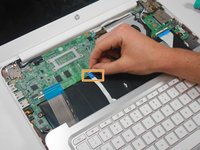
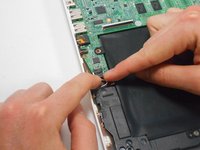
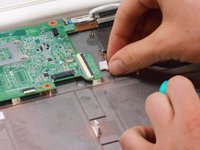
  7. HP Chromebook 14-Q010DX Motherboard Replacement: étape 7, image 1 de 2 HP Chromebook 14-Q010DX Motherboard Replacement: étape 7, image 2 de 2
    • Gently remove the speakers.

  8. HP Chromebook 14-Q010DX Motherboard Replacement, Battery: étape 8, image 1 de 2 HP Chromebook 14-Q010DX Motherboard Replacement, Battery: étape 8, image 2 de 2
    • Lift the black flaps and gently pull the strip out.

    • Set the strip aside.
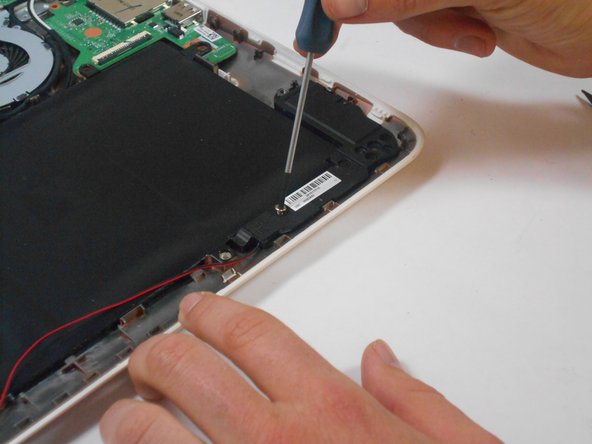
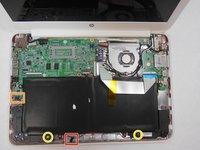
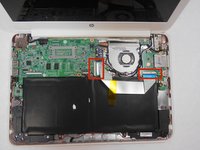
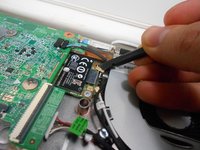
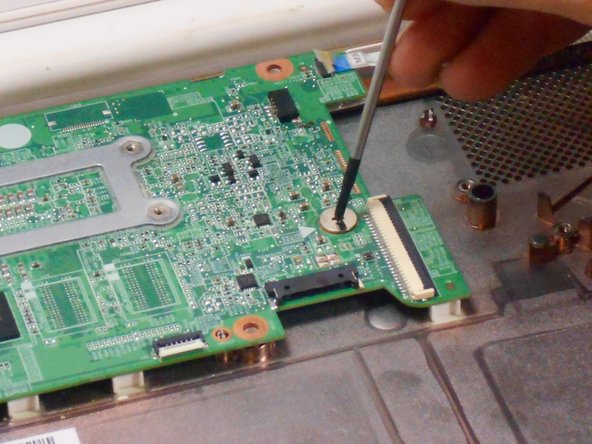
    • Note the shape that this wire strip is resting at and that the blue tip of the strip goes into the right connector for reassembly.

  9. HP Chromebook 14-Q010DX Motherboard Replacement: étape 9, image 1 de 3 HP Chromebook 14-Q010DX Motherboard Replacement: étape 9, image 2 de 3 HP Chromebook 14-Q010DX Motherboard Replacement: étape 9, image 3 de 3
    • Remove the screw.

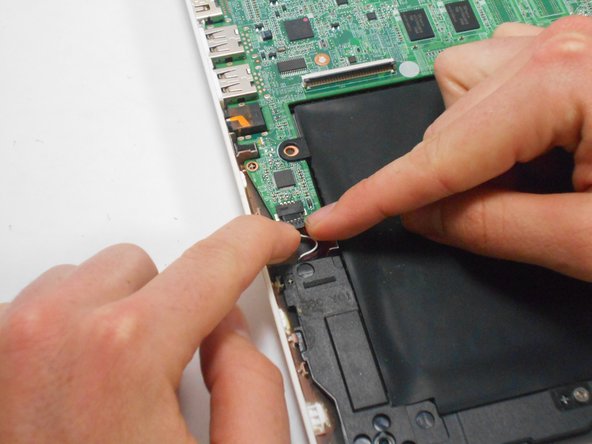
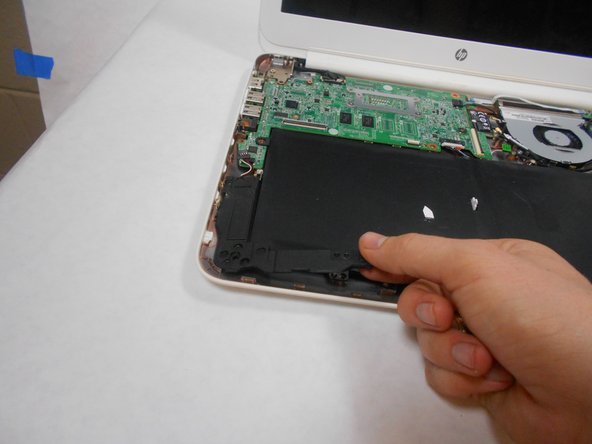
    • Use your fingers to pull the white tab out of the black slot above the battery.

  10. HP Chromebook 14-Q010DX Motherboard Replacement: étape 10, image 1 de 1
    • Gently remove battery.

  11. HP Chromebook 14-Q010DX Motherboard Replacement, Bluetooth and Wireless Card: étape 11, image 1 de 2 HP Chromebook 14-Q010DX Motherboard Replacement, Bluetooth and Wireless Card: étape 11, image 2 de 2
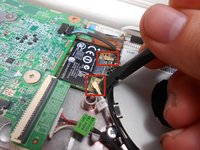
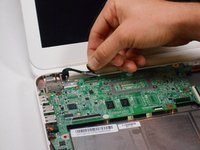
    • Using a spudger, remove the white and black cables from the card.

  12. HP Chromebook 14-Q010DX Motherboard Replacement: étape 12, image 1 de 2 HP Chromebook 14-Q010DX Motherboard Replacement: étape 12, image 2 de 2
    • Remove screw from card.

  13. HP Chromebook 14-Q010DX Motherboard Replacement: étape 13, image 1 de 1
    • Gently pull card at a 45° angle to remove it.

  14. HP Chromebook 14-Q010DX Motherboard Replacement, Fan: étape 14, image 1 de 3 HP Chromebook 14-Q010DX Motherboard Replacement, Fan: étape 14, image 2 de 3 HP Chromebook 14-Q010DX Motherboard Replacement, Fan: étape 14, image 3 de 3
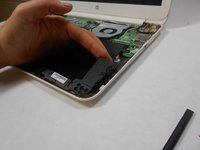
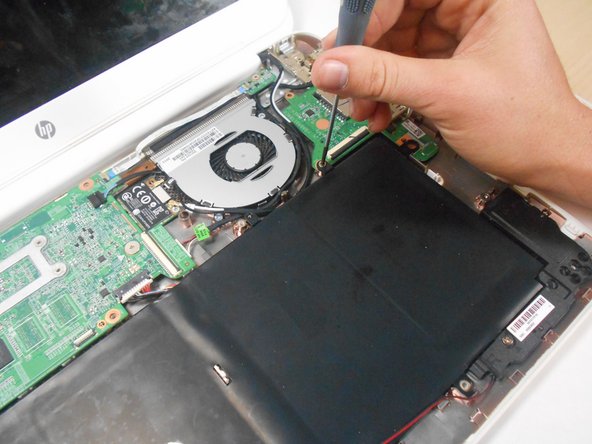
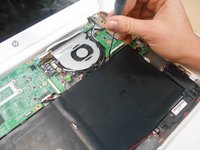
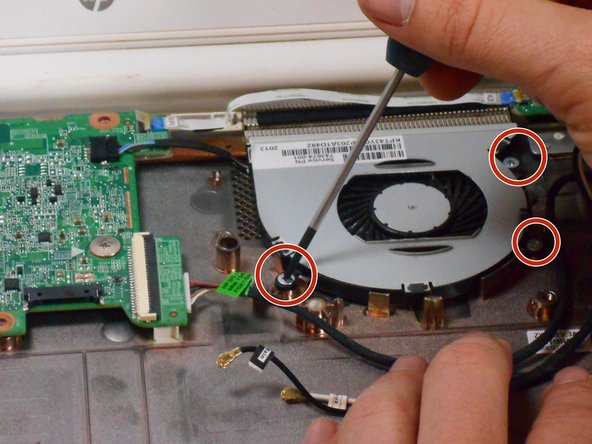
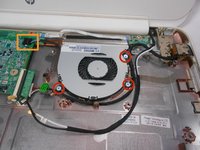
    • Remove the 3 screws around the fan.

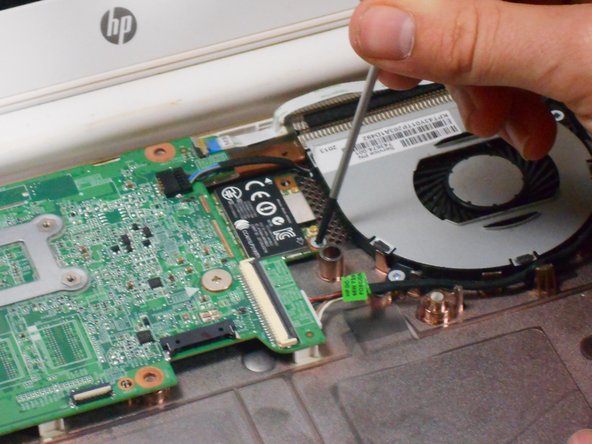
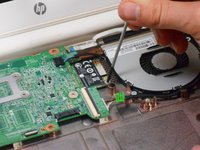
    • Using your fingers or the spudger, disconnect the cable connecting the fan to the motherboard.

  15. HP Chromebook 14-Q010DX Motherboard Replacement: étape 15, image 1 de 1
    • Gently remove fan.

  16. HP Chromebook 14-Q010DX Motherboard Replacement, Motherboard: étape 16, image 1 de 2 HP Chromebook 14-Q010DX Motherboard Replacement, Motherboard: étape 16, image 2 de 2
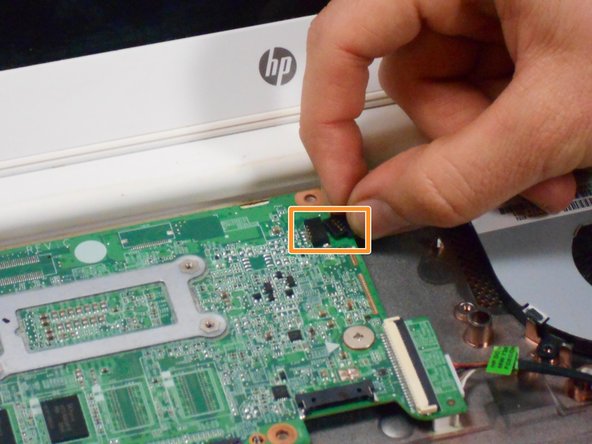
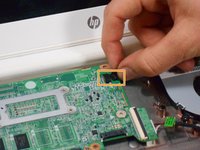
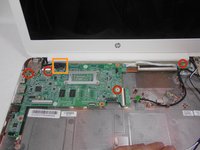
    • Using your fingers or spudger, pull out the connector.

  17. HP Chromebook 14-Q010DX Motherboard Replacement: étape 17, image 1 de 3 HP Chromebook 14-Q010DX Motherboard Replacement: étape 17, image 2 de 3 HP Chromebook 14-Q010DX Motherboard Replacement: étape 17, image 3 de 3
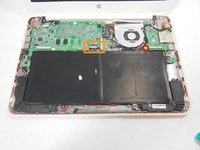
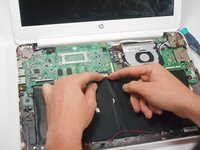
    • Remove all of the indicated screws.

    • Pull up on black strip to remove the monitor cord.

  18. HP Chromebook 14-Q010DX Motherboard Replacement: étape 18, image 1 de 1
    • Gently remove motherboard.

Conclusion

To reassemble your device, follow these instructions in reverse order.

2 autres ont terminé cette réparation.

Kevin Piper

Membre depuis le 01/16/15

1 587 Réputation

6 tutoriels rédigés

Équipe

USF Tampa, Team 17-2, Watkins Winter 2015 Membre de l'équipe USF Tampa, Team 17-2, Watkins Winter 2015

USFT-WATKINS-W15S17G2

4 membres

8 tutoriels rédigés

4 commentaires

Can someone just explain for what the sensor board is needed?

martindoerflinger - Réponse

Let's the motherboard know when the lid is closed.

Jeff Briedwell -

Hi! How do you start a chrome book from motherboard? Since I am doing a project I need help with that question.... Please send a mail with the explanation on my mail: steffe010929@gmail.con

Stefan - Réponse

hope some one is still maintaining this site, i would like to know if i would be able to use a motherboard from another HP chromebook in the same product line for example if i have a motherboard from the 14-q010dx can i swap it with the motherboard from the 14-q010nr? thevet82@gmail.com

david saldivias - Réponse

Ajouter un commentaire

Nombre de vues :

Dernières 24 heures : 0

7 derniers jours : 3

30 derniers jours : 15

Total : 4,492