Aller au contenu principal

HP Compaq C700 Fan Replacement

Ce dont vous avez besoin

  1. HP Compaq C700 Fan Replacement, Keyboard: étape 1, image 1 de 1
    • It is advised to work on the device only when it is powered off so as to avoid electrocution risks.

    • Turn off computer by pressing and holding the power button.

  2. HP Compaq C700 Fan Replacement: étape 2, image 1 de 3 HP Compaq C700 Fan Replacement: étape 2, image 2 de 3 HP Compaq C700 Fan Replacement: étape 2, image 3 de 3
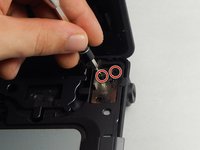
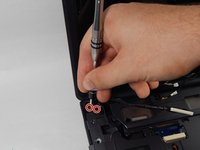
    • Locate and unscrew the two screws on the back marked with a small keyboard. These screws hold the keyboard in place.

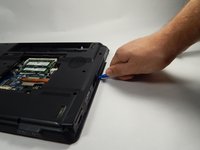
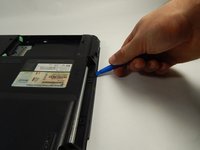
    • Locate the metal hooks where the keyboard connects to the laptop and use a metal spudger to gently pry up the keyboard.

  3. HP Compaq C700 Fan Replacement: étape 3, image 1 de 1
    • Gently lift up and remove the keyboard.

  4. HP Compaq C700 Fan Replacement, Fan: étape 4, image 1 de 1
    • Turn the laptop over so that you see the bottom.

    • Locate the twenty 3 mm Phillips head screws.

    • Unscrew them using the PH0 screwdriver

  5. HP Compaq C700 Fan Replacement: étape 5, image 1 de 1
    • After unscrewing the 3 mm screws, remove the hard drive covering by lifting upward.

  6. HP Compaq C700 Fan Replacement: étape 6, image 1 de 1
    • Remove the hard drive by pulling on the plastic tab and lifting upward.

  7. HP Compaq C700 Fan Replacement: étape 7, image 1 de 1
    • Remove the covering that houses the RAM modules.

  8. HP Compaq C700 Fan Replacement: étape 8, image 1 de 1
    • Locate and unscrew the two Phillips head 3 mm screws on the wireless card.

  9. HP Compaq C700 Fan Replacement: étape 9, image 1 de 1
    • Unhook the two wires connecting to the wireless card by gently pulling them out.

  10. HP Compaq C700 Fan Replacement: étape 10, image 1 de 1
    • Gently lift and pull out the card.

  11. HP Compaq C700 Fan Replacement: étape 11, image 1 de 1
    • Locate the power button connector wire. (This can be found where the keyboard sits.)

    • Using the tweezers, unhook the wire.

  12. HP Compaq C700 Fan Replacement: étape 12, image 1 de 2 HP Compaq C700 Fan Replacement: étape 12, image 2 de 2
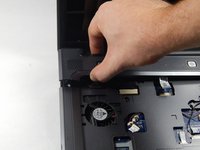
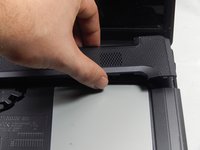
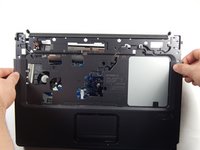
    • Press and hold the lock to pop the panel piece above the keyboard and pull up to remove it.

  13. HP Compaq C700 Fan Replacement: étape 13, image 1 de 2 HP Compaq C700 Fan Replacement: étape 13, image 2 de 2
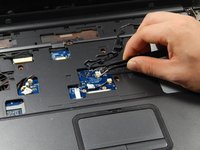
    • Unplug the remaining wires using the tweezers.

  14. HP Compaq C700 Fan Replacement: étape 14, image 1 de 1
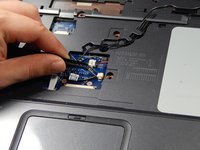
    • Gently pull out the three wires.

  15. HP Compaq C700 Fan Replacement: étape 15, image 1 de 2 HP Compaq C700 Fan Replacement: étape 15, image 2 de 2
    • Locate the four 3 mm Phillips head screws.

    • Unscrew them using the PH0 screwdriver.

  16. HP Compaq C700 Fan Replacement: étape 16, image 1 de 1
    • Unhook the display connector wire.

  17. HP Compaq C700 Fan Replacement: étape 17, image 1 de 1
    • Gently disconnect the display by pulling it upwards.

  18. HP Compaq C700 Fan Replacement: étape 18, image 1 de 1
    • Locate the disk drive on the side of the device.

    • Remove it by pulling it all the way out.

  19. HP Compaq C700 Fan Replacement: étape 19, image 1 de 1
    • Use the PH0 screwdriver to remove the two 3 mm Phillips head screws in the disk drive port.

  20. HP Compaq C700 Fan Replacement: étape 20, image 1 de 1
    • Locate and unplug the touchpad connection using the tweezers.

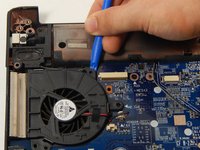
  21. HP Compaq C700 Fan Replacement: étape 21, image 1 de 3 HP Compaq C700 Fan Replacement: étape 21, image 2 de 3 HP Compaq C700 Fan Replacement: étape 21, image 3 de 3
    • Using the Opening tool, gently pry up the cover and remove it.

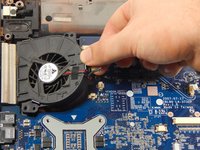
  22. HP Compaq C700 Fan Replacement: étape 22, image 1 de 1
    • Unplug the fan wire connection using the tweezers.

  23. HP Compaq C700 Fan Replacement: étape 23, image 1 de 1
    • Locate the 3 mm Phillips head screw.

    • Unscrew it using the PH0 screwdriver.

  24. HP Compaq C700 Fan Replacement: étape 24, image 1 de 2 HP Compaq C700 Fan Replacement: étape 24, image 2 de 2
    • Using the opening tool, gently pry up and remove the fan.

Conclusion

To reassemble your device, follow these instructions in reverse order.

Une autre personne a terminé cette réparation.

Taylor Johansen

Membre depuis le 10/20/16

690 Réputation

5 tutoriels rédigés

Équipe

UMass Dartmouth, Team 5-6, Martin Fall 2016 Membre de l'équipe UMass Dartmouth, Team 5-6, Martin Fall 2016

UMASSD-MARTIN-F16S5G6

3 membres

6 tutoriels rédigés

0 commentaires

Ajouter un commentaire

Nombre de vues :

Dernières 24 heures : 2

7 derniers jours : 9

30 derniers jours : 13

Total : 1,273