Introduction
Comment démonter l'imprimante HP Deskjet 930c pour atteindre et nettoyer le réservoir et le tampon d'encre usagée.
Ce dont vous avez besoin
-
-
Soulevez délicatement le couvercle de la carte des boutons avec un tournevis à tête plate.
-
Débranchez et retirez la carte des boutons.
-
Retirez les deux vis qui maintiennent la pièce supérieure de l'imprimante en place avec un tournevis de sécurité TR8 Torx.
-
-
-
-
Avec le moteur débranché, déplacez le support de la cartouche d'encre vers le milieu de l'imprimante.
-
Retirez les quatre vis du panneau arrière
I had to unscrew the little red screw that holds the back panel in the black plastic base. It is shown in picture two in this step beneath the silver tongue.
-
-
-
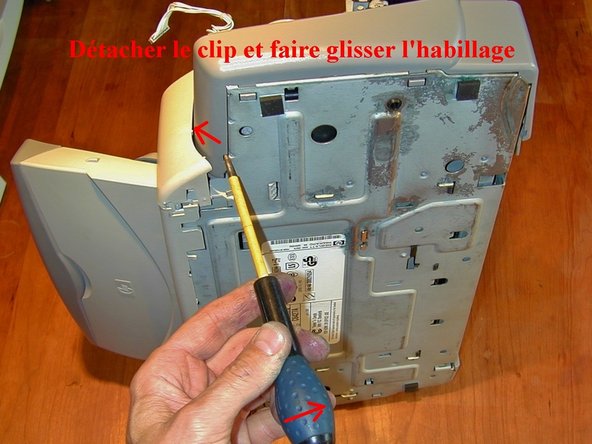
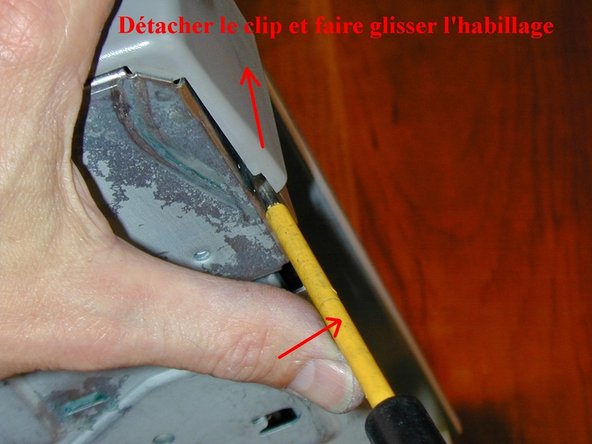
Appuyez sur le clip marqué en rouge.
-
Faites-le glisser vers la droite.
-
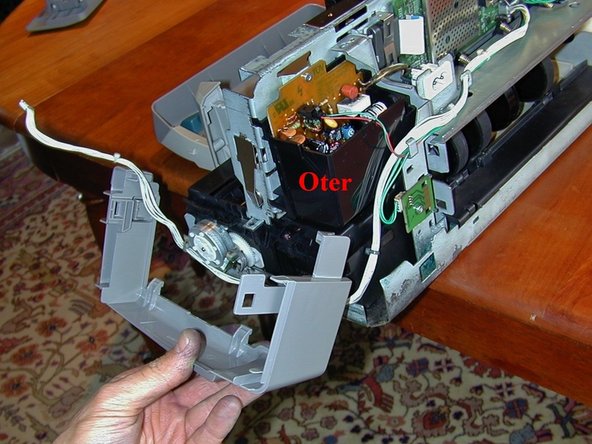
Soulevez et retirez ce côté.
It was helpful to disassemble the main power connector to move the back panel. It is shown in picture two in this step beneath your wrist. The cable between the connector and the electronic in the box on the right side was to short to move the panel.
On my 990Cse I had to remove a pink screw from the top of the power board to do this step.
-
-
-
Appuyez à l'endroit indiqué par la flèche et soulevez le réservoir d'encre usagée.
-
Retirez le moteur et nettoyez-le avec de l'eau à haute pression.
Impossible to remove the waste ink reservoir (step 9). There is absolutely NO play (blocked by the grey metal bracket - above left corner of red rectangle). I ended up removing plastic “sponge” (with difficulty) from reservoir to clean it and then thoroughly washing the reservoir mechanism itself ‘in-situ’ and letting it dry upside down for a couple of days.
Using the instructions I have managed to remove and clean the waste ink reservoir but would like to add some additional necessary steps. 1) At Step 7 there are two screws on the back panel the other two are holding the carriage bar down.
2) Unplug the power unit, remove retaining screw for it and the one for the power plug socket then lift unit clear.
3) Lift the back panel and place a suitable item to keep it raised and out of the way. The reservoir with a bit of a wiggle can now be removed.
4) Water is totally ineffective for cleaning. The pad can be emptied by compression between absorbent material. I found the best cleaning agent for the consequent mess was Brake Cleaner which had no detrimental effect on any of the casing plastics.
-


Pour remonter votre appareil, suivez ces instructions dans l'ordre inverse.
Pour remonter votre appareil, suivez ces instructions dans l'ordre inverse.
Annulation : je n'ai pas terminé ce tutoriel.
14 autres ont terminé cette réparation.
Merci à ces traducteurs :
100%
[deleted] nous aide à réparer le monde ! Vous voulez contribuer ?
Commencez à traduire ›
9 commentaires
Thanks so much, I was able to fix my bad paper feed jam on my Deskjet 952C using your disassembly instructions. Apparently you can take apart the 930C 932C 950C and 952C using similar methods.
I have no idea. I don’t have a HP deskjet 9300 printer.
Many thanks for your instruction, Bernard. I was able to clean my DeskJet 970 cxi, because the waste ink leaked off the reservoir, as I transported the printer upside down :-( I’ve only got two additions, that I commented within the steps.
This also works on the 990Cse Professional, with only minor tweaks, which I’ve added in comments. I suspect all the 900-series deskjets (at least those that use the 45 and 78 cartridges) are pretty similar.
after assembled don’t recognize toner. Help
Hello, can anyone show me how to locate and remove the duplexer from a HP Deskjet 952c?
Can’t find it
Thanks
Many thanks for your HP930c instructions. I would not have been able to clean the waste ink without your help.//