Aller au contenu principal

HP Deskjet F4480 Lid Panel Removal

Ce dont vous avez besoin

  1. HP Deskjet F4480 Lid Panel Removal, Remove Back Panel of Lid: étape 1, image 1 de 1
    • Remove one 9mm T10 Torx screw from the back of the printer lid.

  2. HP Deskjet F4480 Lid Panel Removal: étape 2, image 1 de 2 HP Deskjet F4480 Lid Panel Removal: étape 2, image 2 de 2
    • Press outward on the plastic tab holding the back panel in place.

  3. HP Deskjet F4480 Lid Panel Removal: étape 3, image 1 de 2 HP Deskjet F4480 Lid Panel Removal: étape 3, image 2 de 2
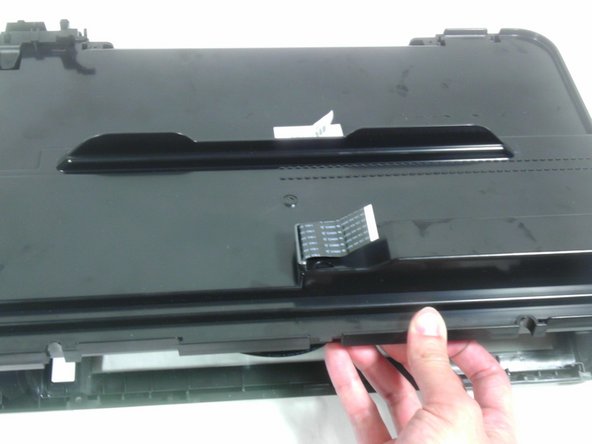
    • Pull the back panel towards you and lift it away from the rest of the printer cover.

    • Some ribbon cables may still be inserted through the back panel. Be careful not to damage these and they should slide out easily.

Conclusion

To reassemble your device, follow these instructions in reverse order.

3 autres ont terminé cette réparation.

Tim

Membre depuis le 01/15/13

184 Réputation

4 tutoriels rédigés

Équipe

Cal Poly, Team 18-35, Regan Winter 2013 Membre de l'équipe Cal Poly, Team 18-35, Regan Winter 2013

CPSU-REGAN-W13S18G35

5 membres

15 tutoriels rédigés

0 commentaires

Ajouter un commentaire

Nombre de vues :

Dernières 24 heures : 0

7 derniers jours : 0

30 derniers jours : 6

Total : 2,481