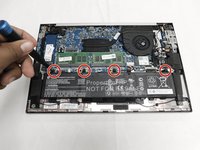
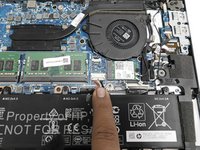
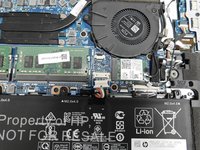
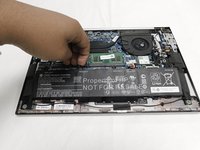
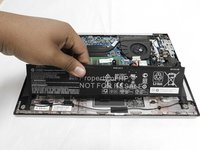
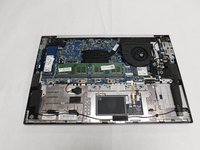
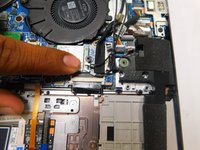
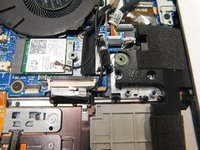
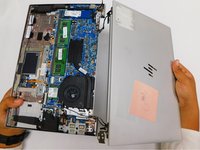
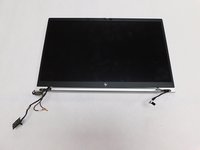
Aller au contenu principal

HP EliteBook 840 G7 Display Assembly Replacement

Ce dont vous avez besoin

  1. HP EliteBook 840 G7 Display Assembly  Replacement, Battery: étape 1, image 1 de 1
    • Turn the laptop on its back.

  2. HP EliteBook 840 G7 Display Assembly  Replacement: étape 2, image 1 de 1
    • Use the Phillips # 1 screwdriver to remove the five 1.2 mm screws from the back cover of the laptop.

  3. HP EliteBook 840 G7 Display Assembly  Replacement: étape 3, image 1 de 1
    • Remove the back cover to expose the hardware.

  4. HP EliteBook 840 G7 Display Assembly  Replacement: étape 4, image 1 de 3 HP EliteBook 840 G7 Display Assembly  Replacement: étape 4, image 2 de 3 HP EliteBook 840 G7 Display Assembly  Replacement: étape 4, image 3 de 3
    • Use your Phillips #1 screwdriver and remove the four 1.2 mm screws that secures the battery into place.

    • Remove the connector that connects the battery to the motherboard.

  5. HP EliteBook 840 G7 Display Assembly  Replacement: étape 5, image 1 de 3 HP EliteBook 840 G7 Display Assembly  Replacement: étape 5, image 2 de 3 HP EliteBook 840 G7 Display Assembly  Replacement: étape 5, image 3 de 3
    • Lift up the battery with you hands or tools.

  6. HP EliteBook 840 G7 Display Assembly  Replacement, Display Assembly: étape 6, image 1 de 2 HP EliteBook 840 G7 Display Assembly  Replacement, Display Assembly: étape 6, image 2 de 2
    • Pull up to remove the two coaxial Wi-Fi card connectors.

  7. HP EliteBook 840 G7 Display Assembly  Replacement: étape 7, image 1 de 2 HP EliteBook 840 G7 Display Assembly  Replacement: étape 7, image 2 de 2
    • Pull upwards on the display connector to remove.

  8. HP EliteBook 840 G7 Display Assembly  Replacement: étape 8, image 1 de 2 HP EliteBook 840 G7 Display Assembly  Replacement: étape 8, image 2 de 2
    • Pull or push to remove the bundled cable connector.

  9. HP EliteBook 840 G7 Display Assembly  Replacement: étape 9, image 1 de 2 HP EliteBook 840 G7 Display Assembly  Replacement: étape 9, image 2 de 2
    • Pull upwards to remove the webcam connector.

  10. HP EliteBook 840 G7 Display Assembly  Replacement: étape 10, image 1 de 1
    • Once you've disconnected all cables from their sockets, gently move them to the top of the laptop.

  11. HP EliteBook 840 G7 Display Assembly  Replacement: étape 11, image 1 de 2 HP EliteBook 840 G7 Display Assembly  Replacement: étape 11, image 2 de 2
    • Use your Phillips # 1 screwdriver to remove the four 1.2 mm screws.

  12. HP EliteBook 840 G7 Display Assembly  Replacement: étape 12, image 1 de 2 HP EliteBook 840 G7 Display Assembly  Replacement: étape 12, image 2 de 2
    • Use your Phillips # 1 screwdriver to remove the two 1.2mm screws.

  13. HP EliteBook 840 G7 Display Assembly  Replacement: étape 13, image 1 de 3 HP EliteBook 840 G7 Display Assembly  Replacement: étape 13, image 2 de 3 HP EliteBook 840 G7 Display Assembly  Replacement: étape 13, image 3 de 3
    • Open the laptop to a 90 degree angle.

    • Slide the display hinges away to remove the display assembly.

Ligne d'arrivée

Une autre personne a terminé cette réparation.

Pedro Ramos Espinoza

Membre depuis le 02/10/22

790 Réputation

4 tutoriels rédigés

Équipe

Gateway, Team 1-1, Pee Spring 2022 Membre de l'équipe Gateway, Team 1-1, Pee Spring 2022

GCC-PEE-S22S1G1

4 membres

5 tutoriels rédigés

0 commentaires

Ajouter un commentaire

Nombre de vues :

Dernières 24 heures : 1

7 derniers jours : 21

30 derniers jours : 125

Total : 2,429