Introduction
If your drive has some cells that are corrupted or is failed to hold any data, that it must be replaced. This is a guide to replacing the solid state drive of your computer. In order to replace it, the back cover of the laptop must be removed to expose the screw which secures the solid state drive.
Please remember to power down your computer and unplug it to avoid any power surges or shorts. Failing to power down and disconnect the power cable may result in further harm to the laptop or even yourself, so precautions must be taken.
Ce dont vous avez besoin
-
Étape 1 Lower Case
Attention : les étapes 1 à 2 sont issues d'un tutoriel marqué comme en cours.
-
Use a TR8 Torx screwdriver to remove:
-
Six 5.3 mm screws
-
Four 3.3 mm screws
-
-
-
-
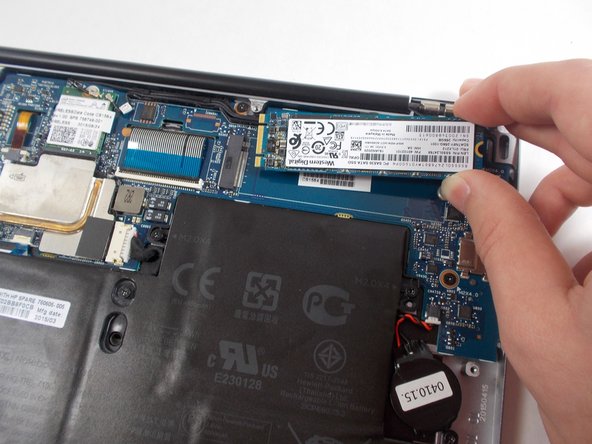
Use a Phillips #1 screwdriver to remove the single 1.8 mm screw that secures the SSD to the board.
-


To reassemble your device, follow these instructions in reverse order.
To reassemble your device, follow these instructions in reverse order.
Équipe

UMass Dartmouth, Team 7-6, Sinclaire Spring 2022 Membre de l'équipe UMass Dartmouth, Team 7-6, Sinclaire Spring 2022
UMASSD-SINCLAIRE-S22S7G6
5 membres
5 tutoriels rédigés