Aller au contenu principal
Pour réparer ensemble - Je crée un compte

HP Envy Sleekbook m6-k010dx LCD Replacement

Ce dont vous avez besoin

    1. HP Envy Sleekbook m6-k010dx LCD Replacement, Battery: étape 1, image 1 de 1
      • Remove the twelve 9 mm Phillips #00 screws.

      Demander à FixBot

      Ajouter un commentaire

    2. HP Envy Sleekbook m6-k010dx LCD Replacement: étape 2, image 1 de 2 HP Envy Sleekbook m6-k010dx LCD Replacement: étape 2, image 2 de 2
      • Use the plastic opening tool and your hands to remove the bottom cover.

      Demander à FixBot

      Ajouter un commentaire

    3. HP Envy Sleekbook m6-k010dx LCD Replacement: étape 3, image 1 de 1
      • Disconnect the battery power cable from the motherboard.

      Demander à FixBot

      Ajouter un commentaire

    4. HP Envy Sleekbook m6-k010dx LCD Replacement: étape 4, image 1 de 1
      • Remove the six 6 mm Phillips #00 screws from the battery.

      Demander à FixBot

      Ajouter un commentaire

    5. HP Envy Sleekbook m6-k010dx LCD Replacement: étape 5, image 1 de 2 HP Envy Sleekbook m6-k010dx LCD Replacement: étape 5, image 2 de 2
      • Lift the battery out of the laptop.

      Demander à FixBot

      Ajouter un commentaire

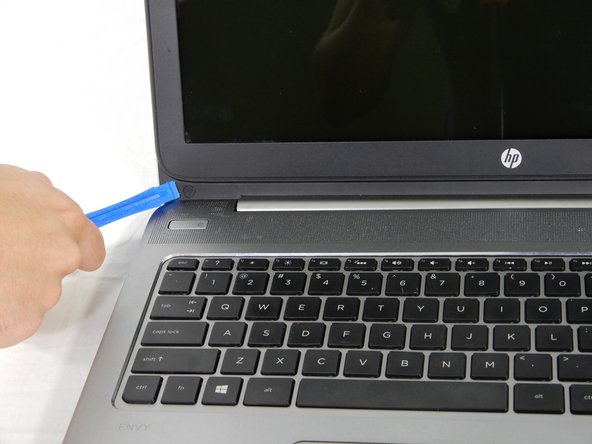
    1. HP Envy Sleekbook m6-k010dx LCD Replacement, LCD: étape 6, image 1 de 2 HP Envy Sleekbook m6-k010dx LCD Replacement, LCD: étape 6, image 2 de 2
      • Remove the stickers from the bottom left and right corner of the device with a plastic opening tool.

      Demander à FixBot

      Ajouter un commentaire

    2. HP Envy Sleekbook m6-k010dx LCD Replacement: étape 7, image 1 de 1
      • Remove the two 2.5mm Phillips #00 screws found underneath the previously removed stickers.

      Demander à FixBot

      Ajouter un commentaire

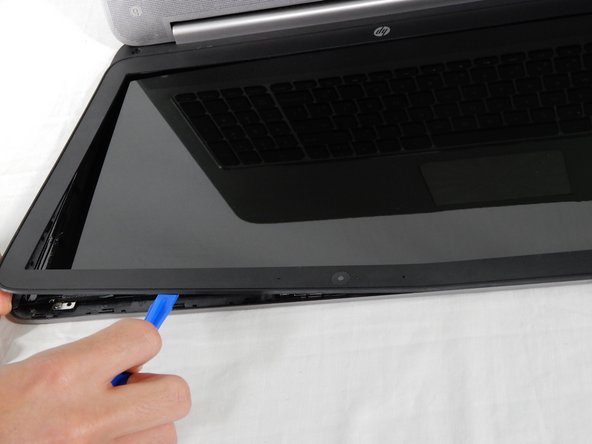
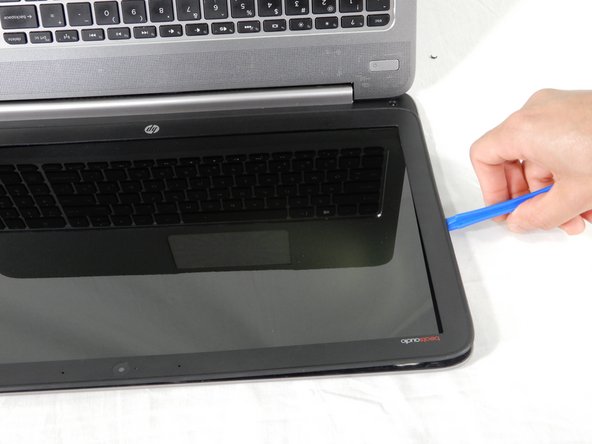
    3. HP Envy Sleekbook m6-k010dx LCD Replacement: étape 8, image 1 de 3 HP Envy Sleekbook m6-k010dx LCD Replacement: étape 8, image 2 de 3 HP Envy Sleekbook m6-k010dx LCD Replacement: étape 8, image 3 de 3
      • Use the plastic opening tool to pry the bezel free from the LCD housing.

      Demander à FixBot

      Ajouter un commentaire

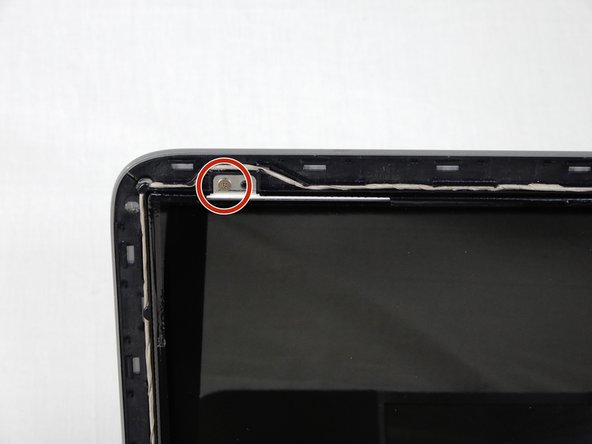
    4. HP Envy Sleekbook m6-k010dx LCD Replacement: étape 9, image 1 de 2 HP Envy Sleekbook m6-k010dx LCD Replacement: étape 9, image 2 de 2
      • Remove the four 2.5mm Phillips #00 screws located in each corner of the LCD screen.

      Demander à FixBot

      Ajouter un commentaire

    5. HP Envy Sleekbook m6-k010dx LCD Replacement: étape 10, image 1 de 2 HP Envy Sleekbook m6-k010dx LCD Replacement: étape 10, image 2 de 2
      • Use the plastic opening tool to remove the LCD screen from its housing.

      • Lay the LCD screen flat on the keyboard.

      Demander à FixBot

      Ajouter un commentaire

    6. HP Envy Sleekbook m6-k010dx LCD Replacement: étape 11, image 1 de 1
      • Disconnect the cable which connects the LCD to the motherboard.

      • Pul the LCD screen out.

      Demander à FixBot

      Ajouter un commentaire

Conclusion

To reassemble your device, follow these instructions in reverse order.

Annulation : je n'ai pas terminé ce tutoriel.

2 autres ont terminé cette réparation.

codi whittaker

Membre depuis le 02/14/18

508 Réputation

3 tutoriels rédigés

Équipe

USF Tampa, Team S1-G4, Nance Spring 2018 Membre de l'équipe USF Tampa, Team S1-G4, Nance Spring 2018

USFT-NANCE-S18S1G4

4 membres

60 tutoriels rédigés

0 commentaires de tutoriel

Ajouter un commentaire

Nombre de vues :

Dernières 24 heures : 1

7 derniers jours : 7

30 derniers jours : 33

Total : 1,309