Aller au contenu principal

HP Envy Touchsmart m6-k125dx Touch Screen Replacement

Ce dont vous avez besoin

  1. HP Envy Touchsmart m6-k125dx Touch Screen Replacement, Touch Screen: étape 1, image 1 de 1
    • Open the laptop.

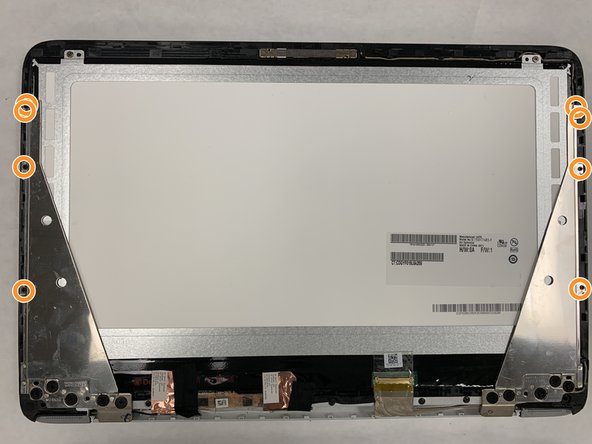
    • Remove black tabs at bottom left and right corners and remove the two M2.5x2.5 screws behind the black tabs with the J0 screwdriver.

  2. HP Envy Touchsmart m6-k125dx Touch Screen Replacement: étape 2, image 1 de 2 HP Envy Touchsmart m6-k125dx Touch Screen Replacement: étape 2, image 2 de 2
    • Insert pick between the black plastic screen panel and the silver plastic exterior case on the side of the device.

    • Slide pick around the border of the screen panel while keeping the pick between the mentioned panel and exterior case.

    • Repeat previous two steps until exterior case is removed. Pry with minimal force if necessary.

  3. HP Envy Touchsmart m6-k125dx Touch Screen Replacement: étape 3, image 1 de 3 HP Envy Touchsmart m6-k125dx Touch Screen Replacement: étape 3, image 2 de 3 HP Envy Touchsmart m6-k125dx Touch Screen Replacement: étape 3, image 3 de 3
    • Remove the front panel from the rest of the device and set it aside.

    • Remove the ten M2.5x2.5 screws with the J0 screwdriver.

    • Remove the eight M2.0x2.0 screws with the J0 screwdriver.

  4. HP Envy Touchsmart m6-k125dx Touch Screen Replacement: étape 4, image 1 de 3 HP Envy Touchsmart m6-k125dx Touch Screen Replacement: étape 4, image 2 de 3 HP Envy Touchsmart m6-k125dx Touch Screen Replacement: étape 4, image 3 de 3
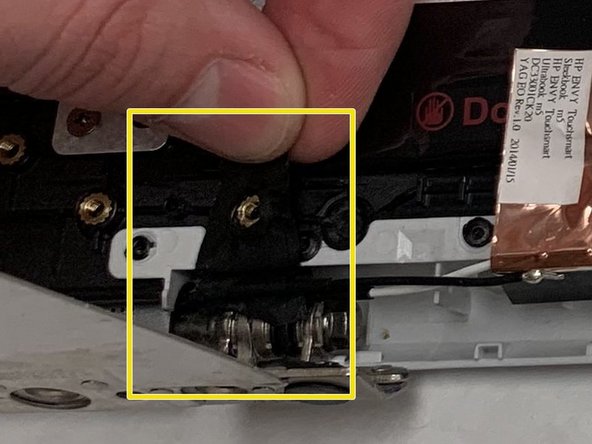
    • Flip hinges down and away from the rest of the panel.

    • Remove the four M2.5x2.5 screws with the J0 screwdriver.

    • Move 4 pieces of black tape across the bottom of the panel and any other accessory tape.

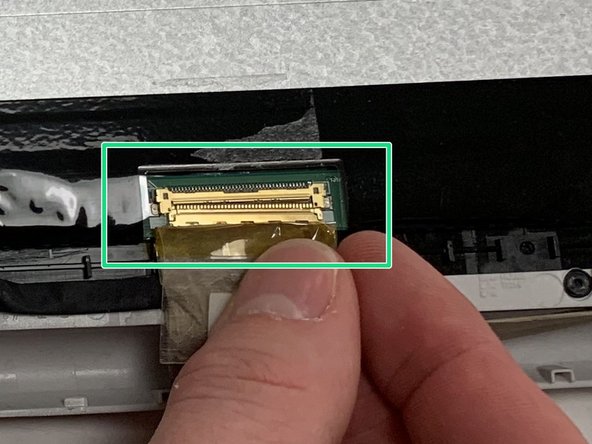
    • Disconnect the display cable connector that is located at the bottom right of the panel by pulling lightly.

  5. HP Envy Touchsmart m6-k125dx Touch Screen Replacement: étape 5, image 1 de 1
    • Slowly lift the screen away from the touch screen front panel to remove.

Conclusion

To reassemble your device, follow these instructions in reverse order.

2 autres ont terminé cette réparation.

Madison Velchek

Membre depuis le 04/06/19

151 Réputation

1 tutoriel rédigé

Équipe

IUPUI, Team S14-G14, Wilson Spring 2019 Membre de l'équipe IUPUI, Team S14-G14, Wilson Spring 2019

IUPUI-WILSON-S19S14G14

4 membres

3 tutoriels rédigés

0 commentaires

Ajouter un commentaire

Nombre de vues :

Dernières 24 heures : 0

7 derniers jours : 0

30 derniers jours : 4

Total : 851