Aller au contenu principal

HP Envy x360 m6-aq005dx Touchpad Replacement

Ce dont vous avez besoin

  1. HP Envy x360 m6-aq005dx Touchpad Replacement, Back Panel: étape 1, image 1 de 2 HP Envy x360 m6-aq005dx Touchpad Replacement, Back Panel: étape 1, image 2 de 2
    • Use the plastic opening tool to remove the gray rubber pads on the bottom of the laptop. For our device we only needed to remove the two at the top.

  2. HP Envy x360 m6-aq005dx Touchpad Replacement: étape 2, image 1 de 3 HP Envy x360 m6-aq005dx Touchpad Replacement: étape 2, image 2 de 3 HP Envy x360 m6-aq005dx Touchpad Replacement: étape 2, image 3 de 3
    • Use a Torx T5 screwdriver to remove the six 5.1 mm screws.

    • Use a JIS #1 screwdriver to remove the two 7.2mm screws.

  3. HP Envy x360 m6-aq005dx Touchpad Replacement: étape 3, image 1 de 1
    • Use a plastic opening tool to pry open the case. Go slowly around the edge. You will hear popping noises, such are due to popping open the small joints that keep the cover attached.

  4. HP Envy x360 m6-aq005dx Touchpad Replacement, Battery: étape 4, image 1 de 2 HP Envy x360 m6-aq005dx Touchpad Replacement, Battery: étape 4, image 2 de 2
    • Use a JIS #1 screwdriver to remove the six 4.7 mm screws.

  5. HP Envy x360 m6-aq005dx Touchpad Replacement: étape 5, image 1 de 1
    • Battery might cause a small electric shock.

    • Use tweezers to disconnect the battery from the motherboard.

  6. HP Envy x360 m6-aq005dx Touchpad Replacement, Touchpad: étape 6, image 1 de 1
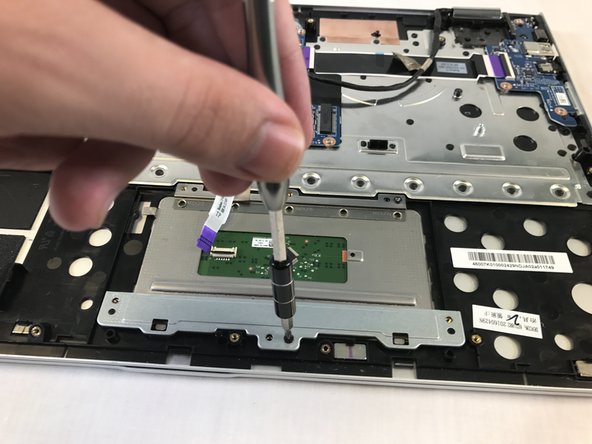
    • Carefully, pull back the locking clip of the connector using a plastic opening tool and disconnect cable.

  7. HP Envy x360 m6-aq005dx Touchpad Replacement: étape 7, image 1 de 2 HP Envy x360 m6-aq005dx Touchpad Replacement: étape 7, image 2 de 2
    • The red square contains two screws side by side.

    • Using a PH0 bit remove the 7 (2.8 mm) screws securing the touchpad to the device.

  8. HP Envy x360 m6-aq005dx Touchpad Replacement: étape 8, image 1 de 2 HP Envy x360 m6-aq005dx Touchpad Replacement: étape 8, image 2 de 2
    • Keep the ribbon cable from interfering with touchpad removal.

    • Use a plastic opening tool to pry up the touchpad.

    • Gently, pull out the touchpad from device.

Conclusion

To reassemble your device, follow these instructions in reverse order.

Darrin Smiley

Membre depuis le 10/10/17

261 Réputation

2 tutoriels rédigés

Équipe

USF Tampa, Team S13-G17, Cagle Fall 2017 Membre de l'équipe USF Tampa, Team S13-G17, Cagle Fall 2017

USFT-CAGLE-F17S13G17

4 membres

7 tutoriels rédigés

0 commentaires

Ajouter un commentaire

Nombre de vues :

Dernières 24 heures : 0

7 derniers jours : 0

30 derniers jours : 1

Total : 1,192