Introduction
Are you unhappy with the performance of your HP Envy x360 m6-aq103dx? If so, here is the guide to replace your motherboard. With just a few tools, you can replace your HP Envy x360 m6-aq103dx's motherboard today.
Ce dont vous avez besoin
-
-
Flip the laptop over to expose the underside.
-
Remove the two grip pads with blue plastic opening tool by inserting the tool between the laptop and the pads and slowly lifting up.
-
-
-
Make sure you are wearing an anti-static wrist strap.
-
Remove the four screws from the blue board that contains the headphone jack using the Phillips head 1 screwdriver (one 4 mm black screw, one 3 mm black screw, and two 4.5 mm silver screws).
-
-
-
-
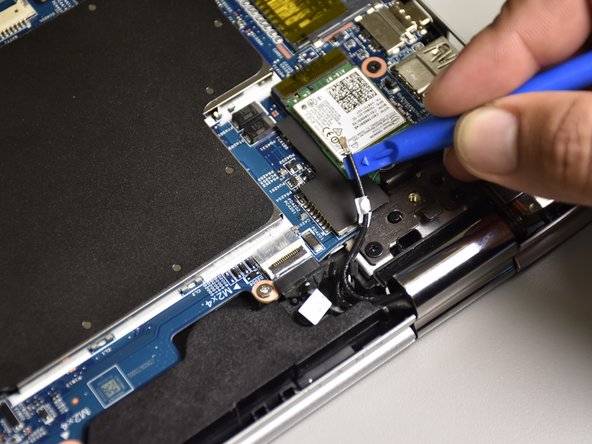
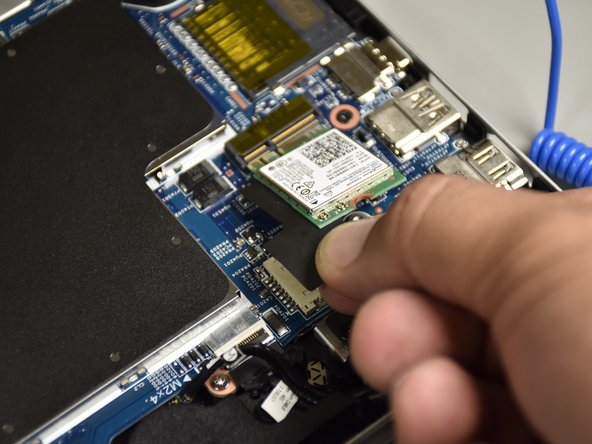
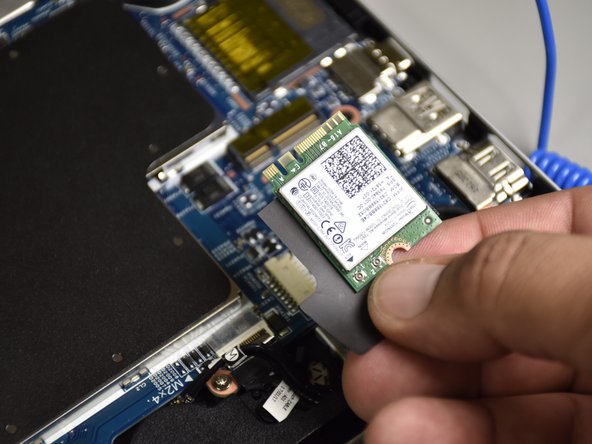
Remove the two antenna cables connected to the wireless module by wedging the small plastic opening tool between the cables and the wireless module and lifting up.
-
-
-
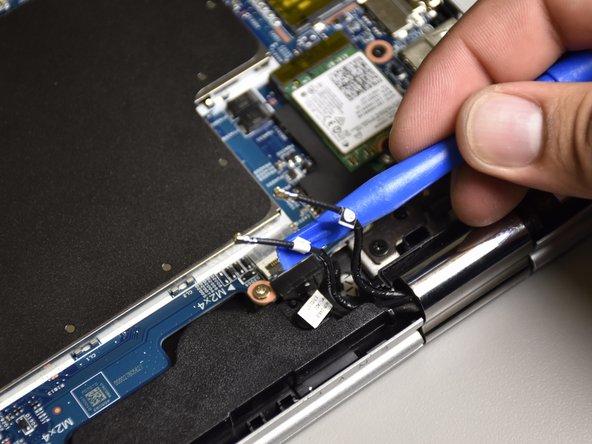
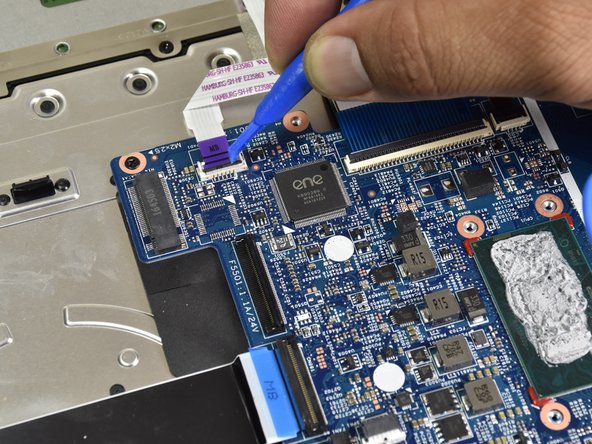
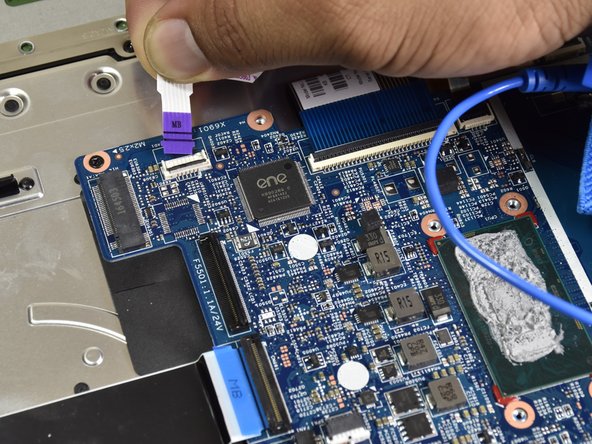
Disconnect the ribbon cable with the purple tag by flipping the black tab with the plastic opening tool.
-
Disconnect the ribbon cable by gently pulling it away from the connector with your fingers.
-
-
-
Remove the ram’s metal cover with your hand.
-
-
-
Use the small plastic opening tool to disconnect the port attached to the white ribbon cable with purple tips.
-
Press the tool to the top of the tip of the cable and pull it outwards.
-
Press the tool to the side of the tip of the cable and slide it outwards.
-
Use your hand to lift the cable up and out of the way.
-
-
-
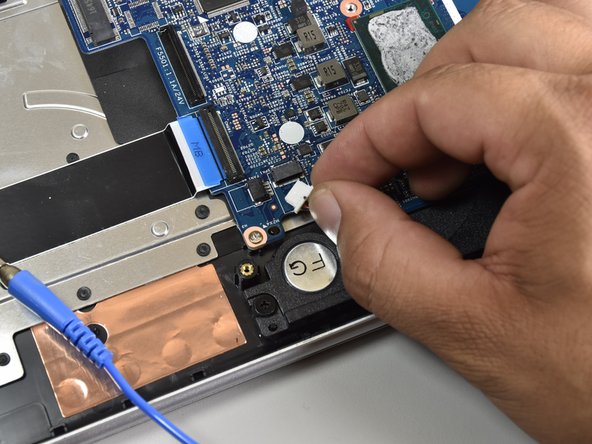
Use the small plastic opening tool to disconnect the port attached to the blue ribbon cable with a black stripe.
-
Press the tool to the top of the tip of the cable and pull it outwards.
-
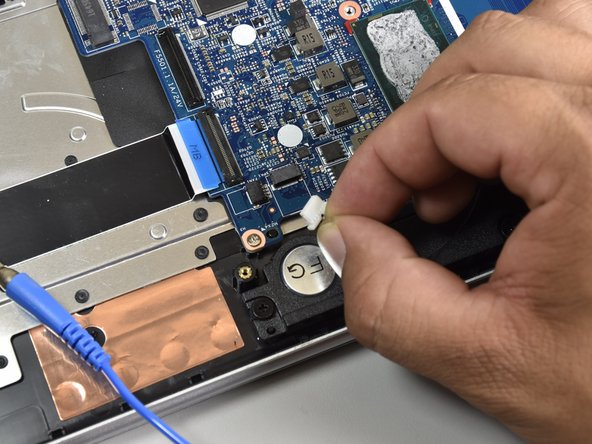
Press the tool to the side of the tip of the cable and slide it outwards.
-
Use your hand to lift the cable up and out of the way.
-
-
-
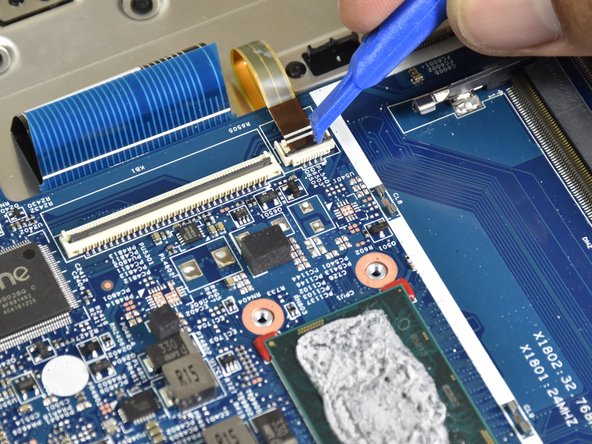
Use the small plastic opening tool to disconnect the port attached to the golden brown ribbon cable with the yellow underside.
-
Press the tool to the top of the tip of the cable and pull it outwards.
-
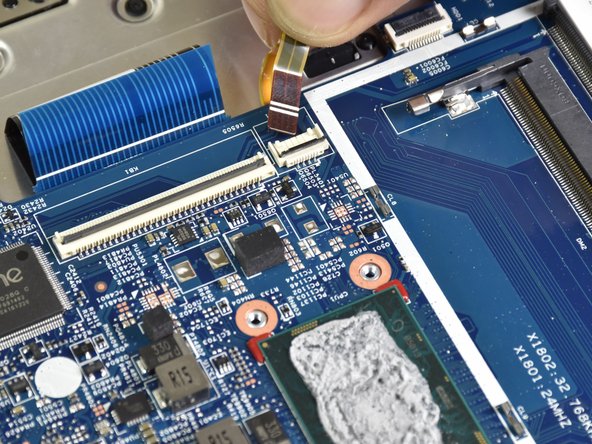
Press the tool to the side of the tip of the cable and slide it outwards.
-
Use your hand to lift the cable up and out of the way.
-


To reassemble your device, follow these instructions in reverse order.
To reassemble your device, follow these instructions in reverse order.
Annulation : je n'ai pas terminé ce tutoriel.
6 autres ont terminé cette réparation.

Équipe

Cal Poly, Team S4-G3, Livingston Fall 2017 Membre de l'équipe Cal Poly, Team S4-G3, Livingston Fall 2017
CPSU-LIVINGSTON-F17S4G3
4 membres
9 tutoriels rédigés
4 commentaires
how to replace the keyboard?
need a solder gun?
What are the newer motherboards I can upgrade this laptop with ? please advise.