Aller au contenu principal

HP Envy x360 m6-aq105dx Solid State Drive Replacement

Tutoriel Archivé
Ce tutoriel est conservé uniquement à des fins de suivis historiques. Utilisez la version actuelle du tutoriel pour effectuer votre réparation.

Ce dont vous avez besoin

  1. HP Envy x360 m6-aq105dx Solid State Drive Replacement, Back Cover: étape 1, image 1 de 1
    • Ground yourself by touching a metal object or surface. This prevents electrical damage to other components in the laptop.

    • Remove the two 7.8 mm screws using the Phillips #0 screwdriver.

    • Remove the six 5.2 mm screws using the Torx T5 screwdriver.

  2. HP Envy x360 m6-aq105dx Solid State Drive Replacement: étape 2, image 1 de 1
    • Light to moderate force is required to remove the back cover.

    • Insert the Jimmy in between the frame of the laptop and the removable back cover and remove the back cover from the device.

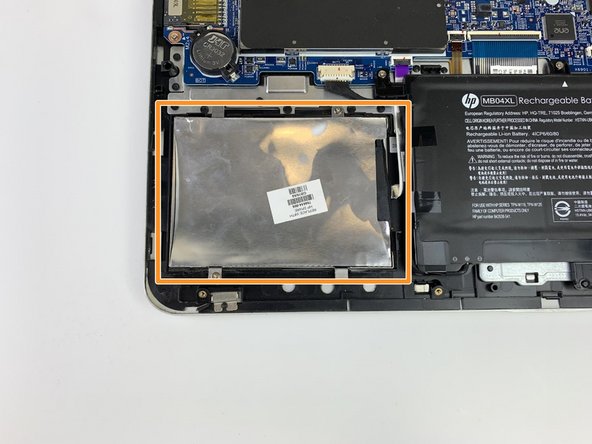
  3. HP Envy x360 m6-aq105dx Solid State Drive Replacement, Solid State Drive: étape 3, image 1 de 1
    • Remove the two 4.6 mm screws securing old hard drive/solid-state drive in place using the Phillips #0 screwdriver.

  4. HP Envy x360 m6-aq105dx Solid State Drive Replacement: étape 4, image 1 de 2 HP Envy x360 m6-aq105dx Solid State Drive Replacement: étape 4, image 2 de 2
    • Disconnect the SATA cable connected to the old hard drive/solid-state drive.

    • Remove the solid state drive.

Conclusion

To reassemble your device, follow these instructions in reverse order.

0 commentaires

Ajouter un commentaire

Nombre de vues :

Dernières 24 heures : 0

7 derniers jours : 4

30 derniers jours : 7

Total : 43