Aller au contenu principal

HP G71t-400 Cooling Fan Replacement

Ce dont vous avez besoin

  1. HP G71t-400 Cooling Fan Replacement, Cooling Fan: étape 1, image 1 de 3 HP G71t-400 Cooling Fan Replacement, Cooling Fan: étape 1, image 2 de 3 HP G71t-400 Cooling Fan Replacement, Cooling Fan: étape 1, image 3 de 3
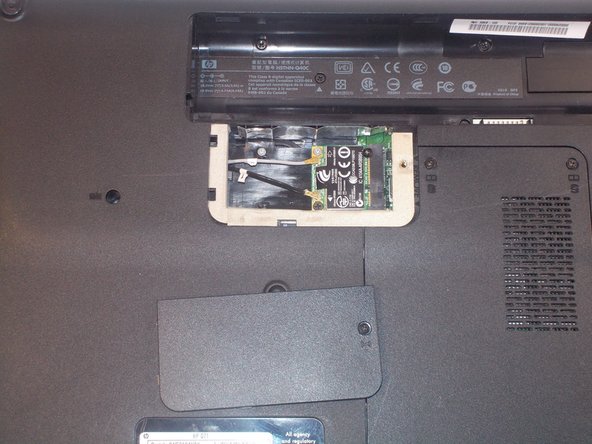
    • Lay the laptop down so the bottom is facing up.

    • Push the slide button, circled in photo 1, to release the battery.

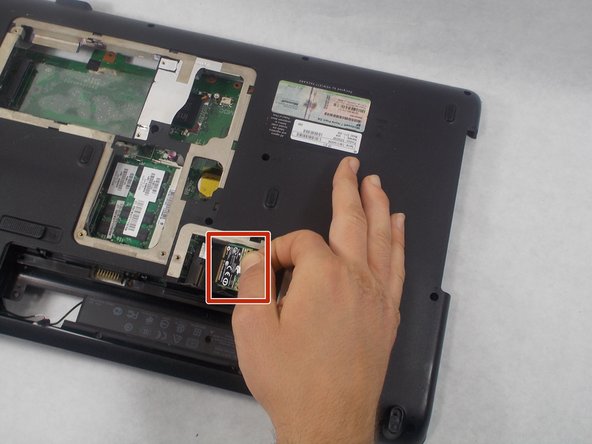
    • Action in picture 2 shows the direction and release.

    • Tilt the battery back in the direction it popped up in and remove the battery.

    • This ensures there is no power in the system that could potentially short out any components.

  2. HP G71t-400 Cooling Fan Replacement: étape 2, image 1 de 3 HP G71t-400 Cooling Fan Replacement: étape 2, image 2 de 3 HP G71t-400 Cooling Fan Replacement: étape 2, image 3 de 3
    • Remove the circled screws.

    • Remove the cover, exposing the hard drive and RAM.

  3. HP G71t-400 Cooling Fan Replacement: étape 3, image 1 de 3 HP G71t-400 Cooling Fan Replacement: étape 3, image 2 de 3 HP G71t-400 Cooling Fan Replacement: étape 3, image 3 de 3
    • Remove the 2 circled screws.

    • Use your pry to slide the hard drive over. This unplugs it from its connection and allows it to be removed.

    • Remove the hard drive.

  4. HP G71t-400 Cooling Fan Replacement: étape 4, image 1 de 2 HP G71t-400 Cooling Fan Replacement: étape 4, image 2 de 2
    • Push the silver tabs in to release the RAM.

    • When they pop up from the locked position they may be removed.

    • Remove the circled screws to release the WiFi card and keyboard.

  5. HP G71t-400 Cooling Fan Replacement: étape 5, image 1 de 3 HP G71t-400 Cooling Fan Replacement: étape 5, image 2 de 3 HP G71t-400 Cooling Fan Replacement: étape 5, image 3 de 3
    • Remove the panel, exposing the WiFi card.

    • Remove the circle wire connections, make note to which port they were connected to.

    • Remove the WiFi card.

  6. HP G71t-400 Cooling Fan Replacement: étape 6, image 1 de 3 HP G71t-400 Cooling Fan Replacement: étape 6, image 2 de 3 HP G71t-400 Cooling Fan Replacement: étape 6, image 3 de 3
    • Flip the laptop over and open it now that the keyboard has been unscrewed.

    • Take your pry bar and go around the outer edge of the keyboard. Popping it free from the bezel.

  7. HP G71t-400 Cooling Fan Replacement: étape 7, image 1 de 3 HP G71t-400 Cooling Fan Replacement: étape 7, image 2 de 3 HP G71t-400 Cooling Fan Replacement: étape 7, image 3 de 3
    • Lift the keyboard up.

    • Remove the connections from the keyboard to the motherboard.

    • Remember each attachments position because they will need to be connected again.

  8. HP G71t-400 Cooling Fan Replacement: étape 8, image 1 de 3 HP G71t-400 Cooling Fan Replacement: étape 8, image 2 de 3 HP G71t-400 Cooling Fan Replacement: étape 8, image 3 de 3
    • Remove the circled screws to release the bezel from the faceplate.

  9. HP G71t-400 Cooling Fan Replacement: étape 9, image 1 de 2 HP G71t-400 Cooling Fan Replacement: étape 9, image 2 de 2
    • Lift the bezel from the face plate.

    • Disconnect the power connection from the bezel to the motherboard.

  10. HP G71t-400 Cooling Fan Replacement: étape 10, image 1 de 3 HP G71t-400 Cooling Fan Replacement: étape 10, image 2 de 3 HP G71t-400 Cooling Fan Replacement: étape 10, image 3 de 3
    • Remove the two screws side-by-side next to each in the red circle.

    • This will be the last layer to remove before reaching the motherboard.

  11. HP G71t-400 Cooling Fan Replacement: étape 11, image 1 de 2 HP G71t-400 Cooling Fan Replacement: étape 11, image 2 de 2
    • Carefully detach the highlighted connections.

    • Remove the motherboard from the device.

  12. HP G71t-400 Cooling Fan Replacement: étape 12, image 1 de 3 HP G71t-400 Cooling Fan Replacement: étape 12, image 2 de 3 HP G71t-400 Cooling Fan Replacement: étape 12, image 3 de 3
    • Remove three screws to detach the cooling fan from the motherboard.

    • Remove the last connection.

Conclusion

To reassemble your device, follow these instructions in reverse order.

Nicholas Castro

Membre depuis le 03/24/19

711 Réputation

6 tutoriels rédigés

Équipe

UMass Dartmouth, Team S1-G5, Simcock Spring 2019 Membre de l'équipe UMass Dartmouth, Team S1-G5, Simcock Spring 2019

UMASSD-SIMCOCK-S19S1G5

2 membres

6 tutoriels rédigés

0 commentaires

Ajouter un commentaire

Nombre de vues :

Dernières 24 heures : 0

7 derniers jours : 2

30 derniers jours : 4

Total : 136