Aller au contenu principal

HP Mini 1000 USB & Power Board Replacement

Conditions préalables uniquement
Ce tutoriel est uniquement destiné à être utilisé comme prérequis d'autres tutoriels. Il ne se suffit pas à lui-même.

Ce dont vous avez besoin

  1. HP Mini 1000 USB & Power Board Replacement, USB & Power Board: étape 1, image 1 de 1
    • If present, remove the two pieces of tape covering the cables routed near the USB and power board.

  2. HP Mini 1000 USB & Power Board Replacement: étape 2, image 1 de 1
    • Use a pair of tweezers to pull the internal display switch cable straight away from its socket on the USB and power board.

  3. HP Mini 1000 USB & Power Board Replacement: étape 3, image 1 de 1
    • Peel and de-route the SIM card ribbon cable from its channel on top of the underside of the battery compartment.

    • The SIM card ribbon cable is still connected to the USB and power board. Do not completely remove it yet.

  4. HP Mini 1000 USB & Power Board Replacement: étape 4, image 1 de 1
    • Remove the single 3 mm Phillips screw that secures the USB and power board as well as the DC jack bracket to the lower case.

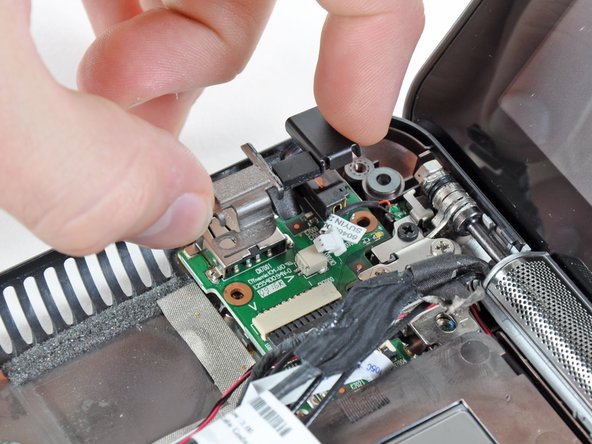
  5. HP Mini 1000 USB & Power Board Replacement: étape 5, image 1 de 2 HP Mini 1000 USB & Power Board Replacement: étape 5, image 2 de 2
    • Lift the DC jack bracket up off the USB and power board.

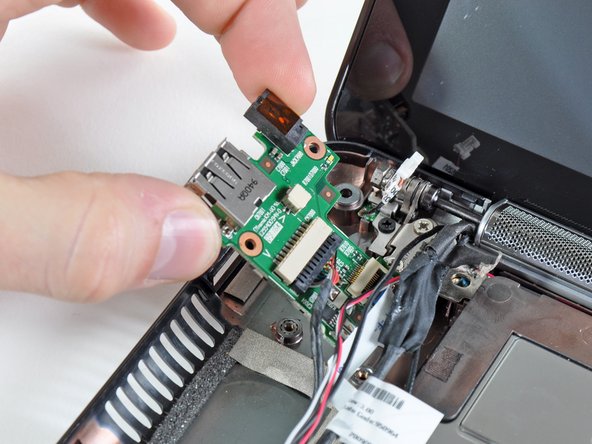
  6. HP Mini 1000 USB & Power Board Replacement: étape 6, image 1 de 2 HP Mini 1000 USB & Power Board Replacement: étape 6, image 2 de 2
    • Grasp the USB and power board from its left edge, nearest the ports side.

    • Remove the USB and power board straight away from its recess in the lower case, minding any cables that may get tangled.

Conclusion

To reassemble your device, follow these instructions in reverse order.

0 commentaires

Ajouter un commentaire

Nombre de vues :

Dernières 24 heures : 0

7 derniers jours : 0

30 derniers jours : 0

Total : 34