Aller au contenu principal

Ce tutoriel a des changements plus récents. Passer à la dernière version non vérifiée.

HP Mini 1000 WWAN Board Replacement

Conditions préalables uniquement
Ce tutoriel est uniquement destiné à être utilisé comme prérequis d'autres tutoriels. Il ne se suffit pas à lui-même.

Ce dont vous avez besoin

  1. HP Mini 1000 WWAN Board Replacement, WWAN Board: étape 1, image 1 de 1
    • If present, carefully peel the piece of tape covering the WWAN board.

  2. HP Mini 1000 WWAN Board Replacement: étape 2, image 1 de 2 HP Mini 1000 WWAN Board Replacement: étape 2, image 2 de 2
    • Pry the WWAN antenna connectors (2 total) up off the WWAN board.

    • During reassembly, remember to correctly connect the antenna cables to their respective terminals. The red labeled antenna is connected to the "MAIN" terminal and the blue labeled antenna is connected to the "AUX" terminal.

  3. HP Mini 1000 WWAN Board Replacement: étape 3, image 1 de 3 HP Mini 1000 WWAN Board Replacement: étape 3, image 2 de 3 HP Mini 1000 WWAN Board Replacement: étape 3, image 3 de 3
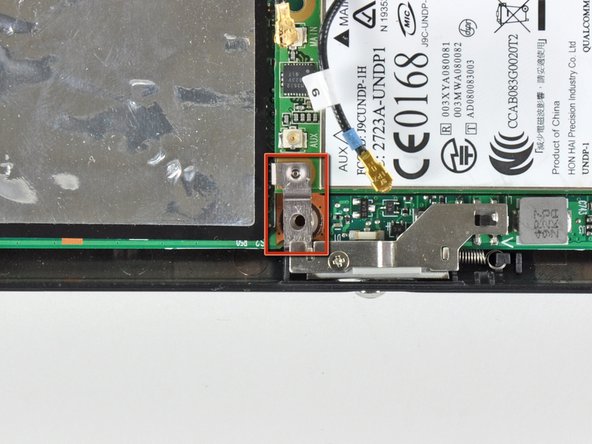
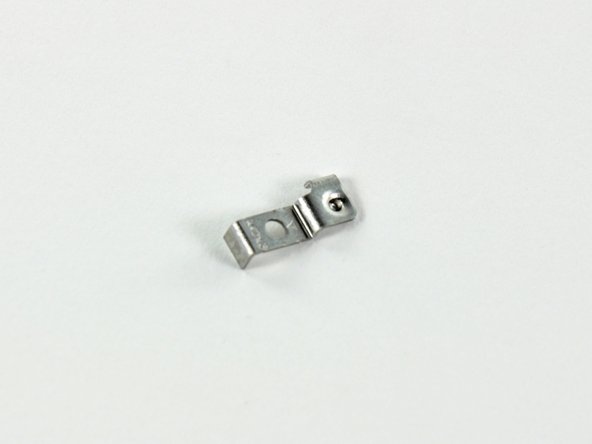
    • Remove the single 3 mm Phillips screw securing the WWAN metal bracket and WWAN board to the motherboard.

    • During reassembly, before securing the WWAN board to the upper case, be sure the metal bracket is correctly placed (as highlighted in the second picture).

    • Be cautious of the metal bracket's displacement. It can easily become lost during disassembly.

  4. HP Mini 1000 WWAN Board Replacement: étape 4, image 1 de 2 HP Mini 1000 WWAN Board Replacement: étape 4, image 2 de 2
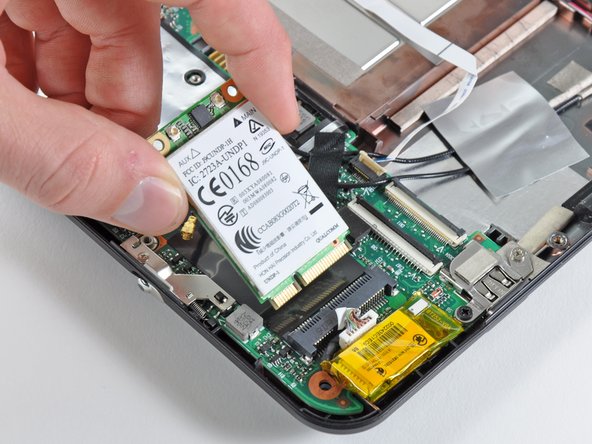
    • Upon removing the Phillips screw that secures the WWAN board to the motherboard, the WWAN board should pop up from its left side.

    • Grasp the WWAN board and pull it straight out of its socket on the motherboard.

Conclusion

To reassemble your device, follow these instructions in reverse order.

0 commentaires

Ajouter un commentaire

Nombre de vues :

Dernières 24 heures : 0

7 derniers jours : 0

30 derniers jours : 0

Total : 48