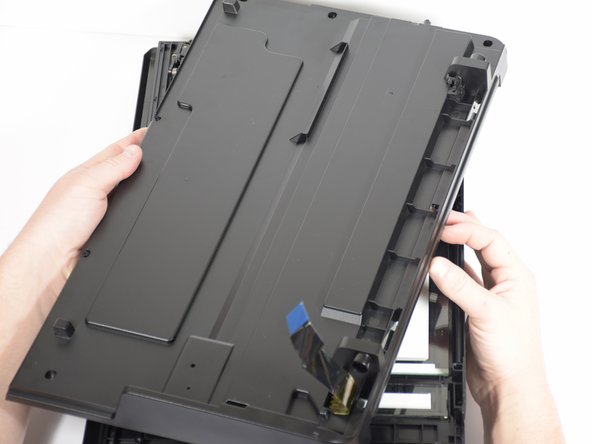
Aller au contenu principal

HP Officejet 4630 Scanner Head Replacement

Ce dont vous avez besoin

  1. HP Officejet 4630 Scanner Head Replacement, LCD Display: étape 1, image 1 de 3 HP Officejet 4630 Scanner Head Replacement, LCD Display: étape 1, image 2 de 3 HP Officejet 4630 Scanner Head Replacement, LCD Display: étape 1, image 3 de 3
    • There is a hidden screw underneath the model sticker on the front panel.

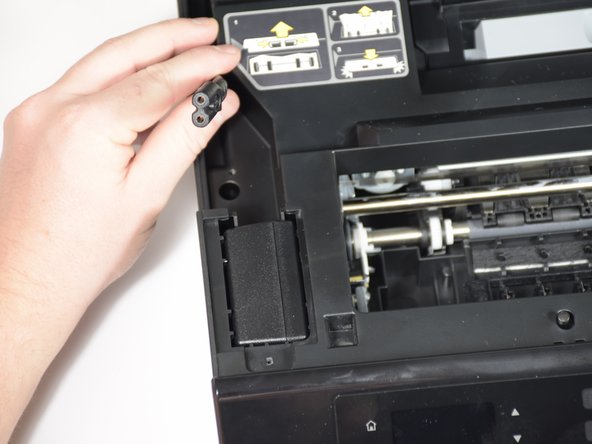
    • Peel the model sticker off the cover.

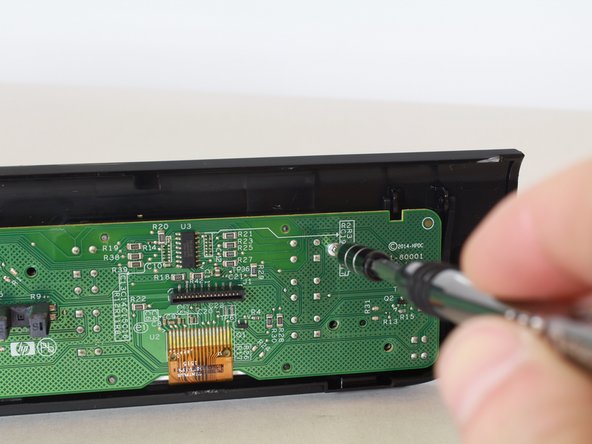
    • This will expose the T10 screw securing the panel.

  2. HP Officejet 4630 Scanner Head Replacement: étape 2, image 1 de 3 HP Officejet 4630 Scanner Head Replacement: étape 2, image 2 de 3 HP Officejet 4630 Scanner Head Replacement: étape 2, image 3 de 3
    • Remove the single 12mm-T10 screw securing the front panel to the printer body.

    • Loosen the panel cover from the printer body.

    • There is a ribbon cable connected to the backside of the cover. Disconnect the cable before separating the panel completely.

  3. HP Officejet 4630 Scanner Head Replacement: étape 3, image 1 de 3 HP Officejet 4630 Scanner Head Replacement: étape 3, image 2 de 3 HP Officejet 4630 Scanner Head Replacement: étape 3, image 3 de 3
    • Gently remove the No-Fuss ribbon cable from the front panel.

  4. HP Officejet 4630 Scanner Head Replacement: étape 4, image 1 de 3 HP Officejet 4630 Scanner Head Replacement: étape 4, image 2 de 3 HP Officejet 4630 Scanner Head Replacement: étape 4, image 3 de 3
    • Remove the seven 8mm screws using the Torx T6 screwdriver.

    • Remove the motherboard from the front-panel housing.

    • The LCD display is on the opposite side.

  5. HP Officejet 4630 Scanner Head Replacement, Power Supply: étape 5, image 1 de 3 HP Officejet 4630 Scanner Head Replacement, Power Supply: étape 5, image 2 de 3 HP Officejet 4630 Scanner Head Replacement, Power Supply: étape 5, image 3 de 3
    • Lift the hood of the printer.

  6. HP Officejet 4630 Scanner Head Replacement: étape 6, image 1 de 3 HP Officejet 4630 Scanner Head Replacement: étape 6, image 2 de 3 HP Officejet 4630 Scanner Head Replacement: étape 6, image 3 de 3
    • Remove the two T10 11mm screws.

  7. HP Officejet 4630 Scanner Head Replacement: étape 7, image 1 de 3 HP Officejet 4630 Scanner Head Replacement: étape 7, image 2 de 3 HP Officejet 4630 Scanner Head Replacement: étape 7, image 3 de 3
    • Remove the panels covering the power brick and cord.

  8. HP Officejet 4630 Scanner Head Replacement: étape 8, image 1 de 2 HP Officejet 4630 Scanner Head Replacement: étape 8, image 2 de 2
    • Remove the cord from the power supply.

  9. HP Officejet 4630 Scanner Head Replacement: étape 9, image 1 de 3 HP Officejet 4630 Scanner Head Replacement: étape 9, image 2 de 3 HP Officejet 4630 Scanner Head Replacement: étape 9, image 3 de 3
    • Slide the power supply out from the chassis.

    • The power supply is still attached; don't pull too quickly.

  10. HP Officejet 4630 Scanner Head Replacement: étape 10, image 1 de 1
    • Remove final cable from power supply.

  11. HP Officejet 4630 Scanner Head Replacement, Scanner Head: étape 11, image 1 de 1
    • Remove eight T10 1mm screws from the top hood of the printer.

  12. HP Officejet 4630 Scanner Head Replacement: étape 12, image 1 de 3 HP Officejet 4630 Scanner Head Replacement: étape 12, image 2 de 3 HP Officejet 4630 Scanner Head Replacement: étape 12, image 3 de 3
    • Use the nylon spudger to pry the tab.

    • Lift up the entire panel.

  13. HP Officejet 4630 Scanner Head Replacement: étape 13, image 1 de 3 HP Officejet 4630 Scanner Head Replacement: étape 13, image 2 de 3 HP Officejet 4630 Scanner Head Replacement: étape 13, image 3 de 3
    • Lift and flip the entire panel.

    • Be aware of the scanner head attached to the panel.

  14. HP Officejet 4630 Scanner Head Replacement: étape 14, image 1 de 3 HP Officejet 4630 Scanner Head Replacement: étape 14, image 2 de 3 HP Officejet 4630 Scanner Head Replacement: étape 14, image 3 de 3
    • Start with the scanner head in place.

    • Unwind the ribbon from the track.

    • Detach ribbon completely.

Conclusion

To reassemble your device, follow these instructions in reverse order.

Maya Willis

Membre depuis le 01/24/18

415 Réputation

3 tutoriels rédigés

Équipe

Cal Poly, Team S18-G3, Livingston Winter 2018 Membre de l'équipe Cal Poly, Team S18-G3, Livingston Winter 2018

CPSU-LIVINGSTON-W18S18G3

4 membres

18 tutoriels rédigés

0 commentaires

Ajouter un commentaire

Nombre de vues :

Dernières 24 heures : 1

7 derniers jours : 4

30 derniers jours : 15

Total : 1,397