Aller au contenu principal
Pour réparer ensemble - Je crée un compte

HP Officejet Pro 6835 Carriage Belt Replacement

Ce dont vous avez besoin

    1. HP Officejet Pro 6835 Carriage Belt Replacement, HP Officejet Pro 6835 Cover Disassembly: étape 1, image 1 de 1
      • Open the main lid as far as it will go.

      • Use a plastic opening tool to gently pry off the hinge on the right side by pushing it to the left and off the hook.

      • Open the lid further.

      Demander à FixBot

      Ajouter un commentaire

    2. HP Officejet Pro 6835 Carriage Belt Replacement: étape 2, image 1 de 3 HP Officejet Pro 6835 Carriage Belt Replacement: étape 2, image 2 de 3 HP Officejet Pro 6835 Carriage Belt Replacement: étape 2, image 3 de 3
      • Use a T9 torx screwdriver to remove a total of ten (10) 12mm screws from the main cover by turning the screwdriver counterclockwise.

      • The two screws above the screen assembly are deep so you may need a long screwdriver.

      Demander à FixBot

      Ajouter un commentaire

    3. HP Officejet Pro 6835 Carriage Belt Replacement: étape 3, image 1 de 1
      • Grab the main cover and lift it up slightly.

      • Do not pull too hard—there is a cable connecting the cover to the printer.

      Demander à FixBot

      Ajouter un commentaire

    4. HP Officejet Pro 6835 Carriage Belt Replacement: étape 4, image 1 de 2 HP Officejet Pro 6835 Carriage Belt Replacement: étape 4, image 2 de 2
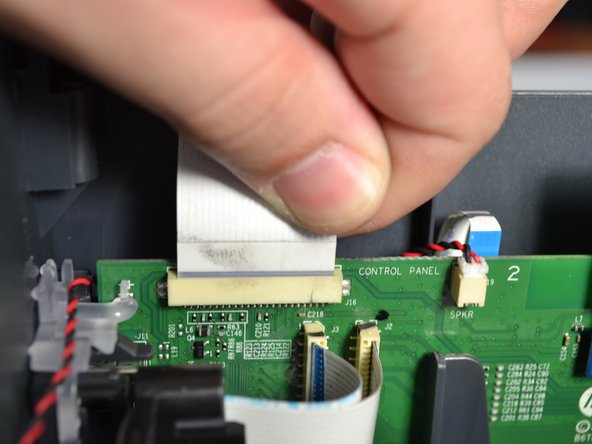
      • Grab the base of the white ribbon cable connecting the cover to the base of the printer and pull it out.

      Demander à FixBot

      Ajouter un commentaire

    1. HP Officejet Pro 6835 Carriage Belt Replacement, Printhead: étape 5, image 1 de 2 HP Officejet Pro 6835 Carriage Belt Replacement, Printhead: étape 5, image 2 de 2
      Outil utilisé dans cette étape :
      Tweezers
      $4.99
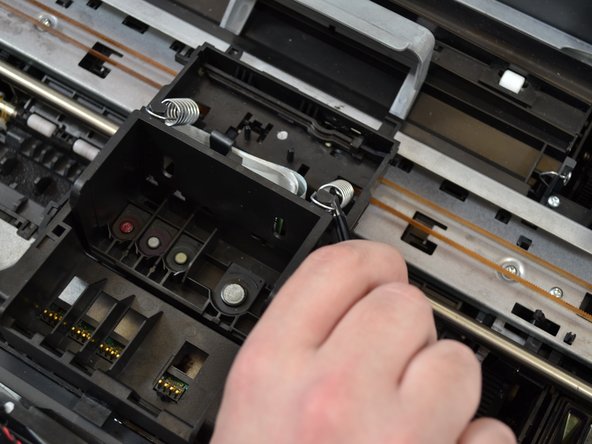
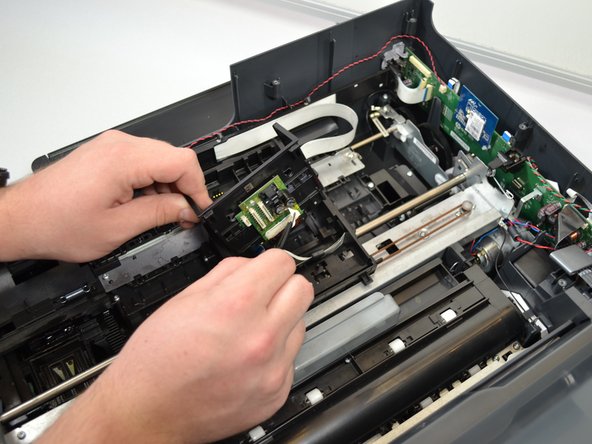
      • Using tweezers, pinch the top of the spring located on the right side of the printhead.

      • Pull the spring up and around the hook of the carriage to remove the spring from the printhead.

      • Use the same procedure to remove the left spring.

      • The springs may fly out of the printer once you remove them.

      Demander à FixBot

      Ajouter un commentaire

    2. HP Officejet Pro 6835 Carriage Belt Replacement: étape 6, image 1 de 3 HP Officejet Pro 6835 Carriage Belt Replacement: étape 6, image 2 de 3 HP Officejet Pro 6835 Carriage Belt Replacement: étape 6, image 3 de 3
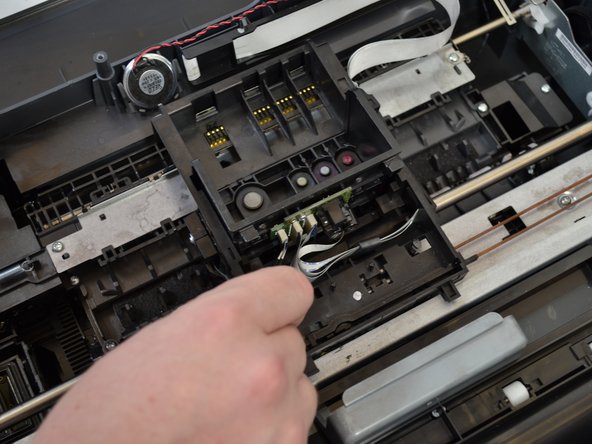
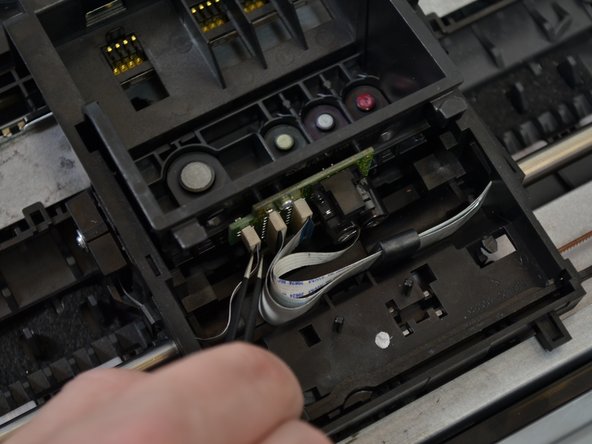
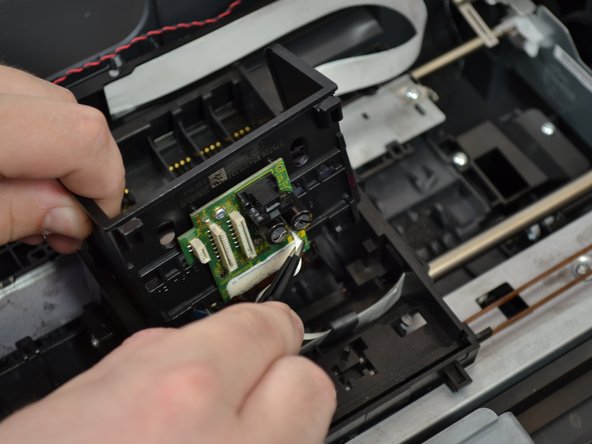
      • Pinch the left most white cable located on the back of the printhead with your tweezers.

      • Pull the cable to remove it from the printhead.

      • Continue this process to remove all three white cable from the printhead.

      Demander à FixBot

      Ajouter un commentaire

    3. HP Officejet Pro 6835 Carriage Belt Replacement: étape 7, image 1 de 3 HP Officejet Pro 6835 Carriage Belt Replacement: étape 7, image 2 de 3 HP Officejet Pro 6835 Carriage Belt Replacement: étape 7, image 3 de 3
      • Lift the printhead off the printer to expose the last white cable.

      • Pinch the the last cable with the tweezers.

      • Pull the cable to disconnect it from the printhead.

      Demander à FixBot

      Ajouter un commentaire

    1. HP Officejet Pro 6835 Carriage Belt Replacement, Carriage Belt: étape 8, image 1 de 3 HP Officejet Pro 6835 Carriage Belt Replacement, Carriage Belt: étape 8, image 2 de 3 HP Officejet Pro 6835 Carriage Belt Replacement, Carriage Belt: étape 8, image 3 de 3
      Outil utilisé dans cette étape :
      Tweezers
      $4.99
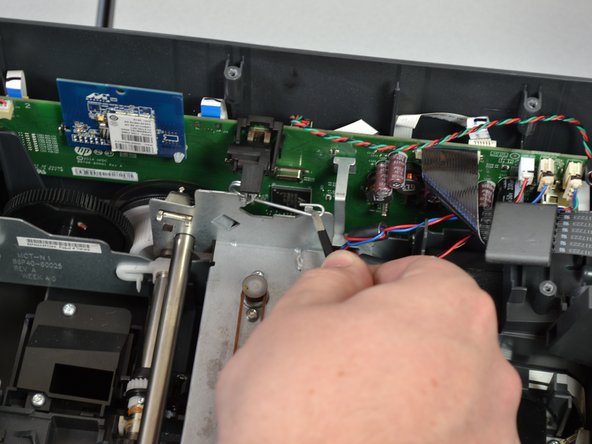
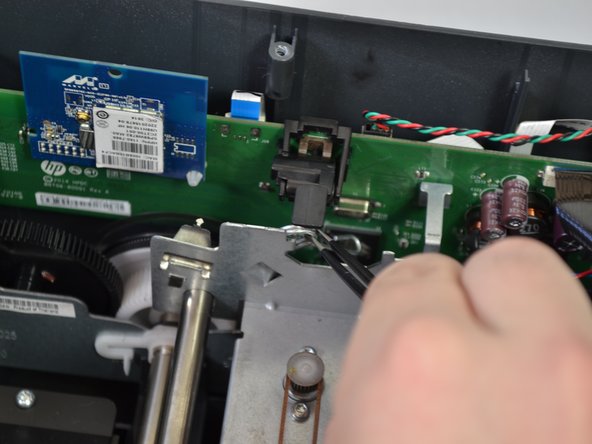
      • Using the tweezers, remove the right side of the metal clamp that is holding the metal frame in place by pulling up.

      • With the tweezers, unhook the metal coil side of the clamp and pull up to remove it completely.

      • Repeat these steps on the other side of the printer.

      Demander à FixBot

      Ajouter un commentaire

    2. HP Officejet Pro 6835 Carriage Belt Replacement: étape 9, image 1 de 1
      • On the right side of the printer, remove the screw (6mm T9) holding the carriage belt wheel by turning the screwdriver counterclockwise.

      Demander à FixBot

      Ajouter un commentaire

    3. HP Officejet Pro 6835 Carriage Belt Replacement: étape 10, image 1 de 1
      • Using the tweezers, remove the metal clamp directly under the screw that was just removed by pulling up.

      Demander à FixBot

      Ajouter un commentaire

    4. HP Officejet Pro 6835 Carriage Belt Replacement: étape 11, image 1 de 2 HP Officejet Pro 6835 Carriage Belt Replacement: étape 11, image 2 de 2
      • Using one hand, loosen the carriage belt around the wheel by compressing the spring against the wheel.

      • While still compressing the spring, use your other hand to grab the spring and wheel and pull up to remove them.

      Demander à FixBot

      Ajouter un commentaire

    5. HP Officejet Pro 6835 Carriage Belt Replacement: étape 12, image 1 de 1
      • Unwrap the carriage belt from the hook on the other side of the printer using the tweezers by pulling to the left and up.

      Demander à FixBot

      Ajouter un commentaire

    6. HP Officejet Pro 6835 Carriage Belt Replacement: étape 13, image 1 de 2 HP Officejet Pro 6835 Carriage Belt Replacement: étape 13, image 2 de 2
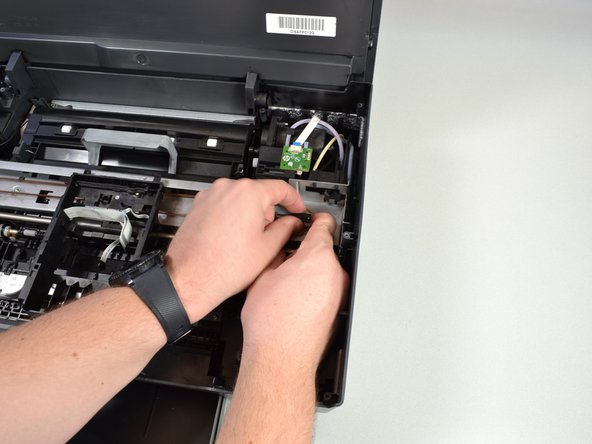
      • Grab the metal rod connected to the carriage.

      • Push the rod to the left and lift up the right end.

      • Lift the metal rod completely out of the printer by lifting straight up, and slide the rod out of the carriage by pushing the left end to the right.

      Demander à FixBot

      Ajouter un commentaire

    7. HP Officejet Pro 6835 Carriage Belt Replacement: étape 14, image 1 de 2 HP Officejet Pro 6835 Carriage Belt Replacement: étape 14, image 2 de 2
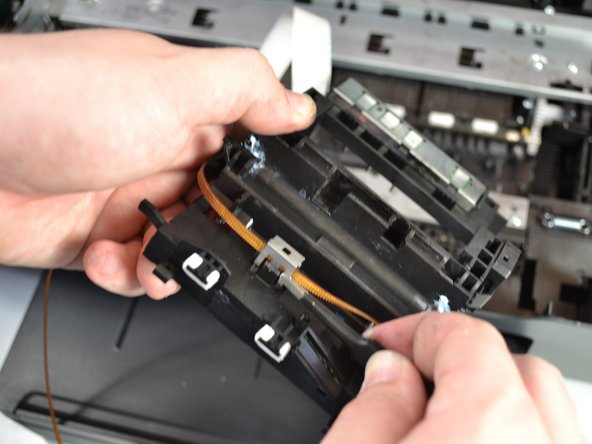
      • Flip the carriage upside down.

      • Using the metal tweezers, remove the clamp over the carriage belt by first pulling up on the back of the clamp, then on the front.

      Demander à FixBot

      Ajouter un commentaire

    8. HP Officejet Pro 6835 Carriage Belt Replacement: étape 15, image 1 de 1
      • Remove the carriage belt by holding the carriage in one hand and pulling the carriage belt up with the other.

      Demander à FixBot

      Ajouter un commentaire

Conclusion

To reassemble your device, follow these instructions in reverse order.

Annulation : je n'ai pas terminé ce tutoriel.

Une autre personne a terminé cette réparation.

Elena Fowler

Membre depuis le 01/24/18

445 Réputation

2 tutoriels rédigés

Équipe

Cal Poly, Team S2-G4, Livingston Winter 2018 Membre de l'équipe Cal Poly, Team S2-G4, Livingston Winter 2018

CPSU-LIVINGSTON-W18S2G4

4 membres

96 tutoriels rédigés

0 commentaires de tutoriel

Ajouter un commentaire

Nombre de vues :

Dernières 24 heures : 3

7 derniers jours : 14

30 derniers jours : 41

Total : 2,672