Cette version peut contenir des modifications incorrectes. Passez au dernier aperçu vérifié.
Ce dont vous avez besoin
-
Cette étape n’est pas traduite. Aidez à la traduire
-
Push inward towards the center of laptop (it may take a lot of pressure). Battery should release once buttons are completely pushed in
-
-
Cette étape n’est pas traduite. Aidez à la traduire
-
Lift the battery upwards and out from the laptop
-
-
Cette étape n’est pas traduite. Aidez à la traduire
-
Remove rectangular rubber tops with a spudger
-
Remove the two 4.60 mm PH#1 screws located under rectangular rubber tops.
-
Remove plastic edge covering with the blue plastic opening tool.
-
Remove two 4.63 mm PH#1 screws located under plastic edge covering.
-
-
Cette étape n’est pas traduite. Aidez à la traduire
-
Use Phillips screwdriver #1
-
Remove all nine 7.09 mm PH#1 screw black screws including small rectangular cover.
-
Remove the three 7.14 mm PH#1 screws.
-
Remove the one 7.09 mm PH#1 screw that will be underneath the small rectangular cover
-
-
Cette étape n’est pas traduite. Aidez à la traduire
-
Remove disc tray
-
Locate screw within computer that is inside of where the disc tray was
-
Using a Phillips #1 screwdriver, unscrew the screw
-
Set laptop down and open laptop so the keyboard is facing you
-
-
-
Cette étape n’est pas traduite. Aidez à la traduire
-
Using a spudger or plastic opening tool, pry along siding of keyboard, where it connects to the rest of the laptop
-
Pry until you are able to lift entire face and keyboard
-
Only cables should be connecting it underneath
-
-
Cette étape n’est pas traduite. Aidez à la traduire
-
Disconnect/ unplug cables using plastic opening tool.
-
Separate the keyboard panel from the laptop with your hands.
-
Turn around the laptop and lay it flat.
-
-
Cette étape n’est pas traduite. Aidez à la traduire
-
Use a spudger to pry around the first layer of the silver panel until you are able to remove it
-
-
Cette étape n’est pas traduite. Aidez à la traduire
-
Using a spudger tool, start prying around the second layer of the silver panel until you are able to remove it
-
-
Cette étape n’est pas traduite. Aidez à la traduire
-
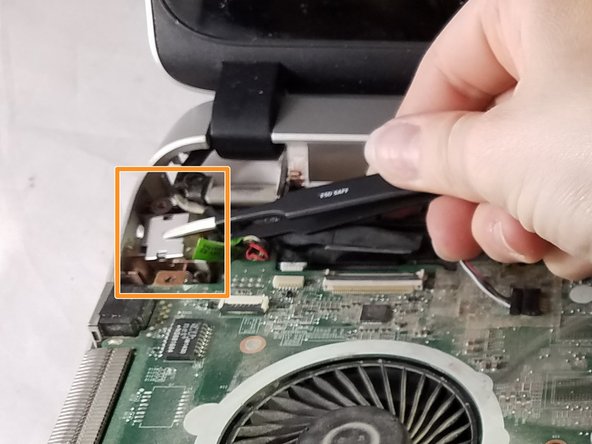
Remove all 6 screws (5.65 mm) from the motherboard, using Phillips screwdriver J0
-
There will be a silver covering (in a z shape) that needs to be removed using black tweezers or a plastic opening tool
-
-
Cette étape n’est pas traduite. Aidez à la traduire
-
Remove the two 5.66mm screws from the motherboard using Phillips head screwdriver J0
-
-
Cette étape n’est pas traduite. Aidez à la traduire
-
Remove entire motherboard from the laptop
-
Turn over and remove the single 5.63mm screw using a Phillips head screwdriver J0.
-
-
Cette étape n’est pas traduite. Aidez à la traduire
-
Remove wiring with plastic opening tool
-
Remove fan
-


Équipe

Eastern Washington University, Team S1-G4, Carnegie Fall 2017 Membre de l'équipe Eastern Washington University, Team S1-G4, Carnegie Fall 2017
EWU-CARNEGIE-F17S1G4
3 membres
4 tutoriels rédigés