Aller au contenu principal

HP Pavilion DV2160BR Inverter Replacement

Ce dont vous avez besoin

  1. HP Pavilion DV2160BR Inverter Replacement, Inverter: étape 1, image 1 de 1
    • Start with the laptop sitting up and open.

  2. HP Pavilion DV2160BR Inverter Replacement: étape 2, image 1 de 3 HP Pavilion DV2160BR Inverter Replacement: étape 2, image 2 de 3 HP Pavilion DV2160BR Inverter Replacement: étape 2, image 3 de 3
    • Remove the 6 rubber screw covers and screws, found around the edge of the laptop screen, surrounded in red and blue.

    • Use the plastic opener tools to remove the screw covers. Just apply firm pressure to the edges to pop the screw covers out, they are attached with a light adhesive.

    • There are four 2.5mm X 4mm-L Phillips #0 screws along the top.

    • There are two 2.5mm X 8mm-L Phillips #1 screws along the bottom.

  3. HP Pavilion DV2160BR Inverter Replacement: étape 3, image 1 de 2 HP Pavilion DV2160BR Inverter Replacement: étape 3, image 2 de 2
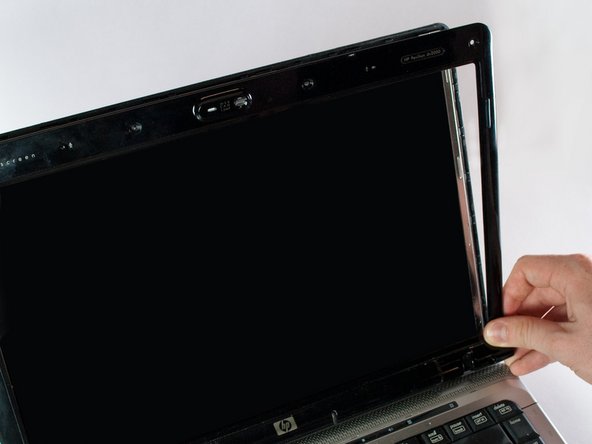
    • Slide a plastic opener tool along the outside edges of the front screen panel, separating it from the screen. You may need to apply some firm pressure.

    • Once the panel is separated from the screen, gently pull it off and set it aside.

  4. HP Pavilion DV2160BR Inverter Replacement: étape 4, image 1 de 2 HP Pavilion DV2160BR Inverter Replacement: étape 4, image 2 de 2
    • The inverter is located underneath the screen.

    • Unscrew the two 5mm Phillips #0 screws holding it in place, one on each end of the inverter.

  5. HP Pavilion DV2160BR Inverter Replacement: étape 5, image 1 de 2 HP Pavilion DV2160BR Inverter Replacement: étape 5, image 2 de 2
    • Disconnect the grey LCD cable on the left side of the inverter by holding the inverter in place and pulling firmly on the connector.

    • Disconnect the backlight plug cable on the right side of the inverter by holding the inverter in place and pulling firmly on the connector.

  6. HP Pavilion DV2160BR Inverter Replacement: étape 6, image 1 de 1
    • Remove the inverter from the device.

Conclusion

To reassemble your device, follow these instructions in reverse order.

3 autres ont terminé cette réparation.

Shannon

Membre depuis le 04/11/13

55 Réputation

6 tutoriels rédigés

Équipe

Cal Poly, Team 13-66, Johann Spring 2013 Membre de l'équipe Cal Poly, Team 13-66, Johann Spring 2013

CPSU-JOHANN-S13S13G66

3 membres

6 tutoriels rédigés

Un commentaire

Thank you for enriching my knowledge.

Hope to meet you again.

ashique mahamud - Réponse

Ajouter un commentaire

Nombre de vues :

Dernières 24 heures : 0

7 derniers jours : 0

30 derniers jours : 4

Total : 1,363