Aller au contenu principal

HP Pavilion Sleekbook 14-b013cl Screen Replacement

Ce dont vous avez besoin

  1. HP Pavilion Sleekbook 14-b013cl Screen Replacement, Battery: étape 1, image 1 de 2 HP Pavilion Sleekbook 14-b013cl Screen Replacement, Battery: étape 1, image 2 de 2
    • Flip the computer over and move the battery lock switch to the "unlocked" position (marked by an orange lock icon).

  2. HP Pavilion Sleekbook 14-b013cl Screen Replacement: étape 2, image 1 de 2 HP Pavilion Sleekbook 14-b013cl Screen Replacement: étape 2, image 2 de 2
    • Press the switch on the right-hand side of the back of the device towards the center until the gray battery icon is no longer visible. This will eject the battery.

  3. HP Pavilion Sleekbook 14-b013cl Screen Replacement: étape 3, image 1 de 2 HP Pavilion Sleekbook 14-b013cl Screen Replacement: étape 3, image 2 de 2
    • Carefully pull the battery away from the device.

  4. HP Pavilion Sleekbook 14-b013cl Screen Replacement, Screen: étape 4, image 1 de 3 HP Pavilion Sleekbook 14-b013cl Screen Replacement, Screen: étape 4, image 2 de 3 HP Pavilion Sleekbook 14-b013cl Screen Replacement, Screen: étape 4, image 3 de 3
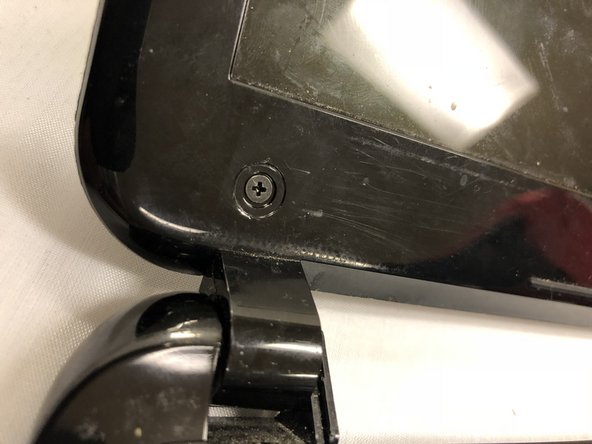
    • Using a 1.0 Flathead screwdriver, remove the two stickers covering the screws that hold the screen in place.

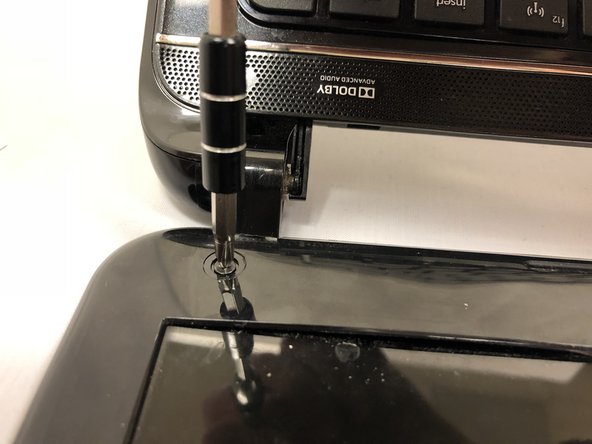
    • Use a Phillips #1 screwdriver to remove the two 3.2mm screws that are now visible.

  5. HP Pavilion Sleekbook 14-b013cl Screen Replacement: étape 5, image 1 de 3 HP Pavilion Sleekbook 14-b013cl Screen Replacement: étape 5, image 2 de 3 HP Pavilion Sleekbook 14-b013cl Screen Replacement: étape 5, image 3 de 3
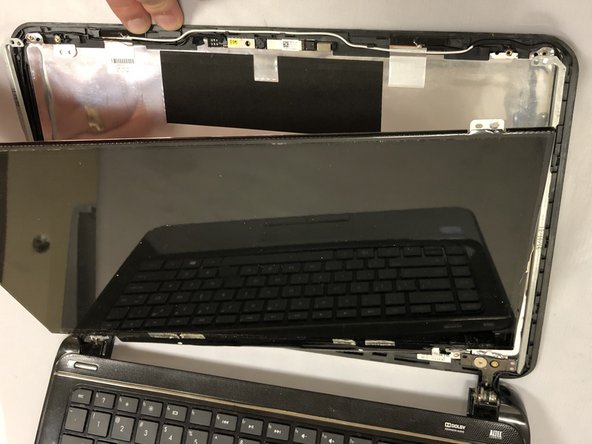
    • Using a plastic opening tool, pry the plastic screen protector off, sliding the tool along the seam. Press the tool in until you hear the plastic tabs clicking as they come undone.

    • Separate the plastic that makes up the hinges for the screen, as they are part of the same screen protector.

    • Use your hands or plastic tool to peel the screen protector away from the adhesive holding it in place.

  6. HP Pavilion Sleekbook 14-b013cl Screen Replacement: étape 6, image 1 de 2 HP Pavilion Sleekbook 14-b013cl Screen Replacement: étape 6, image 2 de 2
    • Using a Phillips #1 screwdriver, remove the six 2.8mm screws holding the screen in place.

    • Lift the screen away from the cover until you have access to the connector cable near the bottom of the screen.

  7. HP Pavilion Sleekbook 14-b013cl Screen Replacement: étape 7, image 1 de 2 HP Pavilion Sleekbook 14-b013cl Screen Replacement: étape 7, image 2 de 2
    • Peel away any sticker holding the connector in place and simply pull the tab out of the connector parallel with the screen.

    • Remove the screen from the device.

Conclusion

To reassemble your device, follow these instructions in reverse order.

Une autre personne a terminé cette réparation.

Duncan Steele

Membre depuis le 04/10/18

308 Réputation

2 tutoriels rédigés

0 commentaires

Ajouter un commentaire

Nombre de vues :

Dernières 24 heures : 2

7 derniers jours : 5

30 derniers jours : 6

Total : 451