Aller au contenu principal

HP Pavilion TPN-C125 RAM Replacement

Ce dont vous avez besoin

  1. HP Pavilion TPN-C125 RAM Replacement, RAM: étape 1, image 1 de 2 HP Pavilion TPN-C125 RAM Replacement, RAM: étape 1, image 2 de 2
    • Flip the laptop over so the bottom is facing up and the external battery is at the top.

  2. HP Pavilion TPN-C125 RAM Replacement: étape 2, image 1 de 2 HP Pavilion TPN-C125 RAM Replacement: étape 2, image 2 de 2
    • Use your thumbs to slide the battery locks towards the center and pop the battery out.

  3. HP Pavilion TPN-C125 RAM Replacement: étape 3, image 1 de 2 HP Pavilion TPN-C125 RAM Replacement: étape 3, image 2 de 2
    • Slowly peel off the two rubber stoppers found at the top corners of the laptop.

    • This will expose two Philips #00 10 mm screws required to remove the back plate.

    • Be careful not to peel off the rubber stoppers too quickly as it could cause the adhesive on the rubber stopper to strip off.

  4. HP Pavilion TPN-C125 RAM Replacement: étape 4, image 1 de 2 HP Pavilion TPN-C125 RAM Replacement: étape 4, image 2 de 2
    • Use a Phillips #00 screwdriver to remove the twelve 10 mm screws (from the twelve holes shown) that secure the bottom case.

    • Use an opening tool to carefully separate the back case from the chassis, working around all four sides.

    • You will hear a "click" as you release the clips and remove it.

  5. HP Pavilion TPN-C125 RAM Replacement: étape 5, image 1 de 3 HP Pavilion TPN-C125 RAM Replacement: étape 5, image 2 de 3 HP Pavilion TPN-C125 RAM Replacement: étape 5, image 3 de 3
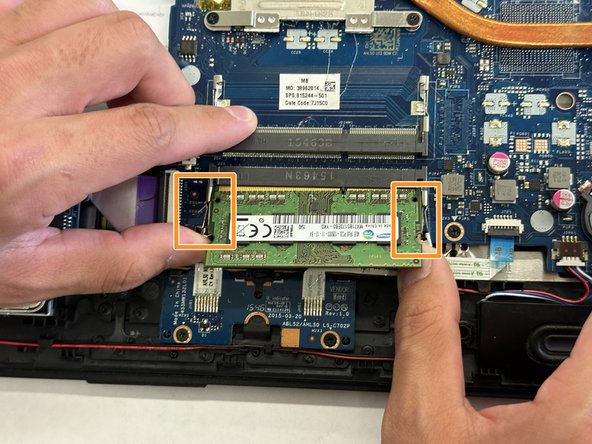
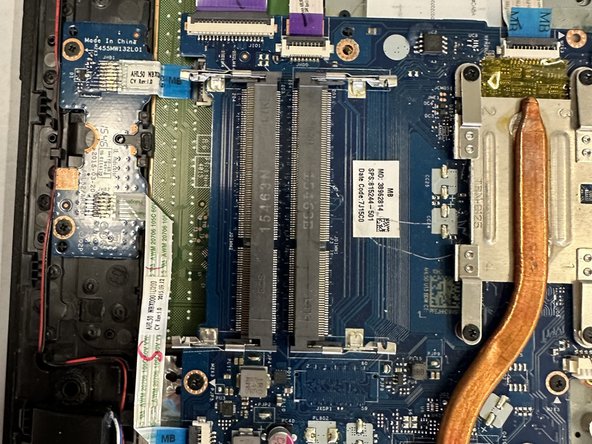
    • The RAM sticks can be found in the bottom right section of the laptop.

    • Push both side arms holding the RAM stick in place outwards.

    • The RAM sticks will "pop" up at a 45-degree angle when released from the arms.

    • Slide the RAM sticks out of the socket gently.

  6. HP Pavilion TPN-C125 RAM Replacement: étape 6, image 1 de 3 HP Pavilion TPN-C125 RAM Replacement: étape 6, image 2 de 3 HP Pavilion TPN-C125 RAM Replacement: étape 6, image 3 de 3
    • Carefully slide the new replacement RAM sticks into their slots.

    • Make sure to align edge of the RAM sticks with the slots to avoid damaging both.

    • Gently push the RAM sticks downward until the latches click into place to secure them.

Conclusion

To reassemble your device, follow these instructions in reverse order.

Cesar Gomez

Membre depuis le 03/05/24

183 Réputation

1 tutoriel rédigé

Équipe

CSU Los Angeles, Team 7-10, Grodsky Spring 2024 Membre de l'équipe CSU Los Angeles, Team 7-10, Grodsky Spring 2024

CSULA-GRODSKY-S24S7G10

2 membres

1 tutoriel rédigé

0 commentaires

Ajouter un commentaire

Nombre de vues :

Dernières 24 heures : 0

7 derniers jours : 17

30 derniers jours : 42

Total : 117