Cette version peut contenir des modifications incorrectes. Passez au dernier aperçu vérifié.
Ce dont vous avez besoin
-
Cette étape n’est pas traduite. Aidez à la traduire
-
Remove rubber screw covers from the LCD screen. The top covers pop off with a fingernail but the two on the bottom may require a screwdriver or flat tool.
-
Remove the six 7.15mm screws underneath the stoppers. There are four on top and two on bottom.
-
-
Cette étape n’est pas traduite. Aidez à la traduire
-
Press the tabs on the sides of the screen in and pop the plastic off. Careful, the plastic is very flimsy and may break.
-
-
-
Cette étape n’est pas traduite. Aidez à la traduire
-
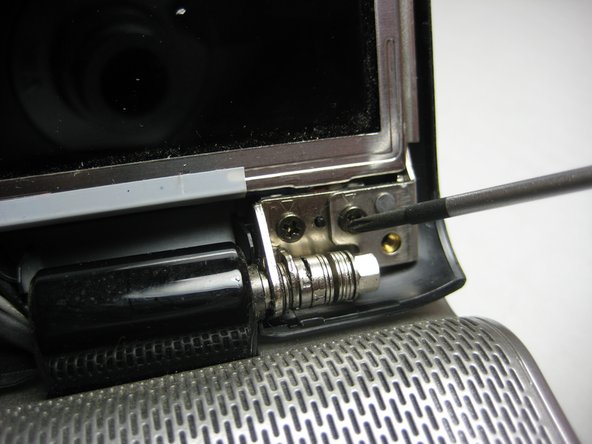
Remove the two screws (5.8mm) on either side of the LCD near the hinge. Remove the screws on the outermost side first.
-
-
Cette étape n’est pas traduite. Aidez à la traduire
-
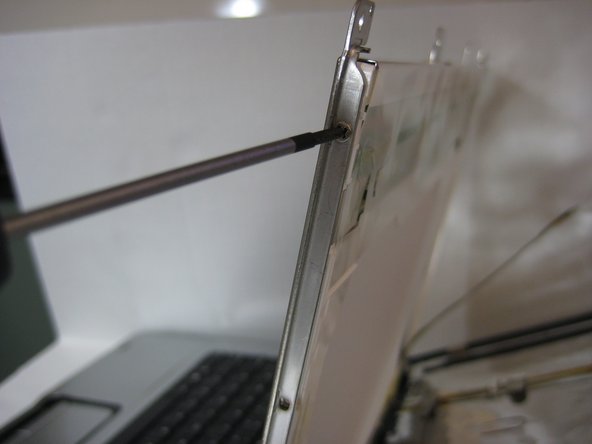
Take out the two 3.58mm screws on the LCD at the top (one on each edge).
-
-
Cette étape n’est pas traduite. Aidez à la traduire
-
Hold on to the LCD screen to prevent it from falling over and remove the two 3.58mm screws on the sides at the bottom.
-
-
Cette étape n’est pas traduite. Aidez à la traduire
-
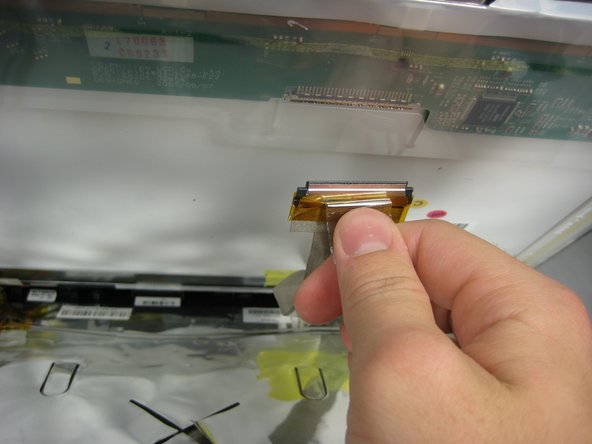
Let the screen gently rest on the keyboard.
-
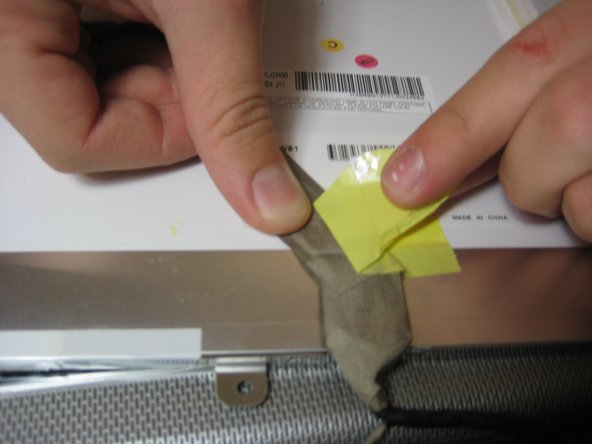
Remove the tape from the ribbon.
-


Annulation : je n'ai pas terminé ce tutoriel.
15 autres ont terminé cette réparation.
Équipe

Cal Poly, Team 21-33, Regan Fall 2010 Membre de l'équipe Cal Poly, Team 21-33, Regan Fall 2010
CPSU-REGAN-F10S21G33
4 membres
12 tutoriels rédigés
Un commentaire
after replacing my cracked screen the back light does not show again