Cette version peut contenir des modifications incorrectes. Passez au dernier aperçu vérifié.
Ce dont vous avez besoin
-
Cette étape n’est pas traduite. Aidez à la traduire
-
Push the battery latch to the left to release the battery.
-
-
Cette étape n’est pas traduite. Aidez à la traduire
-
Use a Phillips #0 screw driver to loosen the screw. The screw will not detach from the cover.
-
-
-
Cette étape n’est pas traduite. Aidez à la traduire
-
Place your hand on the cover and slide the cover down.
-
Use your hand to lift the cover from the bottom right and slide the cover to the right to remove the cover.
-
-
Cette étape n’est pas traduite. Aidez à la traduire
-
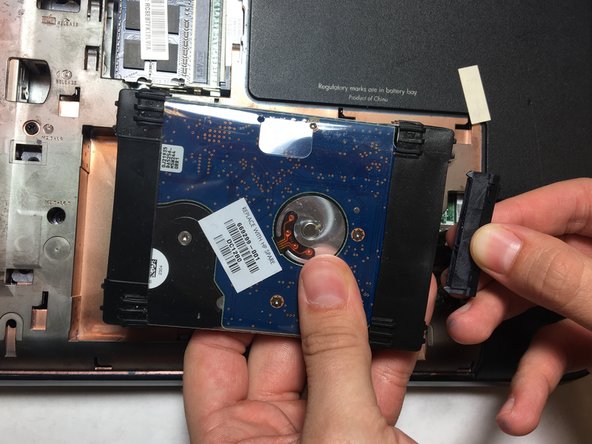
Place one finger on the right side of the hard drive.
-
Push the hard drive to the left and lift the hard drive up to remove it from the device.
-
-
Cette étape n’est pas traduite. Aidez à la traduire
-
Disconnect the connecting part by pulling the part to the right.
-
Remove the hard drive from the device.
-


Annulation : je n'ai pas terminé ce tutoriel.
Une autre personne a terminé cette réparation.
Équipe

UC Davis, Team S4-G6, Lore Fall 2018 Membre de l'équipe UC Davis, Team S4-G6, Lore Fall 2018
UCD-LORE-F18S4G6
3 membres
4 tutoriels rédigés