Cette version peut contenir des modifications incorrectes. Passez au dernier aperçu vérifié.
Ce dont vous avez besoin
-
Cette étape n’est pas traduite. Aidez à la traduire
-
First, begin by removing the printer's hood.
-
Open the printer's mouth by simply pulling down on it; there are 2 mouth pieces that need to be pulled down.
-
Adjust the flap covering the scanner upward, as shown.
-
-
Cette étape n’est pas traduite. Aidez à la traduire
-
Remove the flap for the scanner. The flap is attached with two clips that can be dislodged by pulling lightly away from the printer.
-
-
Cette étape n’est pas traduite. Aidez à la traduire
-
Locate the three screws on top of the printer.
-
The orange circle shows a fourth screw located behind the power panel. Directions to remove this screw are in a later step.
-
-
Cette étape n’est pas traduite. Aidez à la traduire
-
Remove the three screws from the top of the printer with a T-9 screwdriver as shown.
-
-
-
Cette étape n’est pas traduite. Aidez à la traduire
-
To access and remove the fourth and final screw attaching the hood, the panel for the power button must be removed as follows:
-
Reach into the mouth of the printer and press on the small clip behind the power button. This allows the panel of the power button to be removed.
-
After pressing the clip, pull out the power button panel by pulling from right to left.
-
-
Cette étape n’est pas traduite. Aidez à la traduire
-
Remove the exposed screw that was covered by the power button panel.
-
-
Cette étape n’est pas traduite. Aidez à la traduire
-
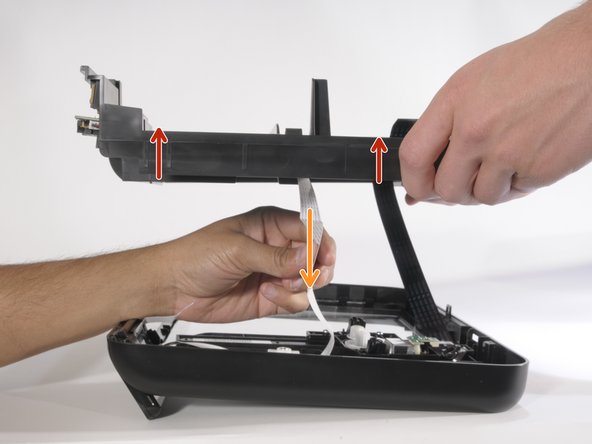
This step is easier with two people. Carefully have one person lift the hood of the printer 2-3 inches above where it was resting.
-
Remove the ribbon cables and wires attaching the motherboard (the only green PCB board) to the hood by gently pulling upward on them.
-
When all three cables are removed, lift the hood away from the printer and set it aside.
-
-
Cette étape n’est pas traduite. Aidez à la traduire
-
After being separated from the printer, the hood is ready to be disassembled.
-
Remove the only screw on the printer hood's underside, as shown. Use a T-9 screwdriver.
-
-
Cette étape n’est pas traduite. Aidez à la traduire
-
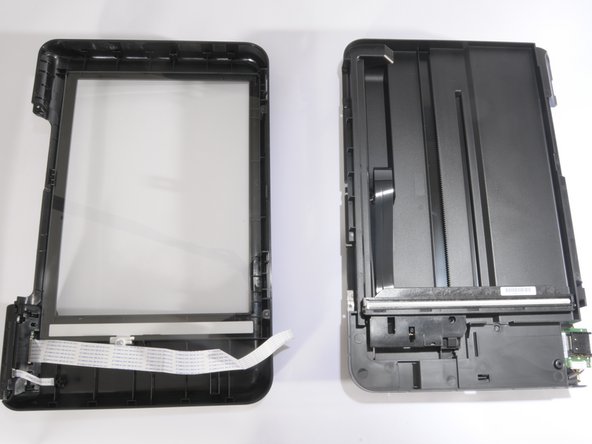
With the screw removed, separate the two pieces of the hood by lifting it vertically.
-
Carefully pull down the white ribbon cable through the top piece of the hood.
-
-
Cette étape n’est pas traduite. Aidez à la traduire
-
Set the piece of the hood down such that no stress is applied to the scanner as it is attached by ribbon cable.
-


Annulation : je n'ai pas terminé ce tutoriel.
Une autre personne a terminé cette réparation.
Équipe

Cal Poly, Team 10-38, Forte Spring 2011 Membre de l'équipe Cal Poly, Team 10-38, Forte Spring 2011
CPSU-FORTE-S11S10G38
5 membres
10 tutoriels rédigés