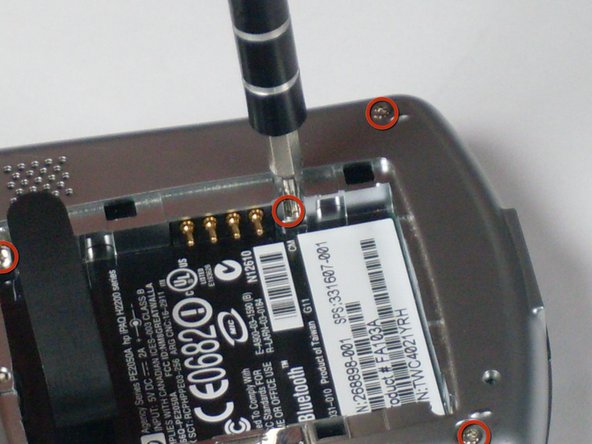
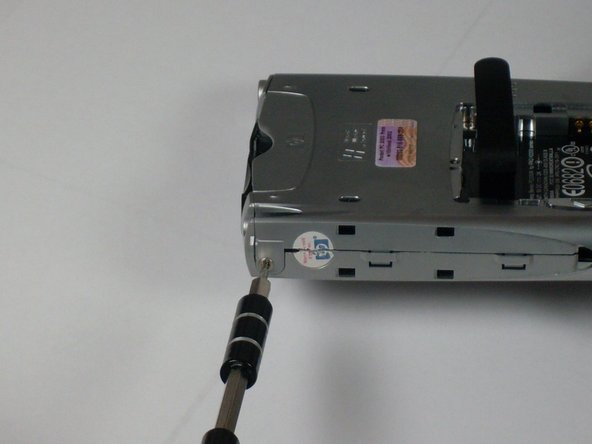
Aller au contenu principal

HP iPAQ H2200 motherbaord replacement

Ce dont vous avez besoin

  1. HP iPAQ H2200 motherbaord replacement, Battery: étape 1, image 1 de 1
    • Press and slide the battery cover tab to remove battery cover.

  2. HP iPAQ H2200 motherbaord replacement: étape 2, image 1 de 2 HP iPAQ H2200 motherbaord replacement: étape 2, image 2 de 2
    • Pull on the black tab to lift the battery out of the battery compartment.

  3. HP iPAQ H2200 motherbaord replacement, Main Board: étape 3, image 1 de 1
    • Remove the stylus by sliding it out of the slot.

  4. HP iPAQ H2200 motherbaord replacement: étape 4, image 1 de 1
    • Remove the CF card by sliding it out of the slot at the top of the device.

  5. HP iPAQ H2200 motherbaord replacement: étape 5, image 1 de 1
    • Press down and push the black side strips toward the top of the device to remove them.

  6. HP iPAQ H2200 motherbaord replacement: étape 6, image 1 de 3 HP iPAQ H2200 motherbaord replacement: étape 6, image 2 de 3 HP iPAQ H2200 motherbaord replacement: étape 6, image 3 de 3
    • Using the T5 Torx screwdriver, remove all six screws on the back and all screws on each side of the device.

  7. HP iPAQ H2200 motherbaord replacement: étape 7, image 1 de 2 HP iPAQ H2200 motherbaord replacement: étape 7, image 2 de 2
    • Remove the back faceplate by pushing and loosening the 4 side slots (2 on each side).

  8. HP iPAQ H2200 motherbaord replacement: étape 8, image 1 de 1
    • Open the LCD connector, where the orange strip attaches to the main board.

  9. HP iPAQ H2200 motherbaord replacement: étape 9, image 1 de 1
    • Carefully remove the orange LCD strip from the connector.

  10. HP iPAQ H2200 motherbaord replacement: étape 10, image 1 de 1
    • Unscrew the 2 screws located at each top corner of the main board.

  11. HP iPAQ H2200 motherbaord replacement: étape 11, image 1 de 1
    • Remove the main board by pushing outward on the two tabs located on each side near the bottom of the device.

Conclusion

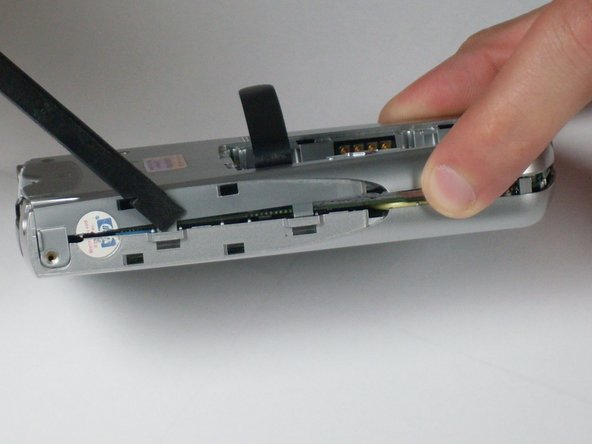
To reassemble your device, follow these instructions in reverse order.

4 autres ont terminé cette réparation.

Tyler Andrews

Membre depuis le 01/13/10

209 Réputation

5 tutoriels rédigés

Équipe

Cal Poly, Team 4-12, Forte Winter 2010 Membre de l'équipe Cal Poly, Team 4-12, Forte Winter 2010

CPSU-FORTE-W10S4G12

3 membres

5 tutoriels rédigés

0 commentaires

Ajouter un commentaire

Nombre de vues :

Dernières 24 heures : 0

7 derniers jours : 1

30 derniers jours : 5

Total : 4,606