Aller au contenu principal

Ce tutoriel a des changements plus récents. Passer à la dernière version non vérifiée.

HP iPAQ h4155 Face Plate Replacement

Ce dont vous avez besoin

  1. HP iPAQ h4155 Face Plate Replacement, Battery: étape 1, image 1 de 1
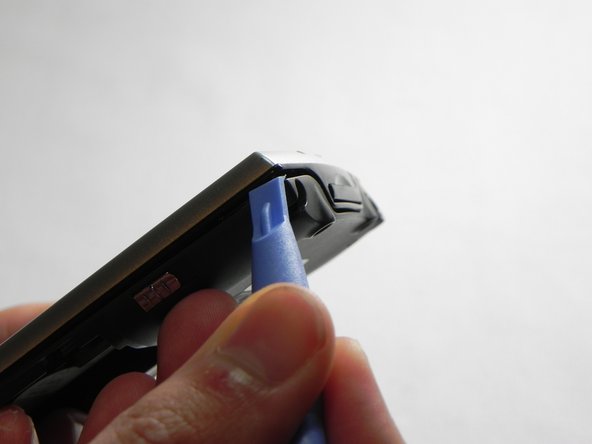
    • While sliding the silver release tab up, simultaneously lift the cover up from the left side.

  2. HP iPAQ h4155 Face Plate Replacement: étape 2, image 1 de 1
    • Push the tab left to right to remove the cover.

  3. HP iPAQ h4155 Face Plate Replacement: étape 3, image 1 de 1
    • Now, lift the battery up and away from the device to remove it.

  4. HP iPAQ h4155 Face Plate Replacement, Back Case: étape 4, image 1 de 1
    • Remove the four silver screws using the T5 Torx Screwdriver (T5 x .25 in).

  5. HP iPAQ h4155 Face Plate Replacement: étape 5, image 1 de 1
    • Remove the single black screw that is located beneath the HP sticker with the T5 Torx Screwdriver.

  6. HP iPAQ h4155 Face Plate Replacement: étape 6, image 1 de 2 HP iPAQ h4155 Face Plate Replacement: étape 6, image 2 de 2
    • Next, use your plastic removal tool to separate the gray back from the black center piece.

    • For better results, start the separation at the corner piece.

  7. HP iPAQ h4155 Face Plate Replacement: étape 7, image 1 de 1
    • Remove the back case.

  8. HP iPAQ h4155 Face Plate Replacement, Face Plate: étape 8, image 1 de 1
    • Now that the back cover is removed, remove the small screw (#00 Philips x .17) to the left of the SD card slot

  9. HP iPAQ h4155 Face Plate Replacement: étape 9, image 1 de 2 HP iPAQ h4155 Face Plate Replacement: étape 9, image 2 de 2
    • Next you will need to unlock and remove the ribbon cable

    • Carefully pull back on both sides of the brown bar using metal tweezers, unlocking the cable and slipping it out of the connector

    • The bar, connector, and cable are fragile components that can be easily broken

  10. HP iPAQ h4155 Face Plate Replacement: étape 10, image 1 de 2 HP iPAQ h4155 Face Plate Replacement: étape 10, image 2 de 2
    • Next you need to remove the wire off the bottom of the mother board

    • The easiest method is to use some metal tweezers and grip the plug close to the connector.

    • Make sure all these connections are properly disconnected before separation of the motherboard

  11. HP iPAQ h4155 Face Plate Replacement: étape 11, image 1 de 1
    • Next use your plastic removal tool and separate the silver front case from the black frame.

Conclusion

To reassemble your device, follow these instructions in reverse order.

Une autre personne a terminé cette réparation.

John Pagliero

Membre depuis le 01/27/11

942 Réputation

7 tutoriels rédigés

0 commentaires

Ajouter un commentaire

Nombre de vues :

Dernières 24 heures : 0

7 derniers jours : 2

30 derniers jours : 5

Total : 1,387