Aller au contenu principal

HTC HD2 Camera Replacement

Ce dont vous avez besoin

  1. HTC HD2 Camera Replacement, Battery: étape 1, image 1 de 1
    • Carefully pull the rear cover from the back of the phone.

    • Place a finger beneath the small lip on the left side of the battery.

  2. HTC HD2 Camera Replacement: étape 2, image 1 de 2 HTC HD2 Camera Replacement: étape 2, image 2 de 2
    • Lay the phone down on it's screen.

    • Lift up on the lip and pull the battery from the phone.

  3. HTC HD2 Camera Replacement, Midframe: étape 3, image 1 de 2 HTC HD2 Camera Replacement, Midframe: étape 3, image 2 de 2
    • Remove the four black 3.5mm T5 screws from the back of the phone.

  4. HTC HD2 Camera Replacement: étape 4, image 1 de 2 HTC HD2 Camera Replacement: étape 4, image 2 de 2
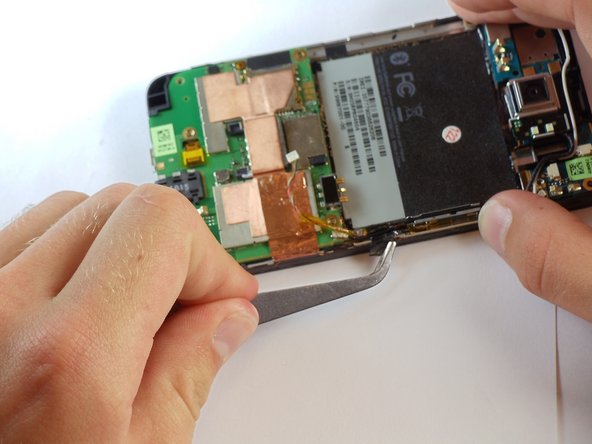
    • Insert the flat end of a spudger between the midframe and the display.

    • Slide the spudger along the seam between the frame and the display.

    • Using the spudger for leverage, carefully pry the midframe away from the display assembly.

    • This process will take some effort. Continue to pry slowly and carefully until the frame begins to detach.

    • As it releases, pull the midframe away from the phone.

    • The volume control tab may fall off during removal. It can be easily reattached.

  5. HTC HD2 Camera Replacement, Camera: étape 5, image 1 de 3 HTC HD2 Camera Replacement, Camera: étape 5, image 2 de 3 HTC HD2 Camera Replacement, Camera: étape 5, image 3 de 3
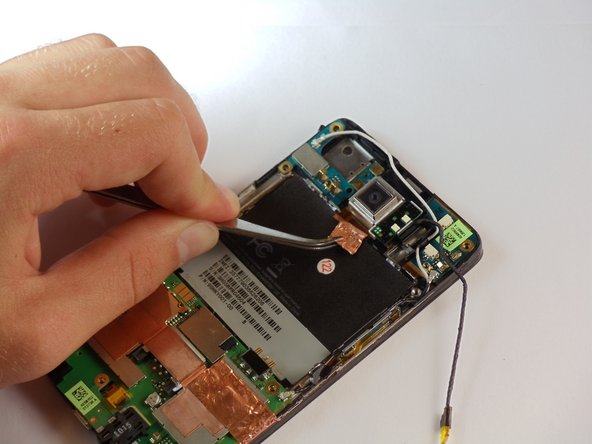
    • Disconnect the flash cable from its socket in the bottom of the motherboard.

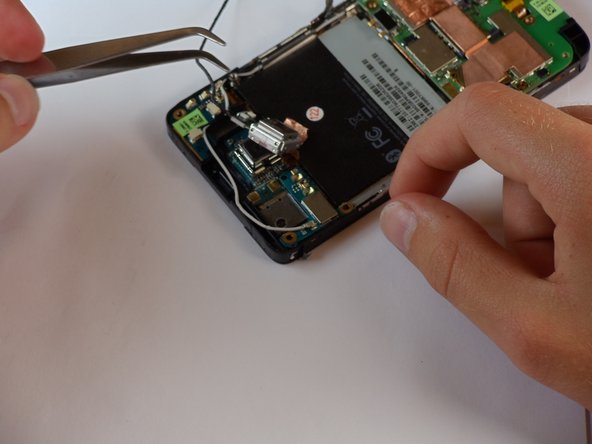
    • Carefully pull the cable from its groove in the frame, working your way back to the camera.

  6. HTC HD2 Camera Replacement: étape 6, image 1 de 3 HTC HD2 Camera Replacement: étape 6, image 2 de 3 HTC HD2 Camera Replacement: étape 6, image 3 de 3
    • Pull the camera flash and cover off of the board.

    • You may need to peel back the sticker that sits behind the battery.

    • Work carefully. Excessive force can damage the camera or motherboard.

  7. HTC HD2 Camera Replacement: étape 7, image 1 de 1
    • Around the camera is a thin shielding. Remove it with tweezers.

    • Using tweezers, remove the primary camera.

Conclusion

To reassemble your device, follow these instructions in reverse order.

2 autres ont terminé cette réparation.

Sam Luedloff

Membre depuis le 04/12/11

727 Réputation

3 tutoriels rédigés

Équipe

Cal Poly, Team 24-55, Amido Spring 2011 Membre de l'équipe Cal Poly, Team 24-55, Amido Spring 2011

CPSU-AMIDO-S11S24G55

5 membres

16 tutoriels rédigés

0 commentaires

Ajouter un commentaire

Nombre de vues :

Dernières 24 heures : 0

7 derniers jours : 0

30 derniers jours : 2

Total : 7,912