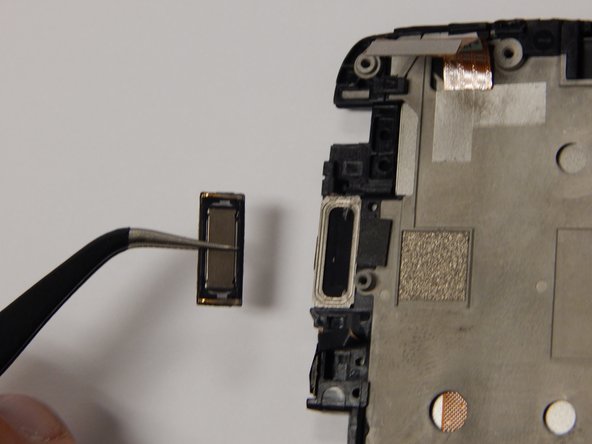
Aller au contenu principal

HTC One X Plus Top Speaker Replacement

Ce dont vous avez besoin

  1. HTC One X Plus Top Speaker Replacement, Top Speaker: étape 1, image 1 de 1
    • Hold down the power button to turn off your device.

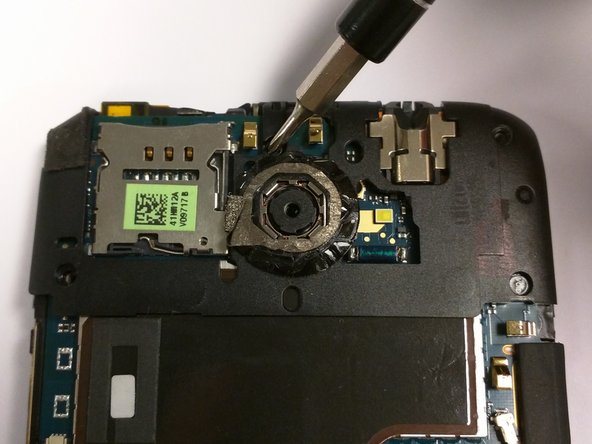
    • Insert a pin, paper clip, or another similar object into the hole next to the micro sim card holder to remove it.

    • The SIM card slot is located on the top edge of the device.

  2. HTC One X Plus Top Speaker Replacement: étape 2, image 1 de 3 HTC One X Plus Top Speaker Replacement: étape 2, image 2 de 3 HTC One X Plus Top Speaker Replacement: étape 2, image 3 de 3
    • Using plastic opening tools, pry open the bottom of the device.

    • You will hear clicking sounds as the sides of the device detach from the screen.

    • Once both sides are detached use the suction cup tool to remove the screen completely from the black casing.

  3. HTC One X Plus Top Speaker Replacement: étape 3, image 1 de 3 HTC One X Plus Top Speaker Replacement: étape 3, image 2 de 3 HTC One X Plus Top Speaker Replacement: étape 3, image 3 de 3
    • Remove the five 2.4mm screws located around the camera using a Philips head screwdriver to remove the plastic cover.

    • Once you have disassembled your device the warranty will no longer be valid.

  4. HTC One X Plus Top Speaker Replacement: étape 4, image 1 de 3 HTC One X Plus Top Speaker Replacement: étape 4, image 2 de 3 HTC One X Plus Top Speaker Replacement: étape 4, image 3 de 3
    • Use the J000 Philips screwdriver to remove the screws and remove the PCB board and antenna.

    • These are two 3.4mm Philips head screws found in the lower right corner of the phone.

  5. HTC One X Plus Top Speaker Replacement: étape 5, image 1 de 2 HTC One X Plus Top Speaker Replacement: étape 5, image 2 de 2
    • Pull out the power button flex cable using tweezers to disconnect from the phone.

    • Use the tweezers to then disconnect the touch screen flex cable.

  6. HTC One X Plus Top Speaker Replacement: étape 6, image 1 de 3 HTC One X Plus Top Speaker Replacement: étape 6, image 2 de 3 HTC One X Plus Top Speaker Replacement: étape 6, image 3 de 3
    • Remove the battery connections to the logic board.

    • This is the six pin connector seen in the red box.

    • Pull the battery away to remove from the back of the screen.

  7. HTC One X Plus Top Speaker Replacement: étape 7, image 1 de 2 HTC One X Plus Top Speaker Replacement: étape 7, image 2 de 2
    • CAUTION: carefully remove the top speaker from the phone using tweezers.

Conclusion

To reassemble your device, follow these instructions in reverse order.

Une autre personne a terminé cette réparation.

Jason Melo

Membre depuis le 08/26/15

483 Réputation

4 tutoriels rédigés

Équipe

USF Tampa, Team 3-3, Eyestone Fall 2015 Membre de l'équipe USF Tampa, Team 3-3, Eyestone Fall 2015

USFT-EYESTONE-F15S3G3

3 membres

10 tutoriels rédigés

0 commentaires

Ajouter un commentaire

Nombre de vues :

Dernières 24 heures : 0

7 derniers jours : 0

30 derniers jours : 0

Total : 419