Aller au contenu principal

HTC Thunderbolt Speaker Replacement

Ce dont vous avez besoin

  1. HTC Thunderbolt Speaker Replacement, Rear Panel: étape 1, image 1 de 1
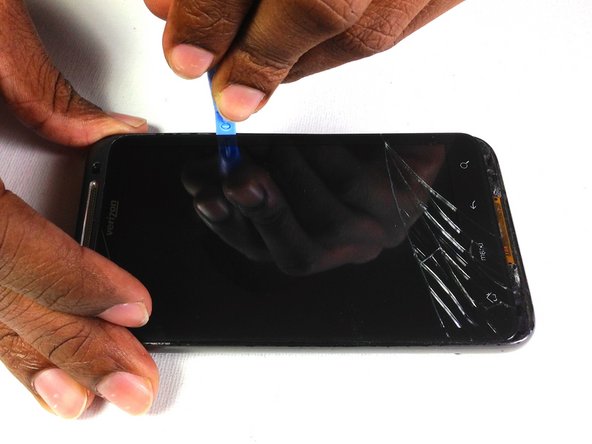
    • Insert the plastic opening tool into the top of the Thunderbolt near the power button.

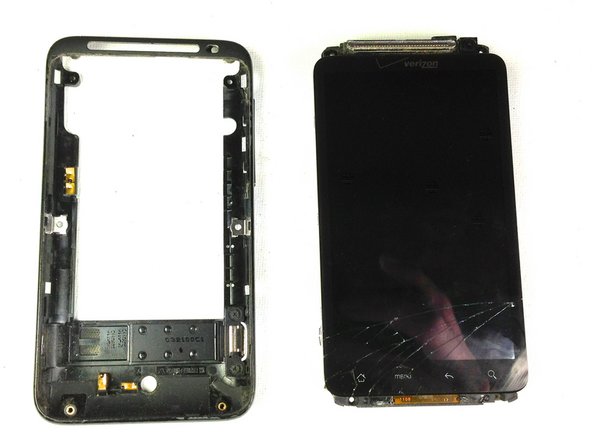
    • Gently pry up on the rear panel around the edges until it is loose.

  2. HTC Thunderbolt Speaker Replacement: étape 2, image 1 de 1
    • Lift and remove the rear panel.

  3. HTC Thunderbolt Speaker Replacement, Battery: étape 3, image 1 de 2 HTC Thunderbolt Speaker Replacement, Battery: étape 3, image 2 de 2
    • Using the plastic opening tool, lift up the battery from the bottom near the kickstand.

    • Remove the battery from the inner frame.

  4. HTC Thunderbolt Speaker Replacement, Rear Frame: étape 4, image 1 de 1
    • Remove the six Phillips screws from the perimeter of the rear frame.

    • By removing the screw with the "void" sticker on it, your Thunderbolt will no longer be covered under warranty.

  5. HTC Thunderbolt Speaker Replacement: étape 5, image 1 de 2 HTC Thunderbolt Speaker Replacement: étape 5, image 2 de 2
    • Insert the plastic opening tool into the bottom of the phone underneath the soft keys.

    • Gently pry up on the plastic cover by sliding the plastic opening tool across the bottom of the phone.

    • Remove the plastic cover.

    • The plastic cover will have adhesive on it making it difficult to remove.

  6. HTC Thunderbolt Speaker Replacement: étape 6, image 1 de 1
    • Remove the two Phillips screws where the plastic cover was.

  7. HTC Thunderbolt Speaker Replacement: étape 7, image 1 de 2 HTC Thunderbolt Speaker Replacement: étape 7, image 2 de 2
    • Insert the plastic opening tool in between the screen and the frame on the side of the phone.

    • Slowly slide the the plastic opening tool along the side of the phone until the screen begins to separate from the frame.

    • Do the same for the opposite side of the phone.

  8. HTC Thunderbolt Speaker Replacement: étape 8, image 1 de 3 HTC Thunderbolt Speaker Replacement: étape 8, image 2 de 3 HTC Thunderbolt Speaker Replacement: étape 8, image 3 de 3
    • Carefully separate the screen and phone from the rear frame, starting from the bottom.

    • Gently pull down on the phone and screen to fully separate it from the rear frame.

  9. HTC Thunderbolt Speaker Replacement, Rear Inner Frame: étape 9, image 1 de 1
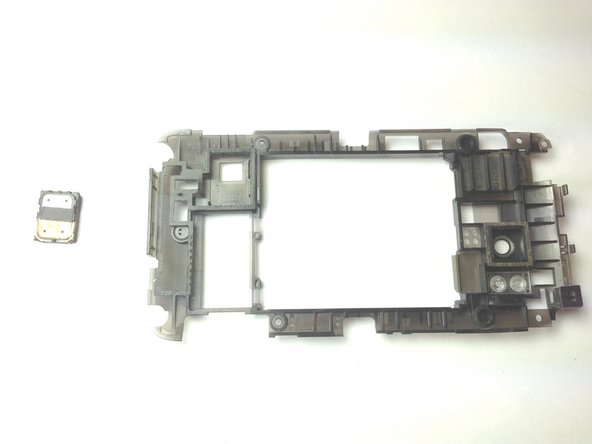
    • Remove the two Phillips screws securing rear inner frame to device.

  10. HTC Thunderbolt Speaker Replacement: étape 10, image 1 de 1
    • Insert the plastic opening tool between the rear inner frame and the motherboard and slowly work your way around the device.

  11. HTC Thunderbolt Speaker Replacement: étape 11, image 1 de 2 HTC Thunderbolt Speaker Replacement: étape 11, image 2 de 2
    • Remove the rear inner frame from the rest of the device.

  12. HTC Thunderbolt Speaker Replacement, Speaker: étape 12, image 1 de 1
    • Flip over rear inner frame.

  13. HTC Thunderbolt Speaker Replacement: étape 13, image 1 de 2 HTC Thunderbolt Speaker Replacement: étape 13, image 2 de 2
    • Pry out speaker with plastic opening tools.

    • You have now removed the speaker.

Conclusion

To reassemble your device, follow these instructions in reverse order.

Brandon Younger

Membre depuis le 01/17/13

212 Réputation

8 tutoriels rédigés

Équipe

Cal Poly, Team 19-45, Regan Winter 2013 Membre de l'équipe Cal Poly, Team 19-45, Regan Winter 2013

CPSU-REGAN-W13S19G45

4 membres

24 tutoriels rédigés

0 commentaires

Ajouter un commentaire

Nombre de vues :

Dernières 24 heures : 0

7 derniers jours : 0

30 derniers jours : 0

Total : 622