Aller au contenu principal

HVAC Filter Replacement

Ce dont vous avez besoin

  1. HVAC Filter Replacement, Filter: étape 1, image 1 de 1
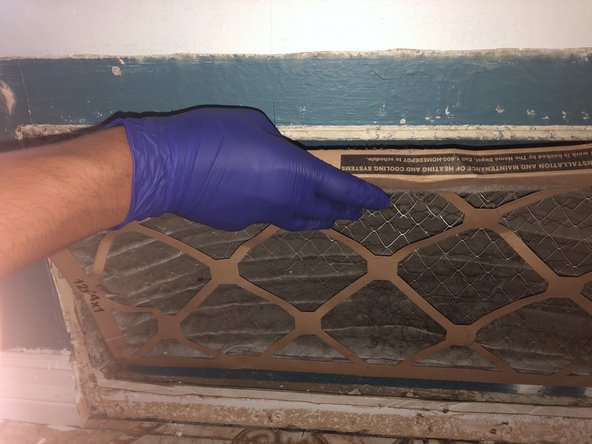
    • Observe your air conditioning vent. If the filter appears to be dirty or damaged, then it is time to change it.

  2. HVAC Filter Replacement: étape 2, image 1 de 1
    • Remove the screws on the vent cover. There should be a minimum of 4 screws in each corner of the vent.

    • The screws in this vent are phillips hex head screws that are 1 3/4 in. long.

  3. HVAC Filter Replacement: étape 3, image 1 de 1
    • Grab a screwdriver with a hex head attachment to remove the screws. Grab the screwdriver and place it on the head of the screw. Twist in a counterclockwise motion until the screw is removed. Repeat for every screw.

  4. HVAC Filter Replacement: étape 4, image 1 de 1
    • Remove the vent cover to access the ventilation filter.

  5. HVAC Filter Replacement: étape 5, image 1 de 1
    • Optional: Put on a latex glove on the hand that you will use to remove the filter.

  6. HVAC Filter Replacement: étape 6, image 1 de 1
    • Remove the filter carefully.

    • Make sure to remove it slowly so that the dust does not come of it.

  7. HVAC Filter Replacement: étape 7, image 1 de 1
    • Dispose of the old filter in a waste bin.

  8. HVAC Filter Replacement: étape 8, image 1 de 1
    • Buy a Honeywell Air Filter from Home Depot and make sure to buy the filter with the correct dimensions.

    • The dimensions for filters will vary depending on the dimensions of the vent.

    • In this case, my vent was 14x25x1 and thus needed a filter with the same dimensions.

  9. HVAC Filter Replacement: étape 9, image 1 de 1
    • Place the new filter into the vent opening. Make sure that it is facing the right direction.

    • There will be an arrow on the side of the filter showing which way to place it.

  10. HVAC Filter Replacement: étape 10, image 1 de 1
    • Place vent cover.

  11. HVAC Filter Replacement: étape 11, image 1 de 1
    • Grab the same screws that were taken out at Step 3 and use them to secure the vent cover.

    • Place the screwdriver on the head of the screw and twist in a clockwise motion until screw is secure.

    • Repeat for every screw.

  12. HVAC Filter Replacement: étape 12, image 1 de 1
    • Turn on your air conditioner to make sure the filter does not move.

    • If the filter does not move, then you have successfully replaced the filter of your air conditioner.

Conclusion

To reassemble your device, follow these instructions in reverse order.

2 autres ont terminé cette réparation.

Anthony Estevez

Membre depuis le 10/20/23

31 Réputation

1 tutoriel rédigé

Équipe

CSU Los Angeles, Team 2-1, Briggs Fall 2023 Membre de l'équipe CSU Los Angeles, Team 2-1, Briggs Fall 2023

CSULA-BRIGGS-F23S2G1

6 membres

5 tutoriels rédigés

0 commentaires

Ajouter un commentaire

Nombre de vues :

Dernières 24 heures : 1

7 derniers jours : 6

30 derniers jours : 19

Total : 110