Aller au contenu principal
Pour réparer ensemble - Je crée un compte

Hamilton Beach 48464 Front Buttons Replacement

Ce dont vous avez besoin

    1. Hamilton Beach 48464 Front Buttons Replacement, Base: étape 1, image 1 de 1
      • This is what the bottom cover will look like. Flip the Brew Station upside down to easily access the screws.

      Demander à FixBot

      Ajouter un commentaire

    2. Hamilton Beach 48464 Front Buttons Replacement: étape 2, image 1 de 3 Hamilton Beach 48464 Front Buttons Replacement: étape 2, image 2 de 3 Hamilton Beach 48464 Front Buttons Replacement: étape 2, image 3 de 3
      • Using the Philips 2 Screwdriver, unscrew the three 8-mm screws labeled in a red outline.

      • Using the Crown Bolt #8 Steel Spanner, unscrew the two 8-mm screws labeled in a orange outline.

      Demander à FixBot

      Ajouter un commentaire

    3. Hamilton Beach 48464 Front Buttons Replacement: étape 3, image 1 de 1
      • Carefully slide off the bottom drip tray by sliding it out away from the Brew Station.

      Demander à FixBot

      Ajouter un commentaire

    4. Hamilton Beach 48464 Front Buttons Replacement: étape 4, image 1 de 1
      • Gently lift the base away from the Brew Station.

      Demander à FixBot

      Ajouter un commentaire

    1. Hamilton Beach 48464 Front Buttons Replacement, Power Cord: étape 5, image 1 de 2 Hamilton Beach 48464 Front Buttons Replacement, Power Cord: étape 5, image 2 de 2
      • Using the Philips 2 Screwdriver, unscrew the two 8-mm screws labeled in a red outline.

      Demander à FixBot

      Ajouter un commentaire

    2. Hamilton Beach 48464 Front Buttons Replacement: étape 6, image 1 de 1
      • Using the Philips 2 Screwdriver, unscrew the two 8-mm screws labeled in a red outline. This will release the bracket that is holding down the large piece in the middle.

      Demander à FixBot

      Ajouter un commentaire

    3. Hamilton Beach 48464 Front Buttons Replacement: étape 7, image 1 de 1
      • Using one hand, gently lift the large silver piece out of the base.

      • The silver piece will still be connected to the Brew Station, so handy it with care.

      • Using the Philips 2 Screwdriver, unscrew the two 8-mm screws labeled in a red outline.

      Demander à FixBot

      Ajouter un commentaire

    4. Hamilton Beach 48464 Front Buttons Replacement: étape 8, image 1 de 1
      • Once the screw is out, gently lift the white circuit board out of the base. This will be where the power cord begins, so you will now have access to the full length of the cord.

      Demander à FixBot

      Ajouter un commentaire

    1. Hamilton Beach 48464 Front Buttons Replacement, Front Panel: étape 9, image 1 de 2 Hamilton Beach 48464 Front Buttons Replacement, Front Panel: étape 9, image 2 de 2
      • Using one hand, hold all cords away from the front end of the Brew Station.

      • Using your other hand, use the Philips 2 Screwdriver to unscrew the two 8-mm screws labeled in a red outline. They are located inside the base on the front end of the Brew Station.

      Demander à FixBot

      Ajouter un commentaire

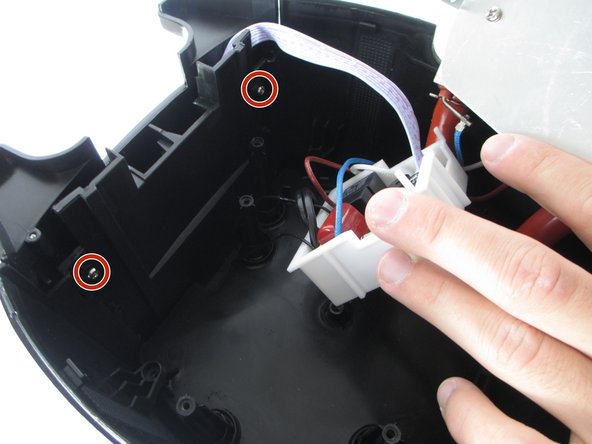
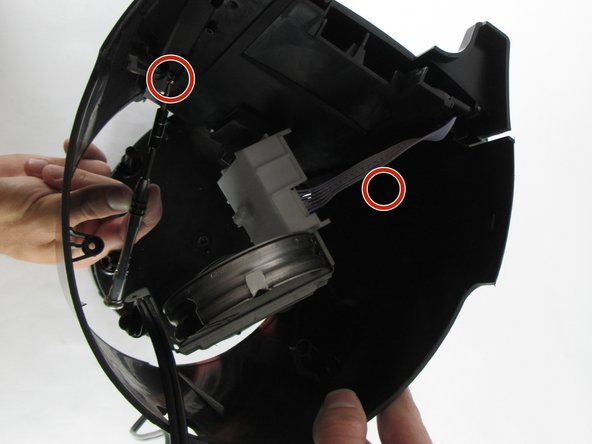
    2. Hamilton Beach 48464 Front Buttons Replacement: étape 10, image 1 de 3 Hamilton Beach 48464 Front Buttons Replacement: étape 10, image 2 de 3 Hamilton Beach 48464 Front Buttons Replacement: étape 10, image 3 de 3
      • Once the screws from the previous step are out, you will be able to grab the bottom half of the Brew Station and lift it up.

      • You will not be able to lift the bottom half all the way off because it is still connected by cords

      • Use one hand to lift up the bottom half of the Brew Station and use your other hand to unscrew the two 8-mm screws labeled in a red outline with a Phillips 2 Screwdriver.

      • The screws are in line with the position of the screws from the previous step, but they are lower.

      • Getting to the screws is difficult, so it may be useful to have someone help you. Also, the pictures show 2 different methods for getting to the screw (entering through the base or entering through the gap after lifting the Brew Station apart).

      Demander à FixBot

      Ajouter un commentaire

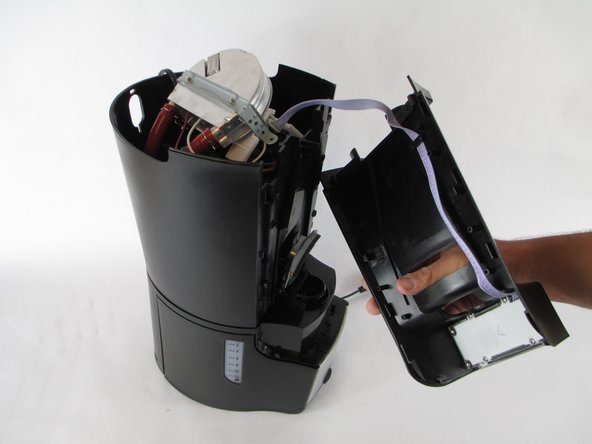
    3. Hamilton Beach 48464 Front Buttons Replacement: étape 11, image 1 de 2 Hamilton Beach 48464 Front Buttons Replacement: étape 11, image 2 de 2
      • Hold the base of the Brew Station with one hand and hold the front panel with the other.

      • Gently pull the front panel away from the rest of the unit until it pulls away completely and is only attached by the purple wire.

      Demander à FixBot

      Ajouter un commentaire

    4. Hamilton Beach 48464 Front Buttons Replacement: étape 12, image 1 de 1
      • Hold on to the front panel with one hand.

      • With your other hand, use the Philips 2 Screwdriver to unscrew the four 8-mm screws labeled in a red outline.

      Demander à FixBot

      Ajouter un commentaire

    5. Hamilton Beach 48464 Front Buttons Replacement: étape 13, image 1 de 1
      • Once the screws are out, you can pull out the piece. This is the piece that holds the buttons located on the front panel.

      Demander à FixBot

      Ajouter un commentaire

Conclusion

To reassemble your device, follow these instructions in reverse order.

Annulation : je n'ai pas terminé ce tutoriel.

2 autres ont terminé cette réparation.

Michael Damico

Membre depuis le 02/10/16

661 Réputation

6 tutoriels rédigés

Équipe

USF Tampa, Team 14-1, Lacy Spring 2016 Membre de l'équipe USF Tampa, Team 14-1, Lacy Spring 2016

USFT-LACY-S16S14G1

4 membres

72 tutoriels rédigés

0 commentaires de tutoriel

Ajouter un commentaire

Nombre de vues :

Dernières 24 heures : 2

7 derniers jours : 10

30 derniers jours : 39

Total : 1,241