Cette version peut contenir des modifications incorrectes. Passez au dernier aperçu vérifié.
Ce dont vous avez besoin
-
Cette étape n’est pas traduite. Aidez à la traduire
-
Open the Visor Edge and place it on a table facing down.
-
Gently push the tab that connects the flip cover (top half) to the PDA (bottom half) upward, lift the pieces apart to detach them.
-
-
Cette étape n’est pas traduite. Aidez à la traduire
-
Remove the six 4.1 mm Phillips screws from the back plate using the #00 Phillips Scewdriver.
-
-
-
Cette étape n’est pas traduite. Aidez à la traduire
-
Remove the four 2.6 mm Philips screws that are on the sides of the frame.
-
Remove the 3.9 mm Philips screw holding the stylus holster to the frame.
-
-
Cette étape n’est pas traduite. Aidez à la traduire
-
Remove the four 2.6 mm Philips screws on the top and bottom of the frame.
-
-
Cette étape n’est pas traduite. Aidez à la traduire
-
Gently remove the white frame from the back of the PDA.
-
-
Cette étape n’est pas traduite. Aidez à la traduire
-
Place the PDA front face up.
-
Gently pull off the front cover.
-
-
Cette étape n’est pas traduite. Aidez à la traduire
-
Flip over the PDA.
-
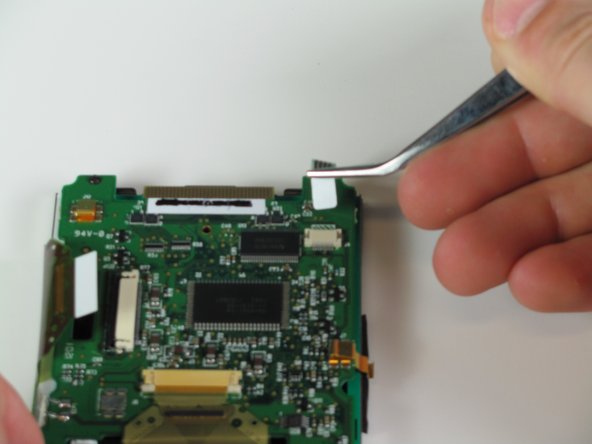
Use the tweezers to remove the ribbon cable attaching the screen to the circuit board.
-
-
Cette étape n’est pas traduite. Aidez à la traduire
-
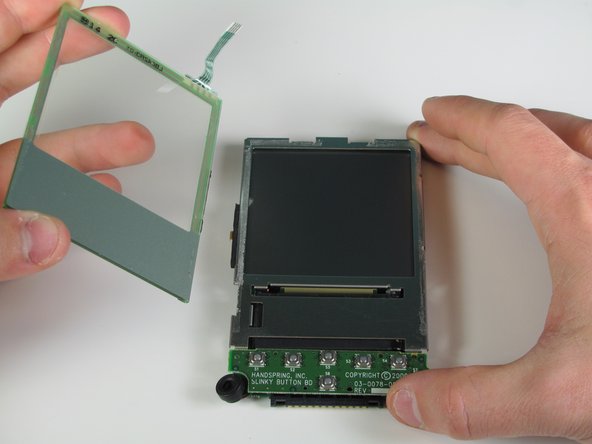
Wedge the spudger in between the glass and the metal frame.
-
Slide the spudger down the length of the screen to detach from the frame.
-
With your hands, pry the screen up from the detached side. The screen will pop off.
-


Équipe

Cal Poly, Team 11-28, Maness Winter 2011 Membre de l'équipe Cal Poly, Team 11-28, Maness Winter 2011
CPSU-MANESS-W11S11G28
4 membres
7 tutoriels rédigés