Aller au contenu principal

Hatch Restore Bottom Circuit Board Replacement

Ce dont vous avez besoin

  1. Hatch Restore Bottom Circuit Board Replacement, Intro: étape 1, image 1 de 2 Hatch Restore Bottom Circuit Board Replacement, Intro: étape 1, image 2 de 2
    • Replacing your bottom circuit board will be easy.

  2. Hatch Restore Bottom Circuit Board Replacement: étape 2, image 1 de 2 Hatch Restore Bottom Circuit Board Replacement: étape 2, image 2 de 2
    • Peel away the rubber feet.

  3. Hatch Restore Bottom Circuit Board Replacement: étape 3, image 1 de 2 Hatch Restore Bottom Circuit Board Replacement: étape 3, image 2 de 2
    • Remove the indicated 8 screws.

    • You may need to remove some adhesive from the screws to remove them.

  4. Hatch Restore Bottom Circuit Board Replacement: étape 4, image 1 de 2 Hatch Restore Bottom Circuit Board Replacement: étape 4, image 2 de 2
    • Pry off the bottom cover.

  5. Hatch Restore Bottom Circuit Board Replacement: étape 5, image 1 de 1
    • Remove the 6 indicated screws.

  6. Hatch Restore Bottom Circuit Board Replacement: étape 6, image 1 de 2 Hatch Restore Bottom Circuit Board Replacement: étape 6, image 2 de 2
    • Remove the power cable

    • There is a ribbon cable under the board. Do not pull the circuit board too far from the device.

  7. Hatch Restore Bottom Circuit Board Replacement: étape 7, image 1 de 2 Hatch Restore Bottom Circuit Board Replacement: étape 7, image 2 de 2
    • Push the black tabs on the ZIF connector towards the cable, then remove the cable.

    • The cable should have no resistance when pulled out. Do not forcefully remove the cable.

Conclusion

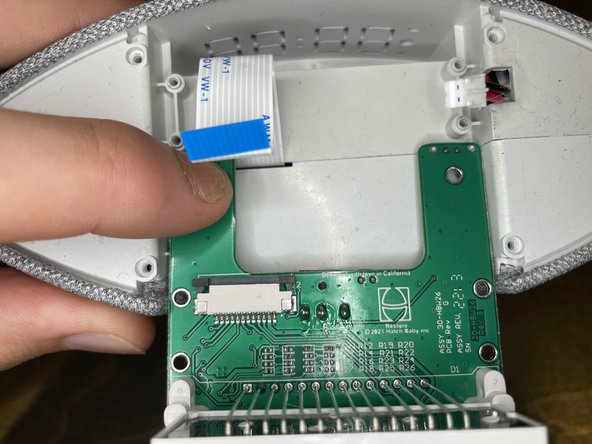
To reassemble your device, follow these instructions in reverse order.

9021007

Membre depuis le 07/13/18

4 599 Réputation

25 tutoriels rédigés

0 commentaires

Ajouter un commentaire

Nombre de vues :

Dernières 24 heures : 0

7 derniers jours : 4

30 derniers jours : 19

Total : 261