Introduction
Après une utilisation prolongée, la batterie risque de ne plus être chargée. Le remplacement de la batterie peut résoudre ce problème.
Ce dont vous avez besoin
-
-
Retirez le capot arrière de l'appareil en utilisant une combinaison des deux outils d'ouverture en plastique.
-
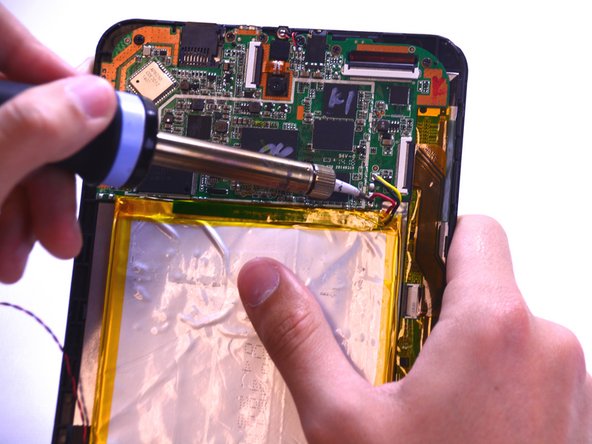
Utilisez votre outil d’ouverture en plastique pour ouvrir un coin de l’appareil, puis continuez sur le côté de l’appareil avec l’outil pour ouvrir complètement l’appareil.
-
-


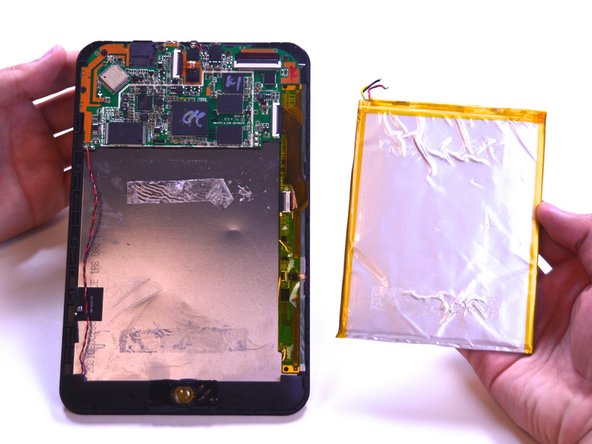
Pour remonter votre appareil, suivez ces instructions dans l’ordre inverse.
Pour remonter votre appareil, suivez ces instructions dans l’ordre inverse.
Annulation : je n'ai pas terminé ce tutoriel.
11 autres ont terminé cette réparation.
Merci à ces traducteurs :
100%
[deleted] nous aide à réparer le monde ! Vous voulez contribuer ?
Commencez à traduire ›
Équipe

USF Tampa, Team 1-2, Leahy Winter 2015 Membre de l'équipe USF Tampa, Team 1-2, Leahy Winter 2015
USFT-LEAHY-W15S1G2
3 membres
10 tutoriels rédigés
20 commentaires
If your battery is bad good luck finding a replacement. If you find one please let me know where you found it and how much it costs as hisense doesn't seem to be interested in helping.
I live in north central Illinois..corn country...your article wasn't what I wanted to hear...if I find a source I will get back on here....Larry....e mail dedduk2000@yahoo.com
so i'm fixing this tablet for a friend. the battery was all puffed up. on the battery is printed "HX 3098126 | 3.7V 4000mAh | 14.10.05" on the battery circuit board it says "HX-704406-01A-2". doing a search for hisense sero 8 battery, i could only find one for the sero 7 lt which is only 3400 mAh, and i hear the battery life is already bad on these. so i found one that looks like the proper power rating, but two issues.
1. the dimensions are listed as 90 x 60 x 6 mm. i measured my sero 8 battery and it seems to be about twice the size (120 x 90 mm). not sure about the thickness, but i'm worried that half size would be double thick, keeping the case from closing on it.
2. the replacement has only red/black wires, the sero has a yellow wire labelled N, which i figure might be ground, though some people suggest it could be something to do with the thermal sensor (not specific to this tablet). most said it wouldn't charge unless you wired it to either ground, or the black wire.
i ordered the battery and both issues came up. it was too thick, but i flattened it a bit with a rolling pin action. the case i have is missing a few tabs so it doesn't close all the way anyway. i put the battery vertically on the bottom left side (back view). anywhere else it would press and make an impression mark when using the LCD.
i could not get it to charge. the original had a Yellow wire (N), in addition to the Red and Black. i tried leaving Yellow disconnected and it powered on, but when i plugged in USB it showed a lightning bolt and said Not Charging.
next i tried putting Yellow to Black (Ground). it did not react to USB. so i removed Yellow again and this time it said Charging but it still wasn't.
only thing i can think is to tie the Yellow to Red, but i'm hesitant to damage the board, as it's a customer's tablet. if anyone else has any ideas on how to get this to charge, let me know. i can provide some pics of the circuit board and batteries if needed. thanks very much in advance.
Lukyan -