Introduction
The mixing paddle drive belt is turned by the motor and in turn, turns the mixing paddle axel (...bad pun). After prolonged or improper use, the belt can become stretched or even break. This guide will show you how to remove and replace the belt on your machine.
Ce dont vous avez besoin
-
-
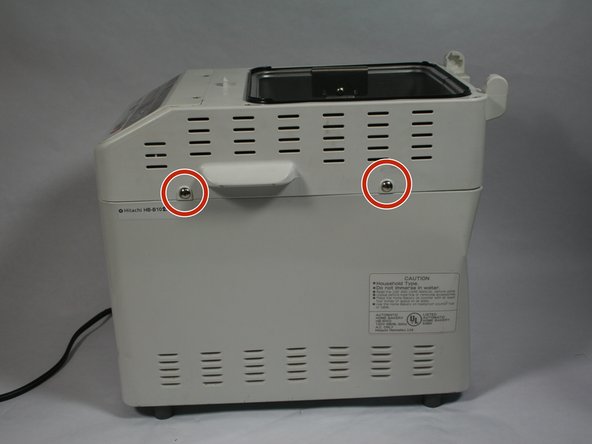
Next, remove the two 1.3cm screws that hold on the control panel with a #2 Phillips head screwdriver. These screws, and the rest of the screws in this guide can all be removed using a #2 Phillips head screwdriver.
-
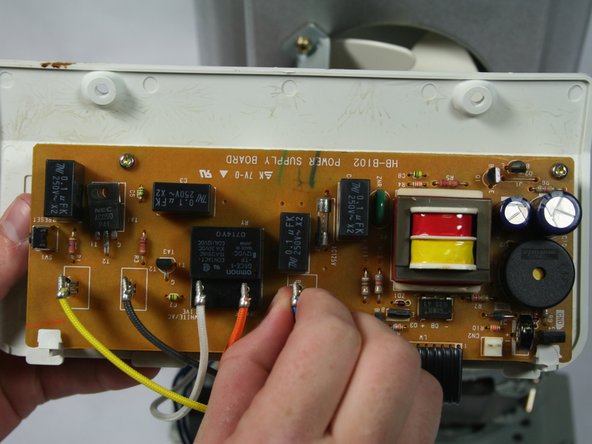
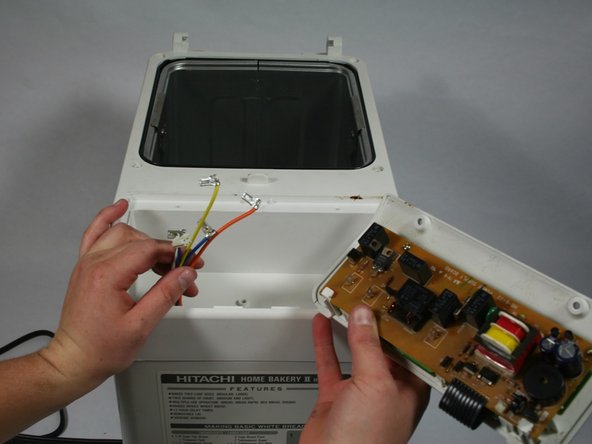
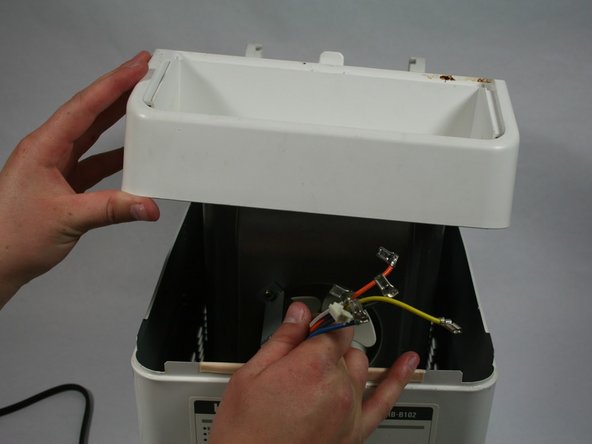
Then pull the control panel out of the device by using a metal spudger to pry it up. Flip it over and look at the back of the motherboard.
-
-
-
-
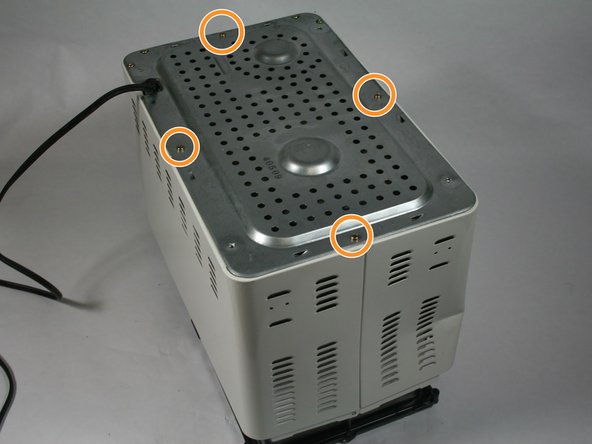
Flip the machine over so that the bottom is facing straight up. Then unscrew the four feet on the device with a #2 Phillips head screwdriver. The screws will stay in the rubber feet.
-
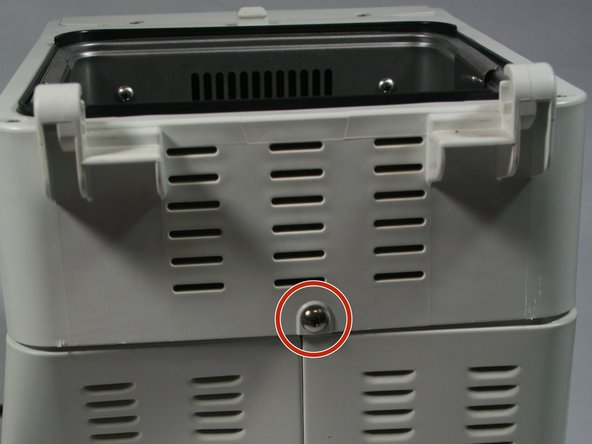
Next, remove the four 8mm screws on the four sides of the machine. You do not need to unscrew the screws on the front end corners.
-
Once the feet and screws are undone gently pull the metal plate off.
-
-
-
Now that the bottom plate and top housing are off, you can gently pull the inner components out of the outer metal housing . This can be done by grabbing hold of the bread pan casing and slowly lifting the entire inner assembly straight up.
-
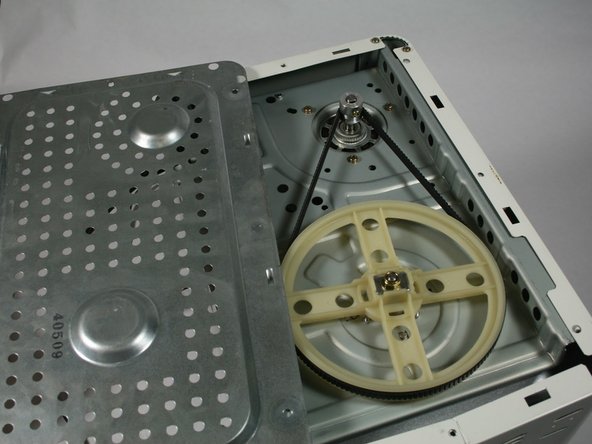
You now have access to the belt and motor.
-
-
-
The Belt assembly can be found on the bottom of the bread maker.
-


To reassemble your device, follow these instructions in reverse order.
To reassemble your device, follow these instructions in reverse order.
Annulation : je n'ai pas terminé ce tutoriel.
4 autres ont terminé cette réparation.
Équipe

Cal Poly, Team 9-2, Banghart Winter 2017 Membre de l'équipe Cal Poly, Team 9-2, Banghart Winter 2017
CPSU-BANGHART-W17S9G2
3 membres
6 tutoriels rédigés
9 commentaires
I haven’t used my machine for about 10 years, will it still work?
I haven’t used my bread machine for about 10 years, will it still work?
I have owned my bread machine for almost 30 years and didn’t use it at all for over five years. I have used it at least twice a week every week for the last 4 years. The only way to find out is to try to use it.
John -
Thank you for your clear and concise instructions. To my surprise when I accessed the belt it hadn’t broken nor was particularly loose. The bushing on the large wheel had seized up and was preventing the beater from turning. After removing the large wheel and the compression washer I put a drop of canola oil (edible) on the axle. Then I replaced the nut onto the axle and pushed the axle out of the bushing. A little bit of cleaning and a bit more canola oil and I replaced it back into the bushing. It turns easily now.
It wasn’t the many wire connections that were the most difficult to handle when reassembling the machine, but rather reseating (step 6) the top part which did not want to allow the black plastic to re-enter the hole. Eventually I used a screw that was a quarter inch longer (#7) to pull the baking pan up into position (and the cover down into position).
Over time the canola oil will congeal and present the same problem but canola oil is safe. And the bread maker works again! Thank you Mike.
If you ONLY remove the bottom panel (step 7), does that allow sufficient access to replace the belt? BTW can you recommend a source/specification for the replacement belt?
Yes you can just remove the bottom
Edward -
I bought mine here: https://www.thepartsbiz.com/Belt-for-Hit...
Why can’t you just remove the bottom panel? I can see the belt through the holes in the “screen” on the bottom of the machine. Is there a way you could “test” the tightness of the belt through the panel? The holes are large enough for a small screw driver. From what I can see through the bottom panel, the belt doesn’t look broken.
This is not necessary to replace the belt. Just go to step 7.
Neil Ames - Réponse