Aller au contenu principal
Pour réparer ensemble - Je crée un compte

Honeywell MultiRae Hydrogen Sulfide Electrochemical Sensors Replacement

Ce dont vous avez besoin

    1. Honeywell MultiRae Hydrogen Sulfide Electrochemical Sensors Replacement, Electrochemical Sensors: étape 1, image 1 de 1
      • Confirm which sensor you are intending to replace. Make note of it.

      • Nitrile gloves should be worn for the entire procedure.

      Demander à FixBot

      Ajouter un commentaire

    2. Honeywell MultiRae Hydrogen Sulfide Electrochemical Sensors Replacement: étape 2, image 1 de 2 Honeywell MultiRae Hydrogen Sulfide Electrochemical Sensors Replacement: étape 2, image 2 de 2
      • Place the monitor face down on a clean surface.

      • Use the Phillips #0 screwdriver to remove the single 3 mm Phillips screw on the belt clip.

      Demander à FixBot

      Ajouter un commentaire

    3. Honeywell MultiRae Hydrogen Sulfide Electrochemical Sensors Replacement: étape 3, image 1 de 1
      • Starting at the bottom of the case, pull the outer case away from the main body of the monitor.

      • Continue pulling out and away until the entire outer case has been removed.

      Demander à FixBot

      Ajouter un commentaire

    4. Honeywell MultiRae Hydrogen Sulfide Electrochemical Sensors Replacement: étape 4, image 1 de 1
      • With the Phillips #0 screwdriver, remove all four 3 mm screws from the rear pump/sensor cover.

      Demander à FixBot

      Ajouter un commentaire

    5. Honeywell MultiRae Hydrogen Sulfide Electrochemical Sensors Replacement: étape 5, image 1 de 1
      • Remove the outer pump/sensor housing cover and set it aside.

      Demander à FixBot

      Ajouter un commentaire

    6. Honeywell MultiRae Hydrogen Sulfide Electrochemical Sensors Replacement: étape 6, image 1 de 1
      • Carefully grip and twist the outer edge of the sensor to remove the sensor from its insertion point.

      • Be careful not to twist too aggressively as this could damage the sensor attachment point in the monitor.

      Demander à FixBot

      Ajouter un commentaire

    7. Honeywell MultiRae Hydrogen Sulfide Electrochemical Sensors Replacement: étape 7, image 1 de 3 Honeywell MultiRae Hydrogen Sulfide Electrochemical Sensors Replacement: étape 7, image 2 de 3 Honeywell MultiRae Hydrogen Sulfide Electrochemical Sensors Replacement: étape 7, image 3 de 3
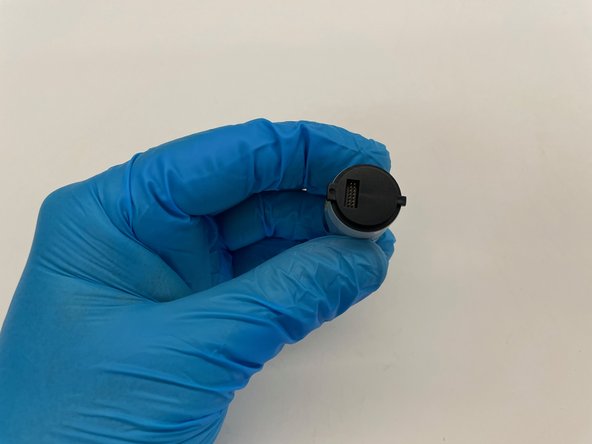
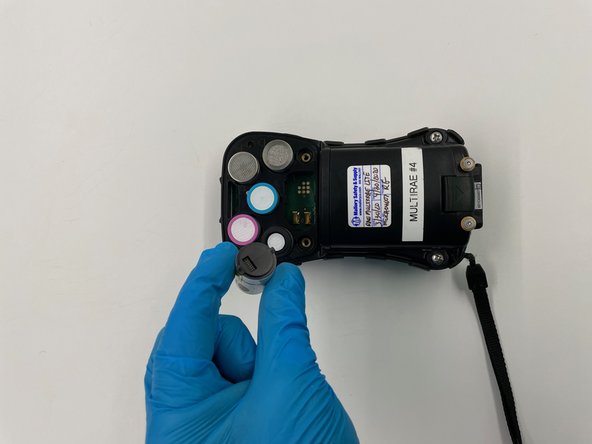
      • Grip the replacement sensor on the outer edge.

      • Insert the new sensor in a straight downward orientation.

      • Be careful to line up the prongs with their insertion/attachment point in the monitor.

      Demander à FixBot

      Ajouter un commentaire

    8. Honeywell MultiRae Hydrogen Sulfide Electrochemical Sensors Replacement: étape 8, image 1 de 1
      • Reassemble the unit in reverse order.

      • After reassembly, power the unit on to ensure that the monitor recognizes the new sensor.

      • Calibrate the sensor per the manufacturer's instructions.

      Demander à FixBot

      Ajouter un commentaire

Conclusion

To reassemble your device, follow these instructions in reverse order.

Annulation : je n'ai pas terminé ce tutoriel.

Une autre personne a terminé cette réparation.

0 commentaires de tutoriel

Ajouter un commentaire

Nombre de vues :

Dernières 24 heures : 1

7 derniers jours : 25

30 derniers jours : 120

Total : 3,368