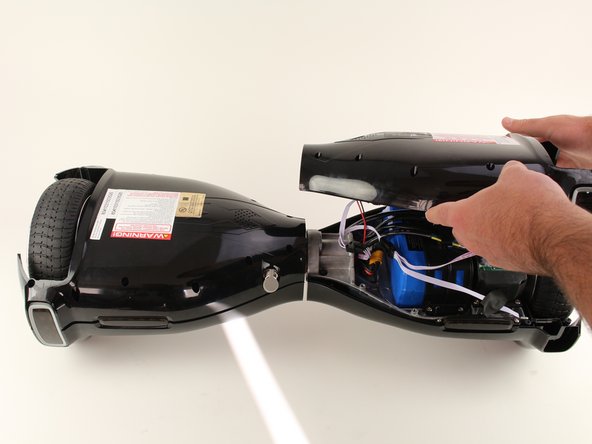
Aller au contenu principal

Hover-1 H1 Gyroscope Sensor Assemblies Replacement

Ce dont vous avez besoin

  1. Hover-1 H1 Gyroscope Sensor Assemblies Replacement, Bottom Shell: étape 1, image 1 de 1
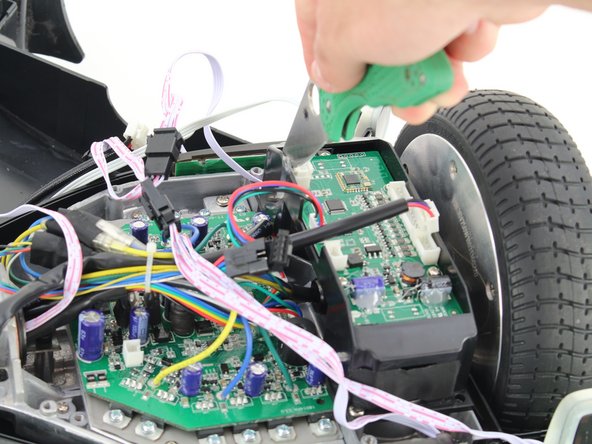
    • Remove the ten 9mm machine screws by using a long Phillips #2 screwdriver to rotate the screws counterclockwise.

    • Remove the twelve 9mm sheet metal screws by using a long Phillips #2 screwdriver to rotate the screws counterclockwise.

  2. Hover-1 H1 Gyroscope Sensor Assemblies Replacement: étape 2, image 1 de 1
    • Puncture the two black stickers by using the tip of a screwdriver.

    • Remove the two 9mm machine screws by using a long Phillips #2 screwdriver to rotate the screws counterclockwise.

  3. Hover-1 H1 Gyroscope Sensor Assemblies Replacement: étape 3, image 1 de 2 Hover-1 H1 Gyroscope Sensor Assemblies Replacement: étape 3, image 2 de 2
    • Lift each side of the bottom shell by pulling up.

    • When lifting the shell, take care to not tear any cables from their connectors.

  4. Hover-1 H1 Gyroscope Sensor Assemblies Replacement: étape 4, image 1 de 1
    • Unplug the battery by pulling gently on both sides of the orange connector.

  5. Hover-1 H1 Gyroscope Sensor Assemblies Replacement, Gyroscope Sensor Assemblies: étape 5, image 1 de 2 Hover-1 H1 Gyroscope Sensor Assemblies Replacement, Gyroscope Sensor Assemblies: étape 5, image 2 de 2
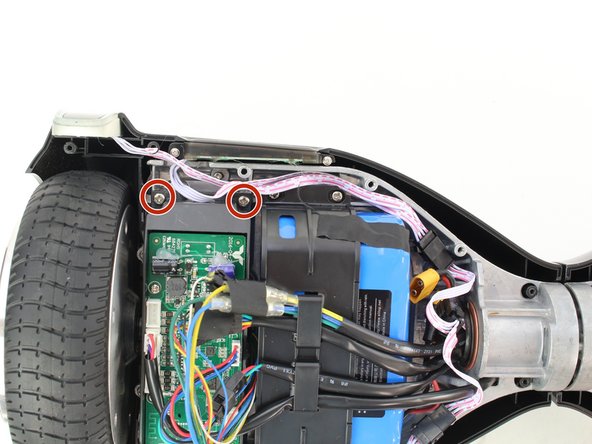
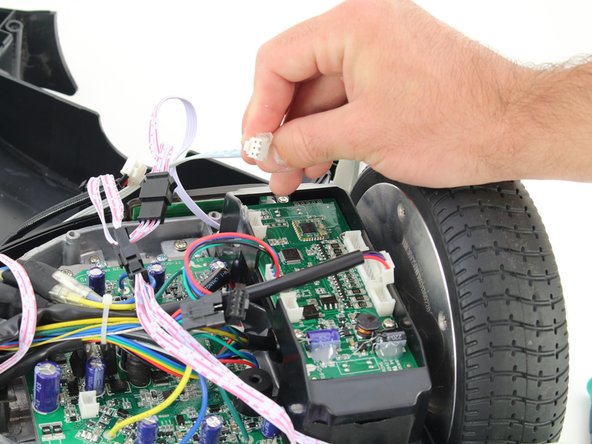
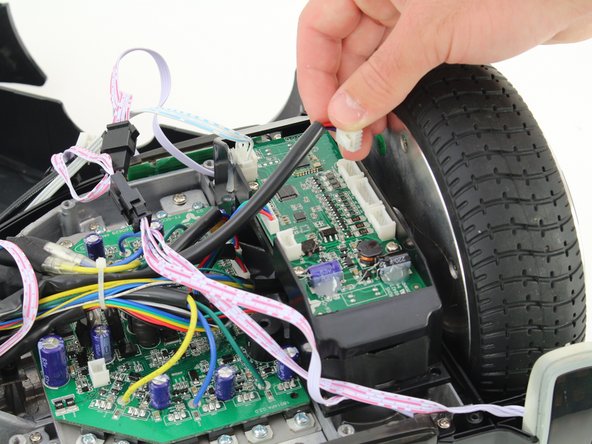
    • On the battery side of the hoverboard, remove the red, black, and purple sleeved cable from the sensor assembly by squeezing the tab and pulling up.

  6. Hover-1 H1 Gyroscope Sensor Assemblies Replacement: étape 6, image 1 de 2 Hover-1 H1 Gyroscope Sensor Assemblies Replacement: étape 6, image 2 de 2
    • Remove the red, blue, and green cable from the cable extension connected to the sensor assembly by squeezing the tabs on the side of the connector.

  7. Hover-1 H1 Gyroscope Sensor Assemblies Replacement: étape 7, image 1 de 2 Hover-1 H1 Gyroscope Sensor Assemblies Replacement: étape 7, image 2 de 2
    • Remove the four 7mm screws by using a Phillips #2 screwdriver to rotate the screws counterclockwise.

  8. Hover-1 H1 Gyroscope Sensor Assemblies Replacement: étape 8, image 1 de 1
    • Remove the sensor assembly on the battery side of the hoverboard by gently lifting and pulling away from the hoverboard.

  9. Hover-1 H1 Gyroscope Sensor Assemblies Replacement: étape 9, image 1 de 3 Hover-1 H1 Gyroscope Sensor Assemblies Replacement: étape 9, image 2 de 3 Hover-1 H1 Gyroscope Sensor Assemblies Replacement: étape 9, image 3 de 3
    • Remove the hot glue holding in the connectors with a utility knife.

    • Remove the white cable from the sensor assembly by squeezing the connector and pulling the connector up.

    • Be careful not to touch any parts of the circuit boards with the knife.

  10. Hover-1 H1 Gyroscope Sensor Assemblies Replacement: étape 10, image 1 de 1
    • Remove the red, blue, and green cable from the extension connected to the sensor assembly by squeezing the tabs on the side of the connector.

  11. Hover-1 H1 Gyroscope Sensor Assemblies Replacement: étape 11, image 1 de 2 Hover-1 H1 Gyroscope Sensor Assemblies Replacement: étape 11, image 2 de 2
    • Remove the red and black sleeved connector from the sensor assembly by squeezing the tab and pulling up.

  12. Hover-1 H1 Gyroscope Sensor Assemblies Replacement: étape 12, image 1 de 2 Hover-1 H1 Gyroscope Sensor Assemblies Replacement: étape 12, image 2 de 2
    • Remove the four 7mm screws by using a Phillips #2 screwdriver to rotate the screws counterclockwise.

  13. Hover-1 H1 Gyroscope Sensor Assemblies Replacement: étape 13, image 1 de 1
    • Remove the sensor assembly on the motherboard side of the hoverboard by gently lifting and pulling away from the hoverboard.

Conclusion

To reassemble your device, follow these instructions in reverse order.

5 autres ont terminé cette réparation.

Aaron Teh

Membre depuis le 10/08/18

442 Réputation

2 tutoriels rédigés

Équipe

Cal Poly, Team S17-G6, White Fall 2018 Membre de l'équipe Cal Poly, Team S17-G6, White Fall 2018

CPSU-WHITE-F18S17G6

4 membres

7 tutoriels rédigés

Un commentaire

where can I get the replacement parts?

Rob Sayles - Réponse

Ajouter un commentaire

Nombre de vues :

Dernières 24 heures : 2

7 derniers jours : 18

30 derniers jours : 114

Total : 4,842