Cette version peut contenir des modifications incorrectes. Passez au dernier aperçu vérifié.
Ce dont vous avez besoin
-
Cette étape n’est pas traduite. Aidez à la traduire
-
Remove the ten 9mm machine screws by using a long Phillips #2 screwdriver to rotate the screws counterclockwise.
-
Remove the twelve 9mm sheet metal screws by using a long Phillips #2 screwdriver to rotate the screws counterclockwise.
-
-
Cette étape n’est pas traduite. Aidez à la traduire
-
Puncture the two black stickers by using the tip of a screwdriver.
-
Remove the two 9mm machine screws by using a long Phillips #2 screwdriver to rotate the screws counterclockwise.
-
-
Cette étape n’est pas traduite. Aidez à la traduire
-
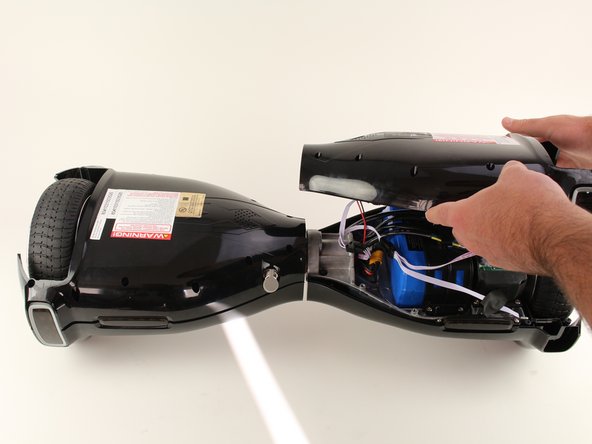
Lift each side of the bottom shell by pulling up.
-
-
-
Cette étape n’est pas traduite. Aidez à la traduire
-
Unplug the battery by pulling gently on both sides of the orange connector.
-
-
Cette étape n’est pas traduite. Aidez à la traduire
-
Unplug the power button connector by pinching the tab on the front and pulling directly upwards.
-
Pull the cable through the center section of the hoverboard.
-
-
Cette étape n’est pas traduite. Aidez à la traduire
-
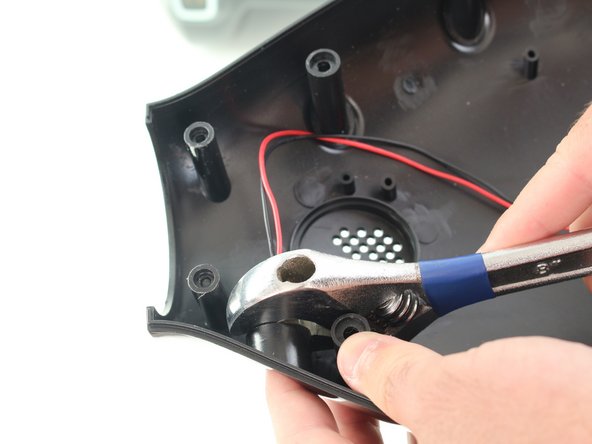
Using an adjustable wrench, remove the nut on the back of the power button by rotating the nut counterclockwise.
-
-
Cette étape n’est pas traduite. Aidez à la traduire
-
Pull the power button through the hole in the shell.
-


Annulation : je n'ai pas terminé ce tutoriel.
Une autre personne a terminé cette réparation.
Équipe

Cal Poly, Team S17-G6, White Fall 2018 Membre de l'équipe Cal Poly, Team S17-G6, White Fall 2018
CPSU-WHITE-F18S17G6
4 membres
7 tutoriels rédigés