
How To Fix A Loose Bicycle Pedal And Check For Damage

Thomas Paulsen et 11 autres contributeurs
Dernière mise à jour le 9 mars 2016
Vues: 70 k
Afficher les statistiques :
- Dernières 24 heures :
- 8
- Sept derniers jours :
- 41
- Trente derniers jours :
- 212
- Total :
- 70 218
Commentaires: 5
1 commentaire d'étapes, 4 commentaires de tutoriel.
Aller aux commentaires de tutorielTerminé: 9 10
9 personnes ont marqué ce tutoriel comme « terminé ». Serez-vous la prochaine ?
10 personnes ont marqué ce tutoriel comme « terminé ». Dont vous — super travail !
Favoris: 12 13
12 personnes ont mis ce tutoriel en favori (et s'y sont abonnées). Serez-vous la prochaine ?
13 personnes ont mis ce tutoriel en favori (et s'y sont abonnées) – dont vous !
Introduction
Passez à l'étape 1 ↓A loose pedal can be dangerous for bicycle riders. This guide will show you how to check for damage and tighten the pedal on your bike.
Ce dont vous avez besoin
Outils
-
-
Smart Wrench4.8

-
-
-
Flip the entire bicycle upside down, balancing the weight on the seat and handle bars.
 Demander à FixBot
-
-
-
If you are using an Allen Wrench, insert the head of the wrench into socket located on the pedal arm.
-
If you are using a Smart Wrench, place the jaws on the nut located between the pedal and pedal arm.
-
Loosen the pedals by turning the right pedal counterclockwise and the left pedal clockwise.
-
Remove the pedal from the socket.
-
-
-
Check the socket and bolt for rust and worn threads.
-
If you do not see any damage, continue to Step 4.
-
-
-
-
Place the pedal back in the socket and tighten it until it is secure.
-
Once you feel resistance, turn the pedal about 1/8 of a rotation further to properly tighten it.
-
-


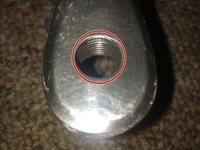
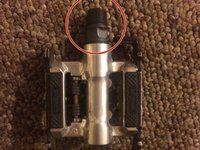


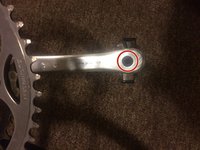
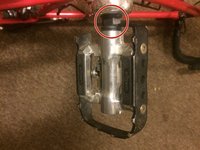
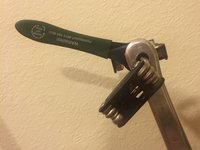
If both pedals need tightening follow the steps again, remembering to turn the opposite directions for tightening and loosening.
Annulation : je n'ai pas terminé ce tutoriel.
9 autres ont terminé cette réparation.

Équipe

Cal Poly, Team 12-1, Green Winter 2015 Membre de l'équipe Cal Poly, Team 12-1, Green Winter 2015
CPSU-GREEN-W15S12G1
6 membres
72 tutoriels rédigés
4 commentaires de tutoriel
Would you be able to tell me how to fix a locked up bike
Wenn das Rad auf dem Kopf steht, ist das linke Pedal rechts und umgekehrt.
My crank arm constantly comes loose, although I tightened it. I go to the bike repair store near my house, and they say that the bearing of the bottom bracket is worn. To fix this, I need to replace it with a new one, grease the new component, and tighten the bicycle crank.
