Aller au contenu principal
Pour réparer ensemble - Je crée un compte

How do I replace a broken zip on my Vaude jacket?

Ce dont vous avez besoin

      • Separate the seams of the broken zip using the seam ripper. It’s best to begin on the outside of the jacket.

      Demander à FixBot

      Ajouter un commentaire

      • Next, separate the seam between the jacket and the front flap.

      Demander à FixBot

      Ajouter un commentaire

    1. How do I replace a broken zip on my Vaude jacket?: étape 3, image 1 de 1
      • After you´ve separated the seam between the jacket and the front flap, you’ll see the lining of your jacket.

      Demander à FixBot

      Ajouter un commentaire

      • Then you can separate the zip from the jacket.

      Demander à FixBot

      Ajouter un commentaire

    2. How do I replace a broken zip on my Vaude jacket?: étape 5, image 1 de 3 How do I replace a broken zip on my Vaude jacket?: étape 5, image 2 de 3 How do I replace a broken zip on my Vaude jacket?: étape 5, image 3 de 3
      • After you’ve separated the zip and front flap from the jacket, you’ll need to separate the zip from the front flap. You should then have both sides of the zip and the front flap laying before you.

      Demander à FixBot

      Ajouter un commentaire

    3. How do I replace a broken zip on my Vaude jacket?: étape 6, image 1 de 2 How do I replace a broken zip on my Vaude jacket?: étape 6, image 2 de 2
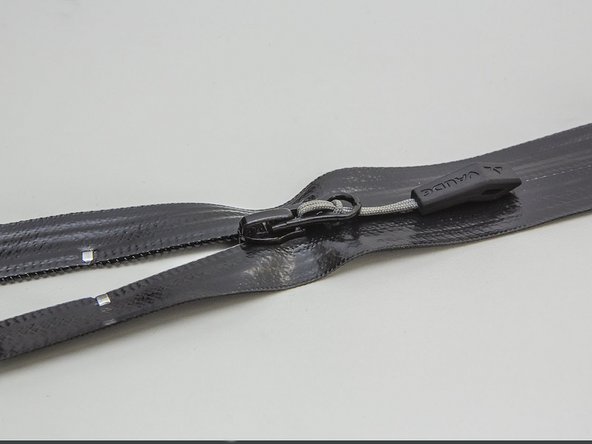
      • Measure the length of the zip that you’ve removed and mark the length on the new zip. Use the tweezers to crimp the zip stop onto the new zip in the correct position.

      Demander à FixBot

      Ajouter un commentaire

    4. How do I replace a broken zip on my Vaude jacket?: étape 7, image 1 de 1
      • Cut off any excess zip approx. 2 cm beyond the zip stop.

      Demander à FixBot

      Ajouter un commentaire

    5. How do I replace a broken zip on my Vaude jacket?: étape 8, image 1 de 1
      • Use the wire cutters to pry off the zip teeth after the stopper.

      Demander à FixBot

      Ajouter un commentaire

      • Then remove any leftover pieces with the seam ripper.

      Demander à FixBot

      Ajouter un commentaire

      • Fold over the seam allowance of the zip and sew it down with the sewing machine.

      Demander à FixBot

      Ajouter un commentaire

    6. How do I replace a broken zip on my Vaude jacket?: étape 11, image 1 de 1
      • Put the inlay aside.

      Demander à FixBot

      Ajouter un commentaire

    7. How do I replace a broken zip on my Vaude jacket?: étape 12, image 1 de 1
      • Position the pocket attachment correctly and sew it on to the closure edge.

      Demander à FixBot

      Ajouter un commentaire

      • Sew the zip onto the front flap using the zip foot.

      Demander à FixBot

      Ajouter un commentaire

      • Sew the front flap with the zip attached onto the jacket lining.

      Demander à FixBot

      Ajouter un commentaire

      • Sew the remaining zip half (without flap) onto the other side of the open jacket.

      Demander à FixBot

      Ajouter un commentaire

      • Sew along the zip again on the outer fabric.

      Demander à FixBot

      Ajouter un commentaire

    8. How do I replace a broken zip on my Vaude jacket?: étape 17, image 1 de 1
      • Smooth out the other half of the jacket, aligning the two sides together using a seam that comes together or other design element. This is important so that the zip is correctly aligned at the end.

      Demander à FixBot

      Ajouter un commentaire

      • Then sew the second side of the zip on. Move the slider as you sew to keep it out of the way.

      Demander à FixBot

      Ajouter un commentaire

      • The last step is to re-sew the hem seam. If any sewing holes are still visible in the jacket, you can close them using the steam setting on an iron. Be sure that the iron does not touch the jacket!

      Demander à FixBot

      Ajouter un commentaire

Ligne d'arrivée

Annulation : je n'ai pas terminé ce tutoriel.

8 autres ont terminé cette réparation.

Merci à ces traducteurs :

de en

100%

Ces traducteurs nous aident réparer le monde ! Vous voulez contribuer ?
Commencez à traduire ›

VAUDE Reparaturteam

Membre depuis le 02/22/16

6 759 Réputation

32 tutoriels rédigés

Équipe

Vaudesport Membre de l'équipe Vaudesport

Community

3 membres

120 tutoriels rédigés

3 commentaires de tutoriel

Prima Anleitung, dankeschön

Für den Hausgebrauch schlage ich vor, den Nähfuß zwischen den Schritten zu wechseln.

Für die Naht einen Standard-Fuß und für den Reißverschluss den Reißverschluss-Fuß.

Eva - Réponse Partager

Good advice if you ask me.

Susanne from Denmark - Réponse Partager

Great videos thank you! My only question is how do you ensure you are catching the linning and outer fabric as you sew down the top side?

Eleonore Hatfield - Réponse Partager

Ajouter un commentaire

Nombre de vues :

Dernières 24 heures : 9

7 derniers jours : 47

30 derniers jours : 179

Total : 10,503